Fleet Maintenance Savings That Start in the Shop

A work truck that misses a service call does more than sit in a bay. It holds up a crew, disappoints a customer, and turns a manageable repair into lost revenue. Real fleet maintenance savings come from controlling those failures before they control the schedule – without cutting corners on the parts and service decisions that keep vehicles productive.

For fleets made up of pickups, vans, SUVs, Jeeps, and light-duty trucks, maintenance is not a back-office expense. It is an operating system. The right approach balances preventive work, accurate diagnosis, quality replacement parts, and replacement timing. Spend too little and breakdowns multiply. Replace every component at the first sign of wear and inventory costs can run ahead of actual need. The target is reliable uptime at a predictable cost per mile.

Build Fleet Maintenance Savings Around Uptime

The lowest invoice is not always the lowest-cost repair. A cheap component that fails early, fits poorly, or creates a repeat labor charge can cost far more than a correctly specified aftermarket replacement. For a commercial vehicle, every return visit also means dispatch disruption and avoidable downtime.

Start by tracking cost per mile and downtime by vehicle, not just total maintenance spend. Two similar trucks can tell very different stories. One may require brakes, tires, and oil changes on schedule. The other may burn through front-end components because it is routinely overloaded, driven on rough access roads, or fitted with tires that do not match its duty cycle. A fleet-wide average hides that difference.

Use each vehicle’s service history to identify repeat repairs, frequent wear items, and the mileage point at which specific components begin to fail. This gives managers a practical basis for planning replacements before a roadside failure, while also revealing when an operating practice needs correction. Excessive tire wear, for example, can point to alignment issues, worn suspension parts, incorrect inflation, or driver habits. Replacing tires without addressing the cause only repeats the expense.

Separate scheduled wear from unpredictable failure

Oil, filters, wiper blades, brake pads, tires, and many ignition components have expected service windows. Their replacement can usually be planned around mileage, engine hours, season, and vehicle use. Keep these items on a schedule and stock the consumables that your operation uses most often.

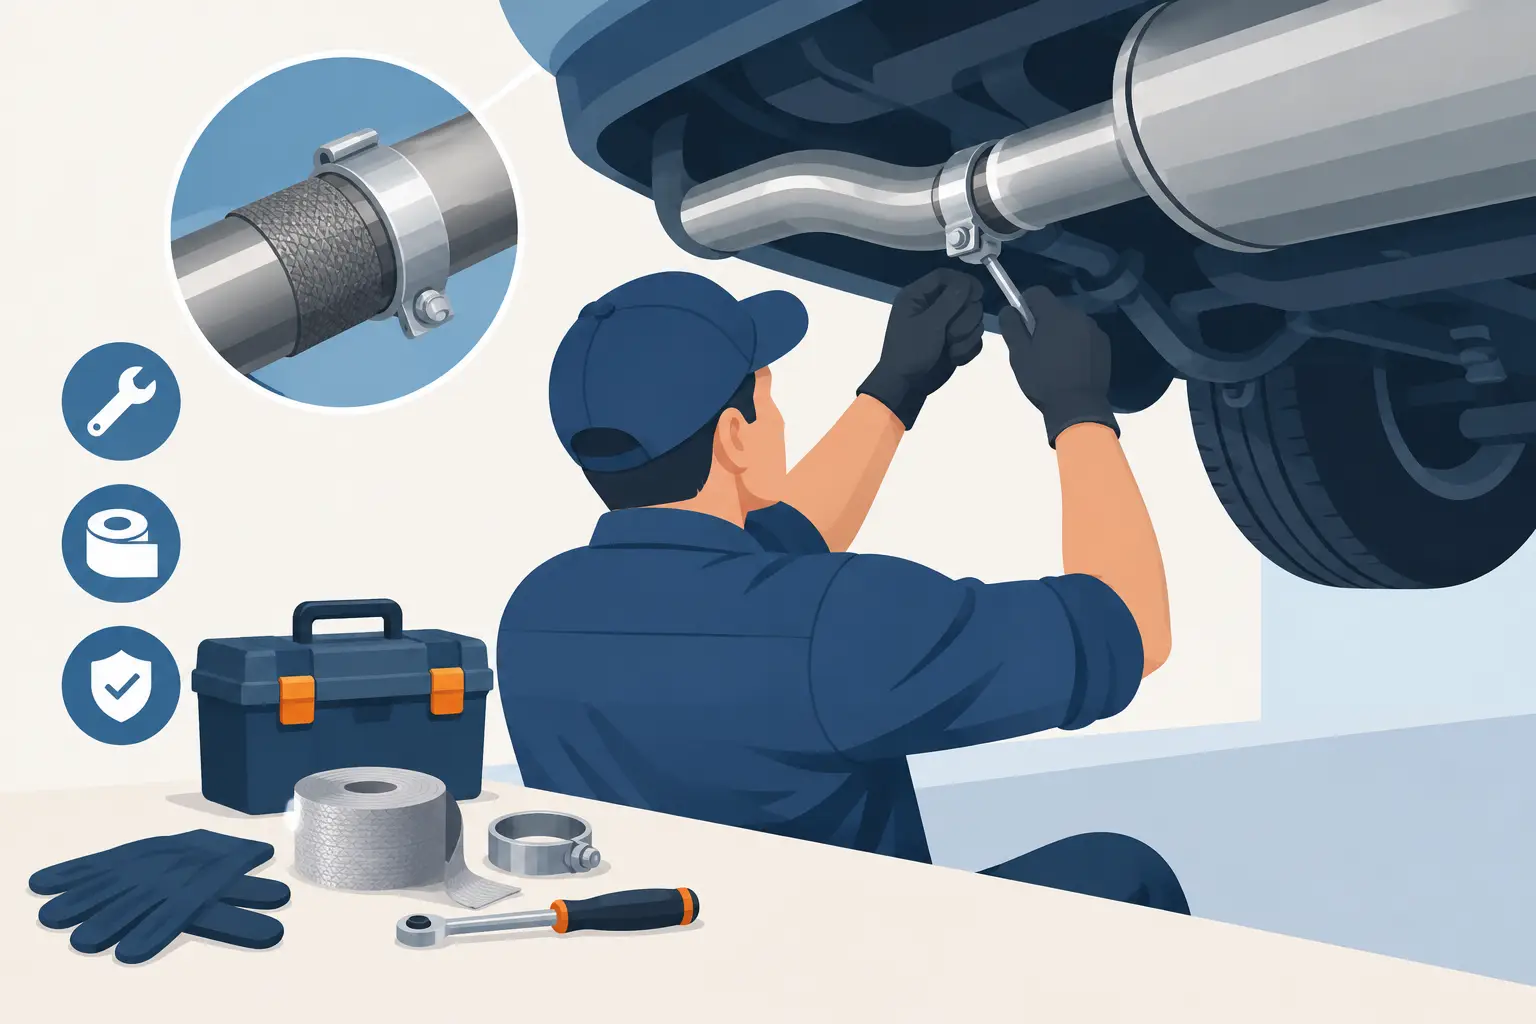
Unexpected failures need a different response. When a catalytic converter concern, ignition fault, suspension noise, or exhaust leak appears, diagnosis matters more than speed alone. Replacing the first suspected part may feel fast, but it can lead to parts returns, repeat labor, and another vehicle-out-of-service event. Verify fitment, inspect related components, and use failure data to determine whether the issue is isolated or recurring across a vehicle group.

Set Service Intervals for the Job, Not the Brochure

Manufacturer maintenance intervals are a starting point, not a complete fleet plan. A highway-driven sales SUV, a contractor pickup that idles for hours, and a Jeep used on unpaved sites do not put the same stress on oil, brakes, suspension, cooling, or tires. Mileage alone cannot capture that difference.

Build service categories around actual duty. Vehicles with long idle time should be managed by engine hours as well as miles. Trucks that tow or haul regularly may need closer inspection of brakes, tires, wheel components, suspension, and exhaust hardware. Urban stop-and-go routes can accelerate brake wear and reduce fuel economy. Seasonal conditions matter too: winter road treatment can accelerate corrosion, while hot climates increase strain on tires, batteries, and cooling systems.

This does not mean shortening every interval to the most conservative possible number. Overservicing wastes labor and parts. Instead, define inspection points that match the risk. A quick, consistent under-vehicle inspection at scheduled service can catch cracked hangers, loose exhaust connections, worn bushings, fluid leaks, or uneven tire wear before they become larger repairs.

Use inspections to protect connected systems

Most vehicle systems do not fail in isolation. A damaged exhaust mount can place stress on pipes and joints. Worn suspension components can affect alignment and shorten tire life. A weak ignition component can contribute to poor combustion and potentially create downstream exhaust-system concerns. Looking at the surrounding system is often where the best savings appear.

Technicians should document the condition of related parts, even when immediate replacement is not needed. That record helps a fleet combine work intelligently. If a vehicle is already in for suspension service and its tires are near replacement, alignment and tire work may be more efficient to schedule together. The same logic applies to exhaust repairs that require access under the vehicle. Coordinating labor reduces duplicate setup time and avoids repeat downtime.

Buy Parts by Total Value, Not Purchase Price

Parts purchasing has an obvious role in fleet maintenance savings, but price comparison should go beyond the line item. Fitment accuracy, material quality, availability, warranty handling, and consistency across the fleet all affect the final result.

Standardizing on dependable replacement parts where appropriate simplifies service. Technicians become familiar with installation requirements. Purchasing can forecast demand. Shops can keep a tighter set of fast-moving items on hand. A common specification for filters, wipers, brakes, or other approved components can also reduce errors when multiple locations service similar vehicles.

That said, standardization should not become a reason to force the wrong part onto the wrong application. Trucks equipped for towing, vehicles operating in corrosive conditions, and units modified for specific work may require different materials or configurations. For exhaust repairs and upgrades, stainless steel can be a smart choice where corrosion resistance and long service life justify the added upfront cost. The same decision should account for vehicle application, climate, installation requirements, and the fleet’s planned replacement cycle.

FORTLUFT supports this practical balance with aftermarket maintenance and upgrade categories for cars, trucks, Jeeps, and SUVs, including exhaust, suspension, ignition, tires, wheels, and wiper components. For buyers, the priority is straightforward: confirm the application, choose materials suited to the job, and avoid paying twice for a part that was never right for the vehicle.

Manage inventory without turning shelves into dead stock

Keeping every conceivable part in stock ties up cash and increases the chance that inventory becomes obsolete. Keeping nothing in stock leaves the fleet exposed to repair delays. The right middle ground is a small, data-driven inventory of parts that are inexpensive, frequently used, and likely to stop a vehicle from returning to service quickly.

Common filters, blades, bulbs, basic ignition service items, and fleet-specific wear components may belong on the shelf. Slow-moving sensors, application-specific exhaust pieces, or infrequent suspension components are often better ordered as needed unless service history proves otherwise. Review usage quarterly. If an item has not moved and is not critical to uptime, it may not deserve shelf space.

Reduce Driver-Caused Wear Before It Reaches the Shop

Driver behavior can erase a carefully built maintenance program. Hard braking, extended idling, rapid acceleration, curb strikes, overloaded cargo, and ignored warning lights all create repair costs that may appear later as ordinary wear.

A short inspection routine at the beginning and end of a shift is more useful than a complicated checklist no one follows. Drivers should be expected to report warning lights, vibrations, unusual noises, exhaust changes, tire damage, fluid spots, and wiper or washer issues as soon as they appear. The goal is not to turn drivers into technicians. It is to catch simple warning signs while the vehicle can still be scheduled instead of sidelined.

Give drivers feedback when reports prevent a larger failure. If a noted vibration leads to an early tire or suspension repair, communicate that result. This turns inspection from paperwork into an operational habit. It also helps distinguish normal wear from a pattern tied to route conditions, loading, or vehicle use.

Measure What Changes After Each Improvement

Maintenance programs improve when decisions can be tested. Track preventive-maintenance compliance, unplanned downtime, repeat repairs, tire life, parts cost, labor hours, and cost per mile. Then compare those numbers after changing an interval, approving a new component, adjusting inventory, or coaching drivers.

Do not expect every metric to improve immediately. A more disciplined inspection process can raise short-term repair spending because it finds deferred work. That can still be the right outcome if roadside failures, overtime labor, and lost vehicle days fall over the following months. The useful question is whether the fleet is becoming more predictable and more available.

The best maintenance decision is rarely the one that produces the smallest invoice this week. It is the one that keeps the right vehicle ready for its next job, with parts and service choices built to last as long as the work demands.

Best Spark Plugs for Mileage: What Fits?

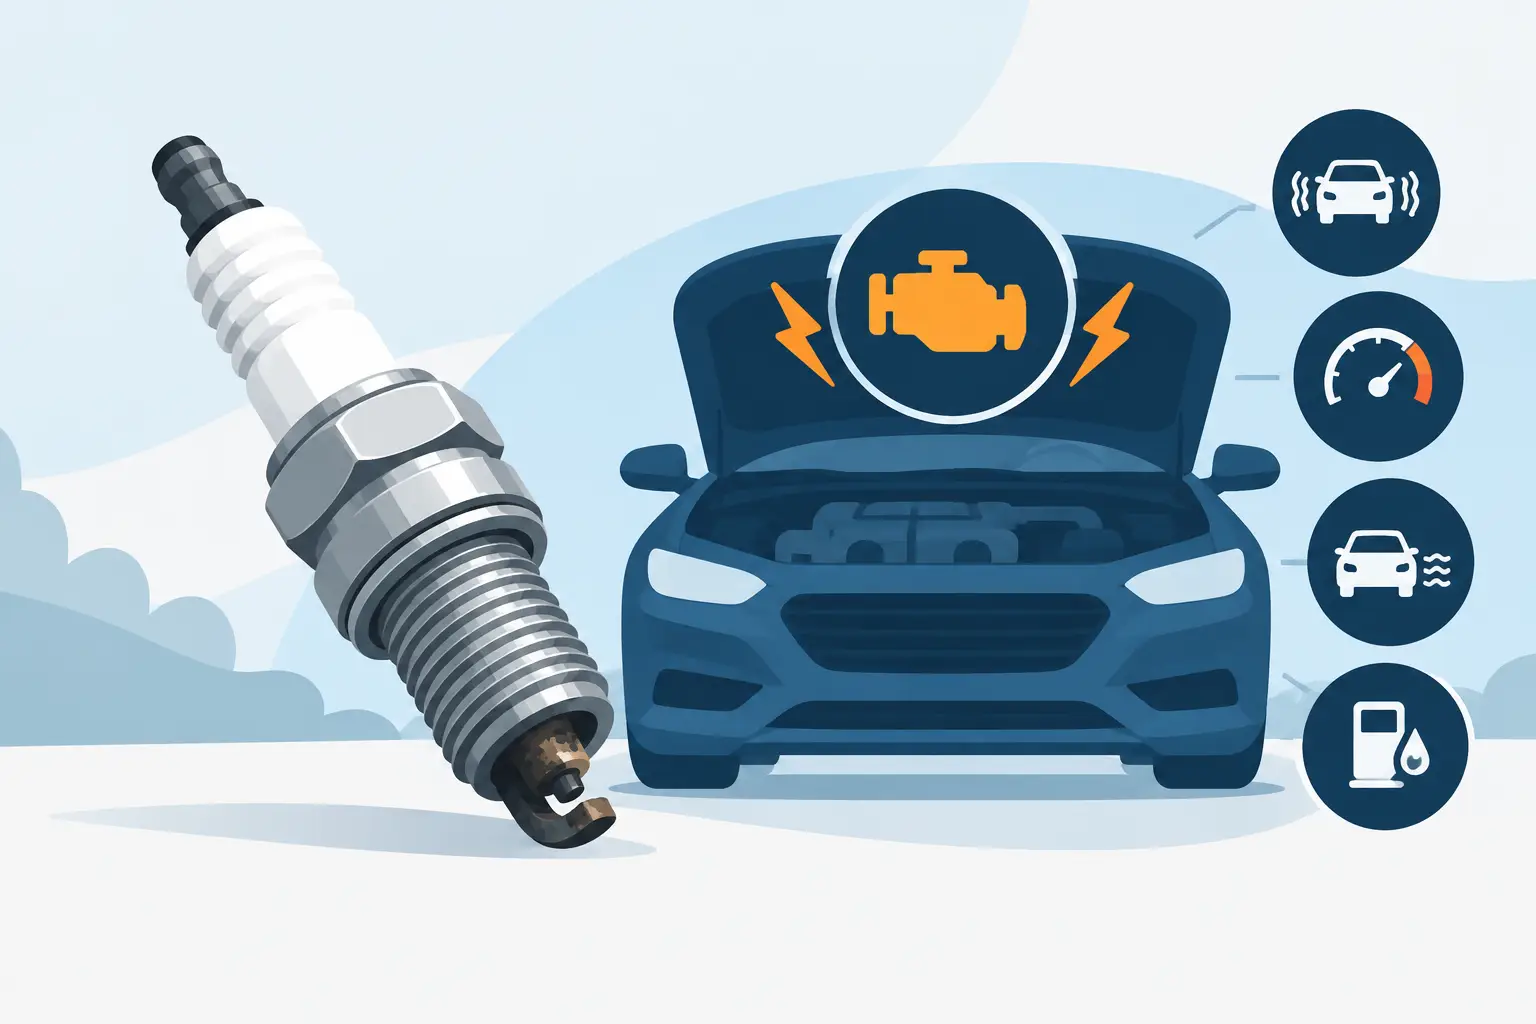
A worn plug does not usually cause a dramatic fuel-economy collapse overnight. More often, it creates a slow loss of efficiency: longer cranking, a less crisp throttle response, occasional hesitation, and extra fuel used to maintain the same pace. The best spark plugs for mileage are not simply the most expensive plugs on the shelf. They are the plugs that match your engine’s factory ignition requirements, are correctly gapped, and are replaced before wear compromises combustion.

For cars, trucks, Jeeps, and SUVs, spark plug selection is a fitment decision first. Material matters, but only after you have confirmed the correct plug design, heat range, reach, seat style, and terminal type for the vehicle.

Why Spark Plugs Affect Fuel Mileage

Every combustion cycle depends on a reliable spark delivered at the right moment. When a plug’s center and ground electrodes wear, the gap grows. The ignition system must work harder to jump that larger gap, and the spark can become inconsistent under load. That does not always trigger a check-engine light immediately, but it can make the engine less efficient.

A healthy ignition system supports a clean, repeatable burn of the air-fuel mixture. That means smoother idle quality, dependable starts, and less unburned fuel moving through the exhaust system. It also helps protect related components such as ignition coils, oxygen sensors, and catalytic converters from the consequences of repeated misfires.

Spark plugs will not transform a mechanically tired engine into a fuel sipper. If mileage has dropped because of low tire pressure, dragging brakes, a dirty air filter, a failing oxygen sensor, fuel-trim issues, or aggressive driving, new plugs alone will not solve it. But if the installed plugs are overdue, contaminated, damaged, or incorrectly specified, replacing them can restore the efficiency the engine was designed to deliver.

Best Spark Plugs for Mileage by Material

The right material depends on what your vehicle manufacturer calls for and how long you expect the plugs to remain in service. In many late-model engines, the factory specification already points toward a platinum or iridium design for a reason.

Copper plugs

Copper-core plugs conduct heat well and remain a practical choice for certain older engines, performance applications, and vehicles specifically designed around conventional plugs. Their larger electrodes wear faster than precious-metal alternatives, so replacement intervals are generally shorter.

For mileage, copper plugs are a good choice only when they are the correct OE-style specification. Installing a budget copper plug in an engine designed for long-life iridium plugs may save money at checkout, but it can shorten service life and create avoidable maintenance work.

Single platinum plugs

Platinum plugs use a platinum pad on the center electrode to slow wear. They typically provide a longer service interval than copper and can be an appropriate replacement in many distributorless ignition systems. They are often a sensible middle ground for drivers who want dependable everyday performance without stepping outside the vehicle’s intended plug design.

Double platinum plugs

Double platinum designs place platinum on both the center and ground electrodes. They are commonly used in waste-spark ignition systems, where spark polarity can alternate and wear both electrodes. If your engine was built for double platinum plugs, switching to a single-platinum design can reduce plug life and may affect long-term consistency.

Iridium plugs

Iridium plugs use an extremely durable fine-wire center electrode. Their smaller firing tip needs less voltage to produce a consistent spark, while the material resists erosion over a long service interval. For many modern cars, crossovers, trucks, and SUVs, iridium is the strongest choice for maintaining mileage over time because it stays closer to its intended gap for longer.

That does not mean every engine benefits from an upgrade to iridium. A plug is part of a complete ignition design. When the owner’s manual or underhood emissions label specifies a particular plug type, follow that specification rather than assuming a premium material automatically improves fuel economy.

Fitment Matters More Than a Premium Label

A spark plug can look nearly identical to the correct part and still be wrong for the engine. Thread diameter, reach, electrode projection, seat type, resistor design, and heat range all matter. An incorrect reach can leave the spark too far from the combustion chamber or extend the plug too far into it. Either condition can hurt performance, and in serious cases, cause damage.

Heat range is especially easy to misunderstand. A colder plug transfers heat away from the firing tip faster and is often used in high-load or modified applications. A hotter plug retains more heat. Neither is universally better for mileage. The correct heat range is the one engineered for your engine, operating conditions, and state of tune.

Gap is equally critical. Some replacement plugs arrive pre-gapped, but pre-gapped does not mean automatically correct for every application. Check the specification before installation. Fine-wire platinum and iridium plugs should be handled carefully because forcing a gap adjustment against the center electrode can damage the delicate firing tip. If a plug is out of specification or has been dropped, replacement is often the smarter move.

When New Plugs Can Help Restore MPG

Fuel-mileage gains from new spark plugs are usually restorative, not magical. If the current set is functioning normally and remains within its scheduled service life, a new set may produce little measurable change at the pump. If the old plugs are worn or misfiring, the difference can be noticeable.

Watch for hard starts, rough idle, hesitation during acceleration, reduced towing confidence, intermittent misfire codes, or a mileage drop with no clear driving-pattern change. These symptoms can also point to coils, injectors, vacuum leaks, or fuel-system problems, so spark plugs should be inspected as part of a broader diagnosis.

When plugs are removed, inspect their condition. Dry black soot may suggest a rich mixture or excessive idling. Oily deposits can indicate an oil-control issue. A chalky white appearance, blistering, or melted electrodes can point to overheating or an incorrect heat range. Replacing plugs without addressing the source of unusual deposits only delays the next problem.

Installation Details That Protect Efficiency

Use the correct torque specification. Under-tightening can prevent proper heat transfer and allow combustion gases to leak past the seat. Over-tightening can damage threads, distort the plug, or crack the insulator. This is particularly important with aluminum cylinder heads.

Install plugs in a cool engine, keep dirt out of the plug wells, and inspect ignition boots or coil-on-plug assemblies during the job. A torn boot, corrosion in a coil connector, or oil in a plug well can undermine the benefit of fresh plugs. Dielectric grease belongs inside the boot where specified, not on the plug’s firing end or threads.

Anti-seize is another detail that depends on the plug maker’s instructions. Many modern plugs use plated threads and are designed to be installed dry. Adding lubricant changes torque values and can lead to over-tightening. Follow the plug and vehicle specifications instead of relying on a one-size-fits-all installation habit.

Choosing Spark Plugs for Daily Drivers and Work Vehicles

For a stock daily driver, choose the OE-specified plug material and design, then replace it at the recommended interval. That is usually the clearest route to stable fuel economy and predictable maintenance costs. For a truck or SUV used for towing, hauling, off-road travel, or long highway miles, correct fitment becomes even more valuable because ignition demand rises under load.

Modified engines need more care. Forced induction, increased compression, tuning changes, and sustained heavy use can change plug requirements. A colder heat range may be appropriate, but it should be selected based on the build and tune rather than as a generic performance upgrade. The best result is an ignition setup that matches the engine’s actual operating conditions.

Reliable mileage starts with precise maintenance. Select plugs built for your vehicle, install them to specification, and give the rest of the ignition and fuel system the same attention. That is practical automotive technology at its best: every component doing its job cleanly, efficiently, and with purpose.

Washer Nozzle Spray Problems: Fast Fixes

A washer system usually fails at the moment visibility matters most: salt spray on a highway, muddy water behind a work truck, or a cold morning film that wipers alone cannot clear. Most washer nozzle spray problems are straightforward to isolate if you start with the symptom instead of replacing parts at random. The goal is not just to get fluid on the glass, but to restore a clean, correctly aimed spray pattern that supports safe driving.

Start With the Spray Pattern

Before opening the hood, turn the ignition on and operate the washer control for a few seconds. Listen closely and look at what reaches the windshield. A working pump with no visible spray points to a blockage, a disconnected hose, frozen fluid, or a nozzle issue. No pump sound at all shifts the diagnosis toward the fuse, wiring, switch, or pump itself.

The pattern matters. A single weak stream usually suggests a partially clogged nozzle. Fluid running down beneath the hood or onto the ground can indicate a split hose or loose connector. A broad but misplaced stream means the system is functioning, but the nozzle needs adjustment. If the spray was normal before a hard freeze, treat frozen fluid or frozen nozzle passages as the first suspect.

Do not keep holding the washer switch for long periods when the reservoir is empty or the lines are frozen. The pump is designed to move fluid, and extended dry operation can shorten its service life.

Common Washer Nozzle Spray Problems

Clogged nozzle openings

Road dust, dried washer fluid, wax residue, and mineral deposits can restrict the tiny nozzle orifices. This is especially common on vehicles driven through construction zones, winter road treatment, or dusty off-road conditions. The nozzle may produce a crooked jet, a dribble, or nothing at all even while the pump can be heard running.

Start by wiping the nozzle area with a clean microfiber cloth. Then use a fine pin or nozzle-cleaning tool very gently to lift debris from the opening. Avoid forcing a thick needle into the nozzle. It can enlarge or distort the orifice, leaving a poor pattern that cannot be corrected by aiming alone.

A small amount of washer fluid applied around the opening can help loosen residue. Compressed air can also help, but use short, controlled bursts. Excessive pressure may push debris deeper into the line or dislodge a hose connection under the hood.

Frozen washer fluid or lines

Water mixed into washer fluid can freeze quickly, and low-grade fluid may not match the temperatures on its label once it has been diluted. Ice can form in the reservoir, pump pickup, hose, or nozzle. A pump may hum without producing fluid, or it may remain silent if the frozen load has stressed the electrical circuit.

Move the vehicle into a warmer space when possible and let the system thaw naturally. Do not use an open flame, and do not pour boiling water over plastic nozzles, hoses, or the windshield. Rapid temperature changes can damage components or crack glass.

Once thawed, empty weak or contaminated fluid if practical and refill with washer fluid rated for the lowest temperatures your vehicle will encounter. Winter-rated fluid costs less than a damaged pump and offers better protection when a dirty windshield needs immediate clearing.

Weak or failed washer pump

A healthy pump creates a consistent spray quickly. If the sound is faint, intermittent, or absent, check the basics before ordering a replacement. Confirm that there is fluid in the reservoir, inspect the relevant fuse, and look for corrosion or loose terminals at the pump connector.

Some vehicles use separate pumps or circuits for front and rear washers. If the rear washer works but the front does not, the problem may be a front hose, front nozzle, or a directional valve rather than the reservoir or switch. Vehicle design varies, so identify which functions share the same pump before drawing conclusions.

If voltage reaches the pump when the washer control is activated but the pump does not run, replacement is generally the right repair. Choose a pump that matches the vehicle application and connector style. Fitment is not a detail to overlook: reservoir shape, outlet position, electrical terminals, and front or rear washer configuration can differ across trims and model years.

Leaking, kinked, or disconnected hoses

Washer hoses live in a harsh environment. Heat cycles, vibration, hood movement, and accidental contact during other repairs can split a line or pull it off a fitting. On SUVs, trucks, and vehicles with rear-window washers, longer hose runs create more locations where a leak can develop.

With the hood open, have another person activate the washer system while you watch the hose route and nozzle connections. Keep hands clear of belts, fans, and hot engine components. A visible stream under the hood identifies the failure faster than guessing from the windshield.

Replace brittle hose instead of wrapping it with tape. Tape may hold briefly, but washer fluid, heat, and vibration quickly expose a temporary repair. Route the replacement hose cleanly, avoiding sharp bends and points where the hood can pinch it. If a retaining clip is missing, secure the hose in a way that prevents rubbing without crushing the line.

Poor nozzle aim

A nozzle can be clean and fully supplied with fluid yet still perform badly because it sprays too low, too high, or toward the edge of the windshield. Poor aim wastes fluid and can leave the driver’s main viewing area dirty. It may appear after a hood repair, minor front-end contact, or routine work around the cowl panel.

Many adjustable nozzles can be aimed with a fine pin inserted lightly into the nozzle opening. Make small adjustments, test the pattern, and repeat. The preferred target depends on vehicle speed and windshield shape, but the spray should generally land in the wiper sweep area rather than on the roof, hood, or far side of the glass.

Some modern nozzles are fixed rather than adjustable. If a fixed unit sprays incorrectly and is not clogged or damaged, inspect its mounting position and replace it if necessary. A cracked nozzle body can flex under pressure and send fluid in unpredictable directions.

A Practical Diagnostic Order

A quick, disciplined sequence prevents unnecessary parts purchases. Check reservoir level and fluid condition first. Next, listen for pump operation, inspect the nozzles, and look for leaking hoses while the system is activated. Then check the fuse, connector, and pump only after the fluid path has been ruled out.

This order is efficient because clogs, empty reservoirs, and frozen fluid are more common than electrical failure. It also avoids replacing a pump when the real issue is a two-dollar hose connection or a blocked nozzle opening.

If the washer system has been neglected for a long time, inspect the wiper blades at the same time. New fluid cannot compensate for hardened, torn, or streaking blades. The washer system and wipers work as one visibility system, and both need to perform under rain, snow, road grime, and glare.

When Replacement Makes More Sense Than Cleaning

Cleaning is the sensible first move for minor blockage, but there are clear limits. Replace washer nozzles when their housings are cracked, the spray slots have been damaged, or cleaning does not restore an even pattern. Replace hoses that are hardened, split, or repeatedly slipping off fittings. Replace a pump that has power and ground but will not operate, or one that runs but cannot build enough pressure after the lines and nozzles have been confirmed clear.

For DIY repairs, use application-specific washer components rather than universal pieces whenever possible. A proper-fit nozzle sits correctly in the hood or cowl, follows the intended spray angle, and connects without improvised adapters. That is the kind of practical precision that keeps a simple maintenance repair from becoming a recurring annoyance.

Keep the System Ready Between Repairs

Use quality washer fluid year-round and avoid topping it off with plain water, especially before winter. Keep the reservoir cap in place to limit dirt entry. During regular under-hood checks, take ten seconds to inspect the hose routing and test the spray pattern. It is easier to correct a weak jet in the driveway than on a dark interstate with a windshield covered in slush.

Clear visibility is not an accessory. Give the washer system the same attention you give tires, brakes, and wiper blades, and your vehicle will be ready when the road turns messy.

All Season Truck Tire Review: What Matters

A truck tire can look aggressive on the rack and still be the wrong choice for the way you drive. This all season truck tire review focuses on what separates a capable year-round tire from one that only looks the part: wet grip, load handling, tread design, comfort, and the fitment details that affect every mile.

For most truck owners, all-season tires are the practical middle ground. They are built for daily driving, rain, light snow, highway travel, towing, and occasional unpaved roads without the noise and fuel-use penalties common with more aggressive all-terrain patterns. The right set should support the truck’s working side while keeping its road manners clean and controlled.

What an All-Season Truck Tire Is Built to Do

An all-season truck tire is designed to perform across a broad temperature range, not every possible condition. Its rubber compound stays flexible in cool weather while remaining stable during hot pavement miles. The tread is usually less open and less blocky than an all-terrain tire, creating more consistent contact with the road.

That design typically benefits highway stability, braking, and tread life. It also reduces the hum that can make a long commute or family road trip tiring. For a pickup, Jeep, or SUV that spends most of its time on pavement, these are meaningful advantages rather than minor refinements.

The trade-off is clear. A standard all-season tire is not a replacement for a dedicated winter tire in severe ice, deep snow, or sustained subfreezing conditions. It is also not the first choice for mud, sharp rocks, or frequent trail use. Match the tire to the terrain you actually cover, not the terrain you might see once a year.

All Season Truck Tire Review: The Key Performance Areas

A useful tire review starts with conditions, not marketing claims. The same tire can feel excellent on a lightly loaded half-ton pickup and less convincing on a fully equipped truck that tows regularly. Start with these core measures.

Wet Traction and Braking

Rain performance deserves more attention than many buyers give it. Trucks have substantial weight, and an unloaded pickup can be especially light over the rear axle. When pavement is wet, the tire must channel water away from the contact patch fast enough to maintain control.

Look for wide circumferential grooves, well-defined lateral channels, and siping across the tread blocks. These features help resist hydroplaning and provide more edges for braking on wet pavement. A tire with strong wet performance generally inspires confidence during sudden lane changes, freeway ramps, and stop-and-go traffic after a storm.

Do not judge wet capability by tread depth alone. A deep tread can still perform poorly if the channels do not move water efficiently or if the compound becomes hard with age. Review the tire’s intended application and replace tires before wear bars turn wet-weather driving into a compromise.

Tread Life and Even Wear

Long tread life is one of the strongest reasons to choose an all-season truck tire. Highway-oriented designs typically use a stable tread pattern that resists irregular wear when the truck is aligned and maintained properly. That can mean more useful miles and a quieter ride throughout the tire’s life.

There is no universal mileage result, however. Towing, hard acceleration, frequent short trips, underinflation, and worn suspension components can shorten tread life quickly. Front-end alignment is particularly important on trucks with larger wheels, altered ride height, or aftermarket suspension parts.

Rotate tires on schedule and check pressure when the tires are cold. These basic habits protect your investment and reveal problems early, including cupping from weak shocks or uneven shoulder wear from incorrect alignment.

Load Capacity and Towing Confidence

A truck tire must do more than carry the vehicle. If you haul equipment, pull a trailer, carry tools, or regularly load the bed, the tire’s load index and load range need to match the job.

Check the placard on the driver-side door jamb and the truck owner’s manual before changing tire sizes or construction. The replacement tire should meet or exceed the original equipment load capacity. When towing, factor in tongue weight, cargo, passengers, and the pressure requirements for the specific tire. More pressure is not automatically better, but running below the recommended pressure under load can build heat and damage the tire.

For drivers who tow only occasionally, a quality standard-load or XL tire may provide the ride quality they want. For frequent heavy-duty use, an LT tire with the appropriate load range may be the better fit. LT tires often have stronger construction, but they can ride firmer and weigh more. That is a functional trade-off worth making only when the workload calls for it.

Ride Quality and Road Noise

Truck owners often assume a tougher-looking tire must be a better tire. On pavement, that is rarely true. Larger tread voids and aggressive shoulder blocks can create more noise, more vibration, and less precise steering response than a road-focused all-season design.

A refined all-season tire should track predictably, absorb small impacts without feeling vague, and remain reasonably quiet at interstate speeds. This matters even more on daily-driven trucks and SUVs where tire noise can dominate the cabin once the tread begins to wear.

Wheel size also changes the experience. Moving to a larger wheel usually means a shorter sidewall, which can sharpen turn-in but reduce impact comfort and increase the chance of wheel damage on potholes. A balanced tire-and-wheel setup delivers a more finished result than chasing diameter alone. Technology as an art form means performance and appearance should work together.

Understanding Tire Size, Construction, and Fitment

The sidewall contains the information that determines whether a tire belongs on your vehicle. A size such as 275/65R18 identifies section width, aspect ratio, radial construction, and wheel diameter. It does not tell the whole story. Load index, speed rating, construction type, and overall diameter also matter.

Changing tire diameter can affect speedometer accuracy, gearing, clearance, and steering travel. On newer trucks, a substantial change may also influence driver-assistance calibration. A wider tire can improve the visual stance, but it may rub at full lock or under suspension compression if wheel offset and clearance are not considered.

Before ordering, confirm wheel diameter, recommended rim width, bolt pattern, offset, brake clearance, and the available space around the fender liner and suspension. This is especially important for lifted trucks, leveled trucks, and vehicles with aftermarket wheels. A tire that fits while parked may still contact bodywork during a turn or over a bump.

When All-Season Tires Are the Right Call

All-season truck tires make the most sense for drivers who spend the majority of their time on paved roads and want dependable performance across changing weather. They fit the needs of commuters, contractors with moderate payloads, family SUVs, and trucks that tow within their rated capacity on maintained roads.

They are also a smart choice for buyers who prioritize tread life and a polished on-road feel. If your truck has upgraded wheels, exhaust components, or a carefully finished exterior, a tire with controlled road noise and a clean sidewall profile can support the overall build without adding unnecessary harshness.

Choose an all-terrain tire instead if gravel, rutted access roads, loose dirt, and occasional trail travel are routine. Choose winter tires if snow and ice are regular parts of your season. The best tire is not the most aggressive option. It is the one that gives your truck the most control where it actually works.

Buying With a Clear Checklist

Before selecting a set, verify the original tire size and required load rating, then decide how often you tow or haul. Consider your local weather, your annual mileage, and whether road noise matters to you. Finally, inspect your wheels and suspension for issues that could ruin a new set prematurely.

A good all-season tire does not need to transform your truck into something it is not. It should make every ordinary drive feel more composed, every wet stop more controlled, and every loaded mile more confident. Choose the tire that supports the work, the ride, and the look you expect from your vehicle.

What Causes Wheel Vibration? Common Fixes

A vibration that starts at 55 mph and fades at 70 mph is not just an annoyance. It is your vehicle telling you that a rotating or steering component is no longer moving as it should. If you are asking what causes wheel vibration, the answer usually comes down to tire and wheel condition, installation quality, braking components, or worn suspension and steering parts. The speed, location, and timing of the shake point toward the right repair.

A light tremor in the steering wheel deserves attention before it becomes uneven tire wear, a damaged wheel, or reduced control on wet pavement. For cars, trucks, Jeeps, and SUVs, the right fix is not always a simple balance. Start by identifying exactly when and where you feel the vibration.

What Causes Wheel Vibration at Different Speeds?

The most useful clue is whether the vibration appears at a certain road speed, during braking, under acceleration, or all the time. A shake felt mainly in the steering wheel often originates at the front axle. A vibration felt through the seat, floor, or rear of the vehicle more often points to a rear tire, wheel, or drivetrain issue. These are patterns, not guarantees, but they help avoid replacing parts by guesswork.

Vibration at highway speed

An out-of-balance tire and wheel assembly is one of the most common causes of a shake between roughly 45 and 75 mph. As the wheel spins faster, even a small weight imbalance creates a force that the suspension and steering wheel transmit to the cabin. A lost wheel weight, mud packed inside a wheel, or an inaccurate balancing job can all produce this symptom.

Tire balance is not the same as wheel alignment. Alignment sets the angles at which the wheels meet the road. Balance distributes mass evenly around the rotating assembly. A vehicle can have a correct alignment and still vibrate at speed.

A tire with excessive road-force variation can feel similar to an imbalance even after conventional balancing. This happens when a stiff section of the tire or a wheel with slight runout creates an inconsistent rolling force. A road-force balance test measures this under load and is especially valuable for low-profile tires, larger wheels, and vehicles that are sensitive to steering feedback.

Vibration while braking

If the steering wheel pulses or shakes only when the brake pedal is applied, inspect the front brake system first. Brake rotor thickness variation, uneven rotor surfaces, or a rotor that does not sit flush against the hub can create a noticeable shake. The problem is often called a warped rotor, but uneven pad deposits and thickness variation are more common explanations.

A sticking caliper, seized slide pin, or unevenly worn brake pads can create excess heat and make the issue return. Replacing rotors without correcting the underlying caliper or hub problem may provide only a temporary result. On the rear axle, brake-related vibration may be felt more through the seat or brake pedal than through the steering wheel.

Vibration after tire or wheel service

A shake that begins immediately after new tires, wheel replacement, brake work, or a seasonal tire change deserves a close installation check. A wheel may not be centered correctly on the hub, lug nuts may not be tightened in the proper sequence, or rust and debris may be trapped between the hub and wheel mounting face.

Aftermarket wheels need the correct bolt pattern, center bore, offset, and load rating for the vehicle. If the wheel center bore is larger than the hub, the proper hub-centric rings may be needed to center the wheel during installation. Lug nuts clamp the wheel in place, but they should not be relied on to correct a poorly centered fitment.

Vibration during acceleration or at all speeds

A vibration that intensifies under acceleration may come from beyond the wheel and tire assembly. On front-wheel-drive and many all-wheel-drive vehicles, a worn inner CV joint can cause a shudder during throttle input. On rear-wheel-drive trucks and SUVs, a damaged driveshaft, worn U-joint, or incorrect driveline angle can produce a floor vibration that changes with vehicle speed.

If the vehicle pulls, wanders, clunks over bumps, or feels loose along with the vibration, inspect suspension and steering components. Worn ball joints, tie-rod ends, control arm bushings, wheel bearings, and struts can allow the tire to move in ways it should not. These parts may not create the original imbalance, but they can amplify it and accelerate tire wear.

Tire and Wheel Problems That Need Immediate Attention

Not every vibration is safe to monitor until the next service visit. Stop driving and inspect the tires if you see a bulge in the sidewall, exposed cords, deep cuts, severe tread separation, or a tire that appears visibly out of round. A separated belt can create a rhythmic thump at low speed and a strong shake at highway speed. It can also fail without much warning.

A bent wheel is another common source of vibration, particularly after a pothole strike, curb impact, or rough off-road use. Alloy wheels can bend on the inner barrel where damage is difficult to see with the wheel installed. Steel wheels can also bend, although they are often more repairable depending on the damage and application.

Loose, damaged, or incorrectly torqued lug nuts are a safety issue, not a balance issue. Never continue driving if a wheel seems loose, makes a knocking sound after service, or shows movement around the mounting surface. Have the wheel mounting hardware inspected and tightened to the vehicle manufacturer’s specified torque using a calibrated torque wrench.

How to Find What Causes Wheel Vibration

A disciplined inspection prevents unnecessary parts replacement. Start with the simplest visible causes, then move toward measurements and component testing.

  1. Check tire pressure and tire condition. Match pressures to the door-jamb specification, not the maximum pressure printed on the tire sidewall. Look for uneven tread wear, bulges, missing chunks of tread, embedded debris, and cupping.
  1. Inspect the wheels and mounting surfaces. Look for missing balance weights, cracked or bent rims, packed mud, and corrosion where the wheel meets the hub. Confirm that the wheel is correct for the vehicle and that each lug nut is the proper style for the wheel seat.
  1. Have the assemblies balanced correctly. Request a road-force balance when a normal balance has not solved a highway-speed vibration. The technician should also measure wheel and tire runout if the vibration persists.
  1. Separate brake symptoms from road-speed symptoms. If the shake arrives only under braking, inspect rotors, pads, calipers, and hub surfaces. If it remains unchanged when coasting and braking lightly, tire and wheel issues remain more likely.
  1. Check steering, suspension, and drivetrain wear. A professional inspection can identify play in wheel bearings, tie rods, ball joints, bushings, CV joints, and driveshaft components. This is especially relevant when the vehicle has high mileage, larger aftermarket wheels, or has recently hit a pothole.

Rotating tires front to rear can also help isolate the source. If a steering-wheel shake becomes a seat vibration after rotation, the tire or wheel that moved is a strong suspect. Do not rotate directional or staggered tires against their intended direction or fitment pattern.

Repairs That Actually Match the Problem

The correct repair depends on the diagnosis. A lost wheel weight calls for balancing, while a damaged tire requires replacement. A bent wheel may be repairable if damage is minor and the wheel has not cracked, but replacement is usually the safer choice for severe bends or any structural damage.

For brake vibration, the best result may require rotors and pads together, plus caliper service and careful hub cleaning. For worn suspension components, replace the failed parts before investing in new tires or alignment. Otherwise, the new tires may wear unevenly and bring the vibration back.

Wheel upgrades require the same discipline. Larger diameters and lower-profile tires can sharpen handling and transform appearance, but they offer less cushion against potholes and make minor balance or runout issues easier to feel. Choose quality wheels and tires with vehicle-appropriate load ratings, fitment, and hardware. The right components should look intentional and perform with equal precision.

A smooth ride is not a cosmetic luxury. It protects tires, preserves steering response, and makes every mile more controlled. Address the first sign of vibration with a careful inspection, then choose parts and service that solve the actual fault rather than masking the symptom.

Aftermarket Ignition Parts Guide for Better Starts

A hard start, intermittent misfire, or rough idle rarely comes down to one “bad ignition part” in isolation. Spark plugs, coils, wires, boots, connectors, and engine controls work as a system. This aftermarket ignition parts guide helps you identify what belongs on your car, truck, Jeep, or SUV – and what should stay on the shelf.

For daily drivers, the right choice is usually an OE-style replacement with correct fitment and dependable materials. For modified engines or vehicles that see towing, trail use, or high-load driving, ignition upgrades can make sense when they solve a specific demand. The goal is not the most aggressive-looking part. It is consistent spark delivery, correct installation, and a component set matched to the vehicle.

Start With the Ignition System You Have

Before choosing parts, confirm how your vehicle produces and delivers spark. Older vehicles may use a distributor, ignition module, cap, rotor, and plug wires. Many modern vehicles use coil-on-plug ignition, where each spark plug has its own coil mounted directly above it. Other engines use a coil pack with short plug wires.

This matters because the replacement strategy changes with the system. A distributor-equipped engine may need routine service across several wear items at once. A coil-on-plug engine may only need individual plugs, boots, or a single failed coil. Buying by vehicle year, make, model, engine size, and VIN-compatible fitment information is the fastest way to avoid a mismatch.

Also check for factory variations. The same model year can have different engines, emissions packages, connector styles, and ignition configurations. Visual comparison is useful, but it should support fitment verification, not replace it.

Spark Plugs: Match Heat Range, Material, and Gap

Spark plugs are the most familiar ignition service part, but they are not interchangeable simply because the threads fit. The plug’s reach, seat type, heat range, electrode design, and specified gap all affect combustion and engine durability.

For most stock vehicles, use the plug type specified by the manufacturer. Copper plugs are common in older applications and may require more frequent replacement. Platinum and iridium plugs typically offer longer service life because their fine-wire center electrodes resist wear. That does not automatically mean an iridium plug is the right upgrade for every engine. Some engines are calibrated around a particular plug design, and staying with the specified style can be the best decision.

Heat range deserves extra attention on modified applications. A colder plug can help manage heat in engines with added boost, higher compression, heavy towing loads, or sustained high-RPM operation. But running a colder plug in a stock engine without a reason can contribute to fouling and poor low-speed operation. Choose heat range based on the engine’s real operating conditions, not a generic performance claim.

Do not assume every new plug arrives ready to install. Many are pre-gapped, yet they can be damaged in shipping or may not match a modified engine’s requirements. Check the gap against the vehicle specification with an appropriate tool. Fine-wire iridium and platinum electrodes should be handled carefully. Forcing a conventional gap tool against the center electrode can damage the plug.

Signs Spark Plugs May Be Due

Slow starts, reduced fuel economy, a rough idle, hesitation under acceleration, and a flashing or steady check engine light can point to worn plugs. Those symptoms can also come from fuel, air, sensor, or mechanical problems. Reading stored diagnostic trouble codes and inspecting the old plugs can reveal more than replacing parts by guesswork.

A worn electrode gap, oil fouling, fuel fouling, cracked porcelain, or unusual deposits can tell a story about engine condition. If one plug looks dramatically different from the rest, investigate that cylinder rather than treating it as normal wear.

Ignition Coils: Replace the Failure, Not the Whole System by Default

An ignition coil converts battery voltage into the high voltage needed to fire the plug. When a coil weakens, the engine may misfire under load before it misfires at idle. You may notice a stumble during acceleration, reduced power, poor fuel economy, or a check engine light with a cylinder-specific misfire code.

On coil-on-plug systems, replacing only the failed coil is often practical. If several coils are original and the vehicle has high mileage, replacing a full set can reduce the chance of repeated repairs, especially when labor access is difficult. There is no universal rule. The smart choice depends on mileage, budget, diagnostic results, and how consistently the vehicle needs to perform.

Look for correct electrical connectors, mounting points, boot length, and vehicle application. A coil marketed as high output is not automatically better for a stock engine. Modern engine management systems are calibrated around dwell time, coil characteristics, plug gap, and combustion conditions. An incompatible performance coil can create new problems instead of solving an existing one.

For modified engines, upgraded coils may be appropriate when increased cylinder pressure makes spark blowout more likely. That decision should be based on the complete combination: boost level, fuel type, plug gap, tuning, and ignition control strategy.

Wires, Boots, Caps, and Rotors Still Matter

Plug wires remain common on many trucks, SUVs, Jeeps, and older performance vehicles. Heat, vibration, oil exposure, and age can break down insulation and increase resistance. A damaged wire may arc to nearby metal, especially under load or in damp weather, creating a miss that is easy to feel but difficult to see.

Choose wire sets with the correct length, terminal ends, routing clips, and heat protection for the application. Route them as designed. Crossing wires incorrectly, letting them rest on exhaust components, or pulling on the wire instead of the boot during service can shorten their life.

Distributor caps and rotors are wear parts, not permanent hardware. Inspect for corrosion, carbon tracking, cracks, burnt terminals, and a worn center contact. When replacing a cap and rotor, inspect the distributor shaft and related components as well. A new cap cannot correct excessive shaft play or a failing ignition module.

Diagnose Before You Buy

Ignition parts are frequently blamed for problems caused elsewhere. A vacuum leak, clogged injector, failing fuel pump, weak battery, poor ground, damaged connector, or low engine compression can all mimic an ignition fault. Start with the basics: scan for codes, inspect connectors and wiring, verify battery condition, and check for obvious contamination around plugs and coils.

If a misfire code follows a coil when you swap it to another cylinder, the coil is a strong suspect. If it stays with the same cylinder, look at the spark plug, injector, wiring, compression, and air leaks. This basic process prevents unnecessary parts replacement and gets the vehicle back on the road faster.

Do not ignore a flashing check engine light. It often indicates an active misfire severe enough to send unburned fuel into the exhaust, where it can overheat and damage the catalytic converter. Reduce load on the engine and address the cause promptly.

Installation Details That Protect the Repair

A quality part can still fail early when installation is rushed. Work on a cool engine, disconnect power when the service procedure calls for it, and keep debris out of spark plug wells. On engines with deep plug tubes, remove dirt and moisture before pulling the plug so contamination does not enter the cylinder.

Use the correct spark plug socket and torque specification. Under-tightening can affect heat transfer and sealing; over-tightening can damage threads, especially in aluminum cylinder heads. Avoid adding anti-seize or dielectric grease unless the part maker or vehicle service information calls for it. Many modern plugs have plated threads, and excess anti-seize can alter torque readings. Dielectric grease belongs on the inside lip of a boot when specified, not on the electrical contact itself.

After installation, reconnect every connector securely, clear codes only after recording them, and verify the repair with a test drive under the conditions that produced the original complaint. A vehicle that idles smoothly but misfires under acceleration is not fully repaired.

Choose Parts for the Job in Front of You

The best ignition purchase is application-specific. A commuter SUV needs dependable OE-style service parts. A work truck may need parts selected for heat, towing, and frequent use. A modified Jeep or performance build may require a more deliberate match between plugs, coils, tuning, and engine load.

Material quality, connector accuracy, heat resistance, and fitment should carry more weight than flashy packaging. At FORTLUFT, the same practical standard applies across maintenance and upgrade categories: choose components that work cleanly, fit correctly, and support the way your vehicle is actually driven. Good ignition service is technology doing its job quietly – every start, every mile.

Best Winter Wiper Blades for Clearer Cold Drives

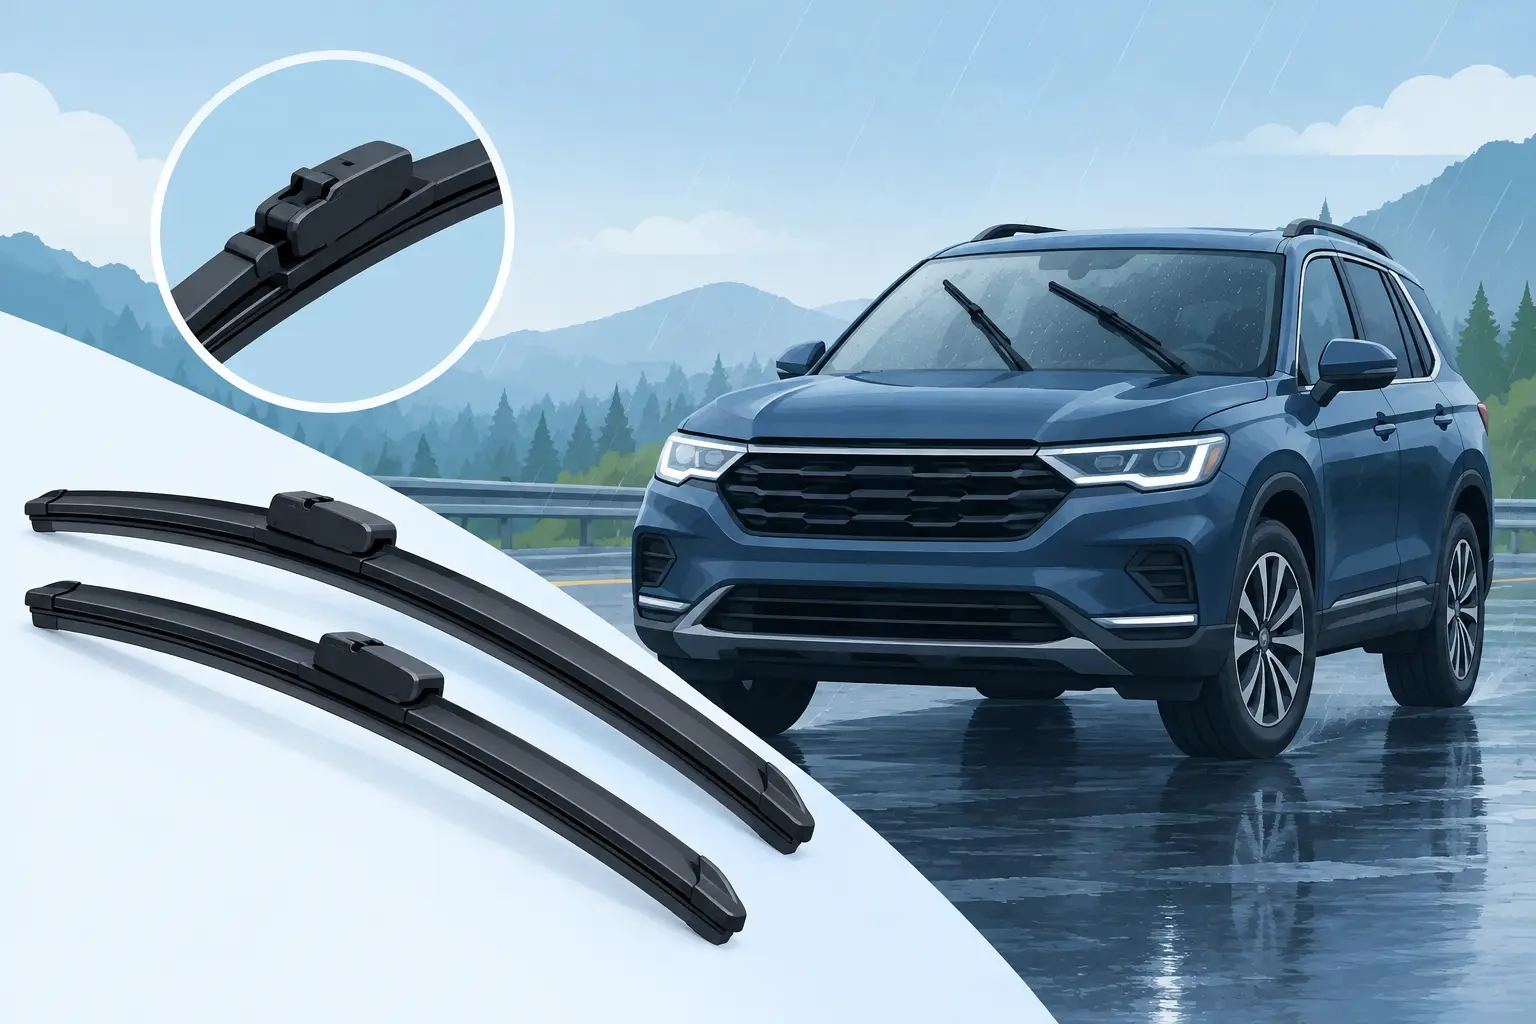
A frozen windshield at 6 a.m. exposes every weakness in a wiper blade. The best winter wiper blades are not simply the most expensive set on the shelf. They are the blades that match your vehicle’s arm style, maintain even pressure across cold glass, and keep slush, salt spray, and packed snow from defeating the wiping edge.

For drivers of cars, trucks, Jeeps, and SUVs, winter visibility is a maintenance priority. A good blade set can reduce streaking and chatter, but it cannot compensate for a dry windshield, thick ice, worn wiper arms, or summer washer fluid that has frozen in the reservoir. Choose the right blade design, confirm fitment, and prepare the rest of the washer system at the same time.

What Makes the Best Winter Wiper Blades Different?

Winter blades are designed around a simple problem: conventional exposed frames have many small hinges. Snow and ice can collect in those hinges, preventing the blade from following the curve of the windshield. The result is skipped sections, uneven wiping, or a blade that lifts away from the glass when you need it most.

The strongest cold-weather options minimize exposed moving parts and use a pliable rubber or synthetic wiping element that stays flexible at low temperatures. A protective outer shell can also help keep snow out of the blade structure. This matters most in areas with repeated snow, freezing rain, road-salt mist, and frequent temperature swings around freezing.

There is a trade-off. A traditional winter blade with a bulky protective boot can be very effective in heavy snow, but its appearance and aerodynamic performance may not suit every vehicle. Beam-style blades are cleaner-looking and often perform well year-round, yet quality varies by construction and by windshield shape. The right choice depends on your climate, driving pattern, and vehicle fitment.

Choose the Right Winter Blade Design

Winter frame blades

Classic winter blades use a conventional metal frame covered by a rubber or synthetic boot. The cover blocks snow and ice from entering the frame joints, preserving movement and contact pressure. For a truck, Jeep, or SUV that regularly sees deep snow, unplowed roads, and heavy accumulation, this design remains a practical option.

Their main limitation is bulk. The boot can hold moisture after a storm, and the blade may not look as refined as a low-profile beam design. Still, when maximum resistance to packed snow is the goal, the extra material serves a purpose.

Beam blades

Beam blades use a curved internal spring strip rather than multiple exposed frame joints. They apply pressure more evenly across the windshield and have fewer places for ice to accumulate. Many premium beam blades also use an integrated spoiler to improve contact at highway speeds.

For most daily drivers, a quality beam blade is the best all-around solution. It offers clean styling, strong all-season performance, and dependable wiping in moderate to severe winter weather. If your vehicle spends more time on salted highways than in deep snow, this is usually the most balanced choice.

Hybrid blades

Hybrid blades combine a supported internal frame with an aerodynamic outer cover. They aim to provide the stable contact of a beam blade while retaining additional structure. A hybrid can be a smart middle ground for drivers who want a more substantial blade than a basic beam model without the full bulk of a traditional winter boot.

The key is not the label alone. Look at the blade’s connection system, pressure points, wiping element, and stated vehicle applications. A well-made blade that fits correctly will outperform a premium-looking blade with the wrong adapter or length.

Fitment Comes Before Features

Wiper blades are a small part with a large fitment range. Driver and passenger blades are often different lengths, and the rear wiper on an SUV or hatchback may require a separate blade and attachment style. Never assume the same size works on both sides of the windshield.

Start with your vehicle year, make, model, and body style. Then verify the front driver-side length, front passenger-side length, rear length if equipped, and the wiper-arm connection. Common arm styles include J-hook, push button, pinch tab, side lock, and bayonet connections. Many aftermarket blades include adapters, but not every adapter works with every arm.

For commercial buyers and repair shops, fitment accuracy also prevents avoidable returns and installation delays. Keep vehicle application details tied to the order, particularly on fleet vehicles where model-year changes can alter wiper-arm hardware.

Do not choose a longer blade just because it appears to offer more coverage. An oversized blade can strike the windshield trim, overlap incorrectly, bind with the other blade, or place excess load on the wiper motor. Correct length and sweep pattern matter more than an extra inch of rubber.

Materials That Hold Up in Freezing Weather

The wiping edge is where winter performance is won or lost. Natural rubber blades can work well, but they may harden faster in severe cold or deteriorate sooner under UV exposure and road chemicals. Synthetic rubber compounds are often selected for better resistance to temperature changes, while silicone blades are known for long service life and smooth wiping when properly matched to the windshield.

Silicone is not automatically the best answer for every driver. It typically costs more, and performance still depends on blade design, windshield condition, and installation. For a vehicle that sees constant winter road spray and high annual mileage, the longer wear potential may justify the price. For a seasonal vehicle or a budget-focused replacement, a quality rubber or synthetic beam blade may be the more sensible purchase.

Look for a precision-cut wiping edge and a blade body that remains flexible without feeling loose. The goal is consistent contact, not excessive pressure. Too little pressure leaves water behind; too much can increase noise, drag, and premature wear.

Prepare the Windshield, Washer System, and Wiper Arms

Even the best winter wiper blades will streak over a windshield coated in oil film, old wax residue, or bonded road grime. Before installing new blades, clean the glass thoroughly with an automotive glass cleaner and wipe the old blade path clean. Then inspect the wiper arms for bent sections, weak springs, corrosion, or loose hardware.

A weak arm spring can mimic blade failure. If one side of the windshield consistently smears while the other wipes clean, check arm tension and blade seating before replacing another set of blades. Also inspect the washer nozzles. A partially blocked nozzle can leave the blade trying to wipe dry glass, which causes chatter and shortens the life of the rubber edge.

Use washer fluid rated for the lowest temperatures you expect to encounter. Water, diluted summer fluid, or a nearly empty reservoir can turn a simple windshield wash into a frozen-visibility problem. In snowy conditions, keep a scraper in the vehicle and clear thick ice manually before using the wipers. Wiper blades are made to clear moisture and light snow, not to break a sheet of ice free from the glass.

Installation Habits That Prevent Damage

Lift the wiper arm carefully and protect the windshield before removing the old blade. If the bare metal arm snaps down, it can chip or crack the glass. A folded towel placed on the windshield provides a simple safeguard during installation.

Attach the new blade until the connector locks securely, then lower the arm gently. Test the washer spray and wipers on a wet windshield at low speed before heading into traffic. Watch for adapter movement, missed zones, or blade-to-trim contact. If the blade chatters immediately, clean the windshield again and confirm the blade is not installed backward or twisted on the arm.

Avoid running the wipers when they are frozen to the glass. Free the blade by warming the vehicle, clearing the windshield, or gently releasing the rubber edge with a scraper. Forcing frozen blades can tear the wiping element, strain the motor, or damage the linkage.

When to Replace Winter Wiper Blades

Replace blades when they leave persistent streaks, miss sections of glass, chatter after cleaning, split at the edge, or show visible deformation. In demanding climates, annual replacement before winter is a reasonable baseline. High-mileage drivers, vehicles parked outdoors, and fleets operating through salted-road conditions may need replacements more often.

Do not wait for a complete failure. The first thin smear can become a dangerous blind spot when glare from headlights meets wet pavement. Keeping a correctly fitted spare set available is especially useful for work trucks, off-road vehicles, and drivers who travel through changing weather.

FORTLUFT customers who prioritize both dependable maintenance and clean vehicle presentation should treat wiper blades like any other performance-minded replacement part: fitment first, materials second, and real operating conditions always in view. Clear glass changes every mile of a winter drive. Choose blades before the first storm, install them correctly, and let the windshield stay focused on the road ahead.

Truck Tires: How to Choose the Right Set

A truck can look ready for anything and still be held back by the four contact patches beneath it. The right truck tires determine how confidently you tow, how stable the truck feels with a loaded bed, how it brakes in rain, and how much road noise follows you home. Size alone is not the answer. The best fit comes from matching tire construction and tread design to the work your truck actually does.

For a daily-driven pickup that sees occasional trailer duty, a quiet all-terrain may make more sense than an aggressive mud-terrain. For a work truck that spends long days under load, load capacity and casing strength should lead the decision. Choosing well protects handling, ride quality, fuel use, and the parts that work hard around the tires – suspension, steering, brakes, and wheel bearings.

Start With the Truck Tire Size and Load Rating

The placard inside the driver-side door jamb is the first place to look. It identifies the original tire size, recommended cold inflation pressure, and vehicle load information. That baseline is more useful than choosing by appearance or wheel diameter alone.

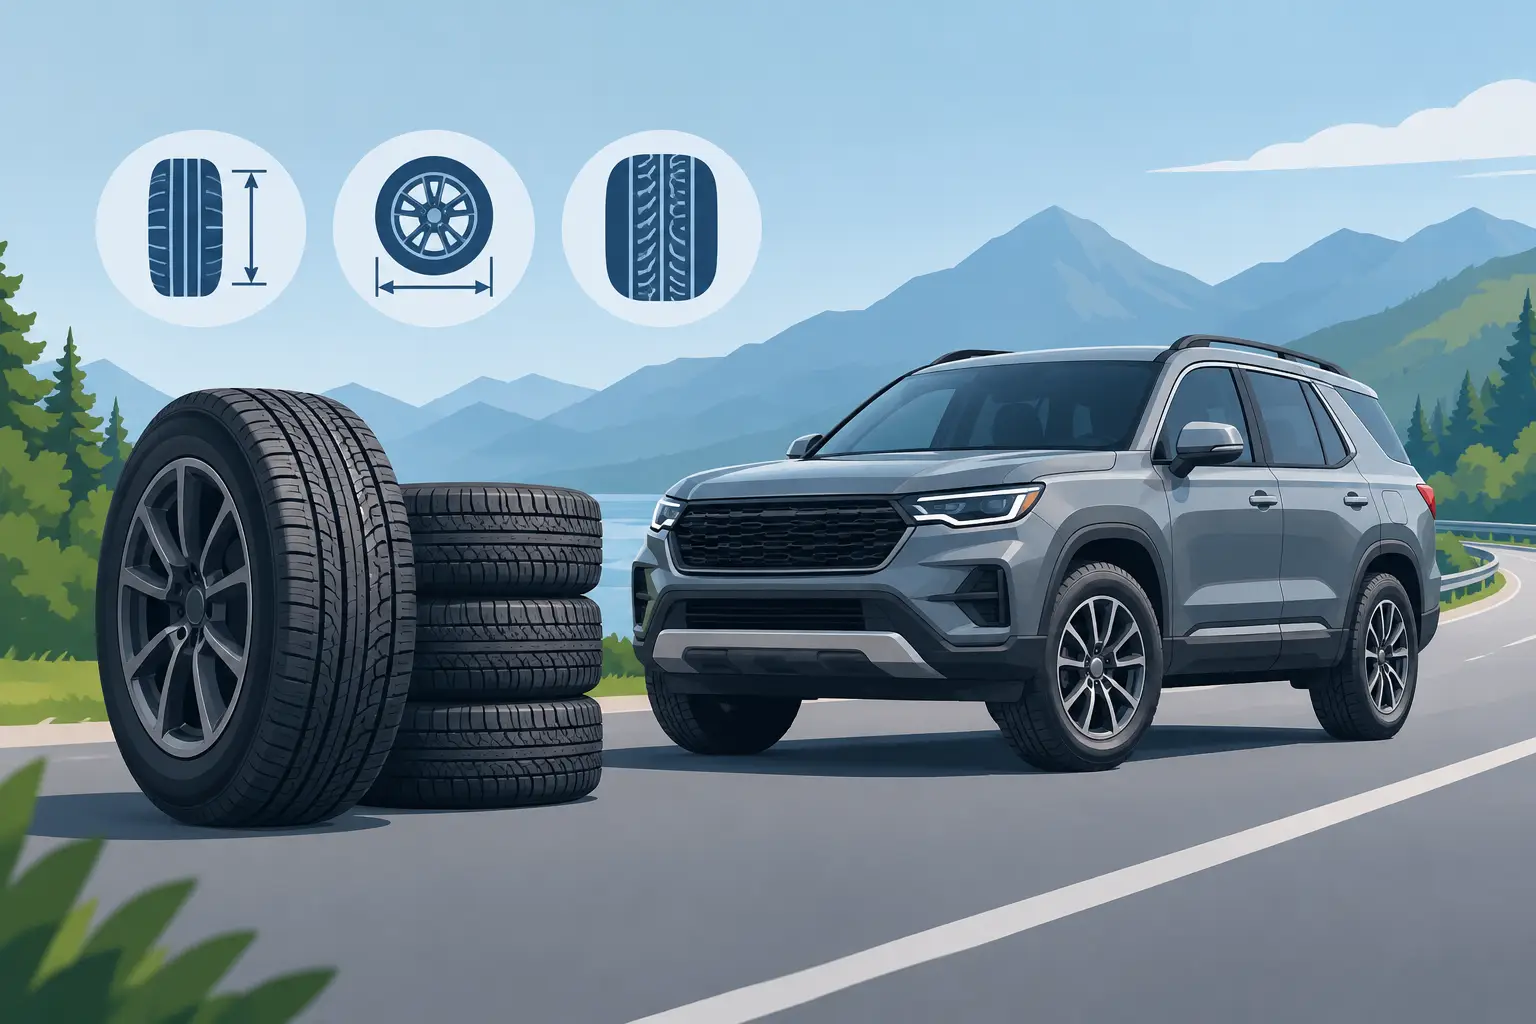
A tire size such as LT275/70R18 tells a clear story. LT means Light Truck construction, 275 is the tire width in millimeters, 70 is the sidewall height expressed as a percentage of width, R identifies radial construction, and 18 is the wheel diameter in inches. Changing any of these numbers can affect clearance, speedometer accuracy, gearing, braking behavior, and steering feel.

Load rating deserves equal attention. Passenger-metric tires can work well on lighter trucks used primarily for commuting, but they are not automatically the right choice for regular hauling or towing. LT tires are built for greater load capability and typically use tougher sidewalls. The trade-off is real: they can weigh more, ride firmer, and slightly reduce fuel economy. For many half-ton trucks, the right answer depends on whether the bed is usually empty or routinely carrying equipment, materials, or a tongue-heavy trailer.

Never select a tire based only on a familiar label such as Load Range E. Confirm the tire’s actual load capacity at the intended inflation pressure, then compare it with the truck’s axle ratings and expected use. The tire must meet the vehicle’s requirements at every wheel position, not just look capable.

Match Truck Tires to the Miles You Drive

Tread pattern changes the way a truck behaves. Consider where the truck spends most of its time, then choose for that environment rather than for the occasional extreme trip.

Highway and touring tires

Highway tires suit trucks that spend most of their lives on pavement, especially unloaded daily drivers and long-distance work vehicles. Their closely spaced tread blocks generally deliver predictable road manners, lower noise, and efficient wear. Many also provide strong wet-road performance when the tread depth is maintained.

This category is a practical choice for drivers who tow on paved roads and want stability without the hum and weight of a highly aggressive tread. It is less convincing in deep mud, loose sand, and sharp rocky terrain.

All-terrain tires

All-terrain tires are the middle ground for many pickup, Jeep, and SUV owners. They use more open tread blocks and stronger shoulders than highway tires, improving grip on gravel, dirt roads, light snow, and uneven job sites. Modern all-terrains can remain civilized on pavement, though they usually produce more noise and may not last as long as a dedicated highway design.

Look closely at the tire’s winter marking if snow is part of the equation. The Three-Peak Mountain Snowflake symbol indicates performance that meets a defined severe-snow standard. An all-terrain with this marking can be a valuable year-round option in colder regions, but it does not replace careful driving or adequate tread depth on ice.

Mud-terrain tires

Mud-terrain tires prioritize clearing loose material from the tread and gripping uneven off-road surfaces. Their large voids, reinforced construction, and bold sidewalls create a purposeful look and serious trail capability. They also bring compromises: more road noise, less refined wet-pavement behavior, faster wear in some applications, and added rotating weight.

They are a strong match for trucks that regularly see mud, rocks, ruts, or remote worksites. On a highway-only pickup, they are often more tire than the job requires.

Consider Wheels, Clearance, and Suspension Together

A larger tire changes more than stance. Diameter affects effective gearing and speedometer readings, while width and offset influence clearance at the fender liner, control arms, and suspension components. A tire that clears while parked may rub at full steering lock or when the suspension compresses over a driveway or trail obstacle.

Before moving up in size, check wheel width, offset, brake clearance, lift height, and the truck’s full range of steering and suspension travel. A modest increase can work cleanly with the correct wheel setup. An oversized setup may require trimming, recalibration, suspension changes, or different gearing to perform as intended.

The visual result matters, but fitment is function. A properly matched tire-and-wheel combination gives the truck a deliberate stance without creating vibration, rubbing, or unnecessary strain. Technology as an art form starts with components that work together.

Do Not Overlook Date Codes and Tread Depth

A tire can appear new and still be older inventory. Check the Department of Transportation date code on the sidewall. The final four digits show the week and year of manufacture. For example, 1825 means the tire was made in the 18th week of 2025. Fresh inventory matters because rubber changes over time, even before significant mileage is added.

Once tires are in service, inspect tread depth across the full width, not just in the center. Center wear often points to overinflation, while wear on both shoulders can suggest underinflation. Feathering or uneven wear may indicate an alignment issue, worn suspension parts, or a balance problem. On a truck, those patterns can develop quickly when the vehicle is frequently loaded or driven on rough surfaces.

Replace tires when tread is no longer safe for the conditions you face, when there is sidewall damage, or when cracking and aging become visible. Do not depend on a single mileage figure. A lightly used truck in high heat, a tow rig carrying heavy loads, and a commuter truck in moderate conditions will not wear tires at the same rate.

Get More Life From Your Truck Tires

Tire maintenance is simple, but it cannot be occasional. Check pressure when tires are cold, ideally at least once a month and before towing or carrying a heavy load. Use the pressure listed on the door placard unless a tire professional has established a different pressure for a specific, approved application. The maximum pressure molded onto a tire sidewall is not a universal daily-use recommendation.

Rotation intervals should follow the vehicle and tire manufacturer guidance. Rotating on schedule helps even out the different demands placed on front and rear tires, especially on trucks that carry variable loads. Keep alignment in check after a hard pothole impact, suspension work, or any sign that the truck is pulling or wearing tires unevenly.

Also inspect tires before long trips. Look for embedded nails, cuts, bulges, exposed cords, and damage around the bead area. A slow leak may be a small repair today, but it can become a heat-related failure when a loaded truck runs for hours at highway speed.

Choose for the Job, Then Drive With Confidence

The right tire is not always the tallest, widest, or most aggressive option. It is the one that supports your truck’s rated capacity, fits correctly, performs in your common conditions, and gives you the control to use the truck as intended. Whether the next miles involve a job site, a trailer, a weekend trail, or a daily commute, give truck tires the same careful attention you give every other working part of the vehicle.

Aftermarket Wheels That Fit, Perform, and Stand Out

A wheel can change a vehicle’s stance in an afternoon, but aftermarket wheels are not simply a cosmetic purchase. The right set can sharpen steering response, create room for larger brakes, support a working truck’s load, or give a Jeep the tire clearance it needs off-road. The wrong set can rub, vibrate, overload, or compromise handling before the first tank of fuel is gone.

For cars, trucks, Jeeps, and SUVs, the best wheel choice starts with fitment and ends with a design that suits how the vehicle is actually used. Technology as an art form only works when the technology is right.

Start With Aftermarket Wheels That Actually Fit

Wheel fitment is a system, not a single measurement. A wheel may have the correct diameter and still be wrong for the vehicle because its bolt pattern, offset, center bore, width, or load rating does not match the application. Checking all of these specifications before ordering protects the investment in wheels, tires, suspension components, and brakes.

The bolt pattern must match exactly. It is expressed as the number of wheel studs and the diameter of the circle they form, such as 5×114.3 or 6×139.7. Similar-looking patterns are not interchangeable. Forcing a wheel onto the wrong bolt pattern can damage studs and create a serious safety issue.

Center bore matters as well. Many factory wheels are hub-centric, meaning the center bore carries the wheel precisely on the hub. An aftermarket wheel with a larger bore may be compatible when installed with properly sized hub-centric rings. A bore that is too small will not fit over the hub. Lug-centric installation is used in some applications, but it still requires the correct lug seat, hardware, and professional attention to torque.

Offset, Backspacing, and Width

Offset determines where the wheel sits in relation to the hub mounting surface. Positive offset places the mounting pad closer to the outer face of the wheel, pulling the wheel inward. Lower or negative offset pushes the wheel outward, which can create a wider, more aggressive stance.

That visual change has mechanical consequences. Too much inward position can contact suspension arms, struts, or brake components. Too much outward position can cause tire-to-fender rubbing, increase stress on wheel bearings, and throw road debris down the side of the vehicle. Backspacing provides another way to understand inside clearance, especially when selecting wheels for lifted trucks and Jeeps.

Wheel width must work with the selected tire. A wider wheel can support a wider tire and alter the contact patch, but extreme combinations may make steering feel heavier or cause uneven wear. A practical setup leaves adequate clearance at full steering lock and through the full range of suspension travel, not just while the vehicle is parked.

Choose Wheel Diameter for the Job

Larger diameter wheels are a style statement, but they are also a tire-sizing decision. Moving from a 17-inch wheel to a 20-inch wheel generally requires a lower-profile tire to maintain a similar overall diameter. That can improve steering precision and create a cleaner, more modern look, but it also leaves less sidewall to absorb potholes.

For a daily-driven sedan or SUV, maintaining near-stock overall tire diameter helps preserve speedometer accuracy, gearing, traction-control behavior, and ride quality. A modest plus-size fitment can work well when tire availability and road conditions support it. Oversizing only for appearance can leave the vehicle more vulnerable to bent wheels and tire damage.

Truck and Jeep owners often have different priorities. A smaller wheel diameter with a taller tire sidewall can be the smarter off-road configuration because it offers more compliance over rocks, ruts, and uneven terrain. It may also provide a wider selection of all-terrain or mud-terrain tires. Brake clearance sets the lower limit, so confirm that the wheel clears calipers before choosing a smaller diameter.

Match Materials and Construction to Your Use

Not every aftermarket wheel is built for the same purpose. Construction affects weight, price, appearance, and durability.

Cast aluminum wheels are common because they offer broad style selection at accessible price points. They are well suited to many daily drivers, street trucks, and appearance-focused builds when their load rating matches the vehicle.

Flow-formed wheels use a manufacturing process that stretches and strengthens the barrel after casting. They can reduce weight while improving material properties compared with conventional cast designs. For drivers who value responsive handling but do not need a premium forged wheel, this can be a strong middle ground.

Forged wheels are machined from a solid billet or forged blank and are often selected for high-performance or specialized applications. Their strength-to-weight potential is excellent, but the cost is significantly higher. They make the most sense when lower unsprung weight, exact specification, or demanding use justifies the investment.

Steel wheels remain a practical option for work vehicles, winter setups, and off-road use. They are typically heavier than aluminum, yet they are economical and may be easier to service after minor damage. The best material depends on the vehicle’s workload, terrain, budget, and desired finish.

Load Rating Is Not Optional

A wheel’s load rating must meet or exceed the load required at each wheel position. This is particularly important for full-size trucks, tow vehicles, commercial SUVs, and vehicles carrying tools, cargo, or trailers. A large wheel with an attractive finish is not automatically suitable for a heavy-duty application.

Consider the vehicle’s gross axle weight ratings rather than relying only on curb weight. If a truck is regularly loaded or towing, its rear axle can carry substantially more weight than it does during an empty test drive. Pair appropriately rated wheels with tires that have sufficient load capacity and inflation capability for the application.

Design Choices That Hold Up in Real Driving

Finish affects both appearance and maintenance. Gloss black, machined faces, bronze, silver, and polished styles each create a distinct result, but they react differently to brake dust, salt, road grime, and cleaning chemicals. A textured or satin finish often hides minor dust better than a high-gloss surface. Polished or chrome-style finishes can look exceptional, though they need more consistent care in harsh climates.

Spoke design also has a practical side. Open-spoke patterns can show off upgraded brakes and improve access for cleaning, while more complex multi-spoke designs may collect more brake dust. On trucks and SUVs, a wheel with adequate spoke and barrel clearance is essential if larger brake packages are planned.

Avoid choosing a wheel solely from a product image. Photos rarely show the relationship between offset, tire profile, suspension height, and fender clearance. A clean factory-style fitment can be as purposeful as a flush stance, while an off-road build may need a different offset and tire package entirely.

Plan the Supporting Parts Before Installation

Wheels are installed with more than lug nuts. Confirm the correct lug seat type, such as conical, ball, or mag seat, because the hardware must match the wheel’s mounting holes. Factory lug nuts do not always transfer to aftermarket wheels. Thread pitch, shank length, and socket access all matter.

If the vehicle uses a tire-pressure monitoring system, verify that the sensors can be transferred or replaced and programmed as needed. New valve stems, hub-centric rings, compatible center caps, and a properly sized spare plan can prevent frustrating details from becoming delays.

After installation, torque lug nuts to the vehicle or wheel manufacturer’s specification using a calibrated torque wrench. Recheck torque after the initial drive interval recommended by the wheel manufacturer or installer. If vibration appears, do not assume it will disappear with time. Have the tire-and-wheel assembly balanced and inspect the mounting surfaces, hub rings, and hardware.

FORTLUFT customers looking at wheels alongside tires, suspension, or exhaust upgrades should treat the build as one system. A vehicle that sits lower, rides higher, or carries more weight may need a different fitment strategy than a stock-height daily driver.

Buy for the Drive You Have, Not Just the Photo You Like

The strongest wheel setups look intentional because their specifications match their purpose. A commuter needs ride quality, tire availability, and reliable clearance. A towing truck needs load capacity. A Jeep needs room to articulate. A performance car may benefit most from a lighter wheel and carefully selected tire dimensions.

Choose the wheel that gives your vehicle the stance you want without asking the tires, suspension, brakes, or bearings to compensate for a poor fit. That is how an upgrade keeps looking right long after the first drive.

Best Jeep Wheel Offset Options for Fitment

A Jeep can clear a tire on the showroom floor and still rub a control arm at full lock, clip a fender under compression, or throw road spray down both sides of the body. That is why the best Jeep wheel offset options are not simply the ones with the most aggressive stance. The right offset puts the tire where your suspension, steering, brakes, and intended use can support it.

For a daily-driven Wrangler, a moderate offset often delivers the cleanest result: more room for a wider tire without pushing the wheel excessively beyond the fender. For a dedicated trail build, the calculation may favor additional clearance and a wider track. Start with the vehicle, wheel width, tire size, lift height, and the kind of driving the Jeep will actually do.

What Wheel Offset Changes on a Jeep

Offset is the distance between the wheel’s centerline and its mounting surface, measured in millimeters. Positive offset moves the wheel inward toward the suspension. Negative offset moves it outward toward the fender. A zero-offset wheel places the mounting pad on the wheel centerline.

On many late-model Wranglers, factory wheels use substantial positive offset. This keeps the tires tucked under the body and preserves factory steering geometry. It also means that moving to a wider aftermarket wheel or tire without changing offset can reduce clearance at the control arms, sway-bar links, and inner fender areas.

Wheel width matters just as much. A 17×8.5 wheel at 0 mm offset will sit differently than a 17×9 wheel at 0 mm offset because the wider wheel adds material to both sides of its centerline. Backspacing tells the same fitment story from another angle: it measures from the mounting face to the wheel’s inner lip. Less backspacing generally moves the wheel outward.

Best Jeep Wheel Offset Options by Build Type

There is no single offset that fits every Jeep. A wheel choice that looks right on a lifted JL with 37-inch tires can be impractical on a stock-height JK used for commuting. These ranges are useful starting points, but they are not a substitute for checking vehicle-specific fitment.

Factory-style replacement: +25 to +45 mm

A positive offset close to factory specifications is the sensible choice for stock tire sizes, road-focused use, and drivers who want minimal changes to steering feel and fender coverage. It keeps the tire tucked in, limits bearing leverage, and usually reduces the amount of debris thrown onto the paint.

This setup is especially appropriate when replacing damaged wheels or maintaining a clean, original profile. The trade-off is limited room on the inside for substantially wider tires. Before choosing a high-positive-offset wheel, confirm that the tire’s sidewall will not contact suspension components at full steering lock.

Balanced daily-driver fitment: +12 to +20 mm

For many Jeep owners stepping up modestly in tire width, a +12 to +20 mm offset is the practical middle ground. It moves the wheel outward enough to improve inner clearance while avoiding the exaggerated poke associated with deeply negative offsets. The result is often a controlled stance that works well for street use, weekend trails, and mild lifts.

This range can be a strong fit for 33-inch or 35-inch tire builds, depending on wheel width, tire brand, and suspension configuration. Tire dimensions vary more than the sidewall label suggests, so a 35-inch mud-terrain from one manufacturer may occupy noticeably more space than another 35-inch all-terrain.

Aggressive all-terrain stance: 0 to +12 mm

Zero to mildly positive offset is one of the most common directions for Jeeps running wider tires and aftermarket suspension. It generally creates useful clearance between the tire and inner suspension while giving the Jeep a broader, more planted appearance.

For many Wrangler applications, this is where appearance and function meet. The wheel sits visibly farther out than stock but can remain manageable with the right tire width and fender setup. It is a better choice than a spacer-only solution when purchasing new wheels because the wheel itself is engineered around the desired mounting position.

Expect a little more steering feedback and additional spray along the doors in wet conditions. If the tire extends beyond the fender, check local coverage requirements and consider appropriate fender extensions for a finished look.

Wide-track trail builds: -12 to 0 mm

Negative offset can make sense on Jeeps built around wide tires, beadlock-capable wheels, long-travel suspension, or a distinctly broad stance. Moving the wheels outward can create valuable inner clearance and improve stability on off-camber terrain. It can also support the visual proportion of a Jeep with high-clearance fenders and larger tires.

The cost is real. More negative offset increases scrub radius and places additional leverage on wheel bearings, ball joints, steering components, and axle hardware. It may also make the tires contact fenders or flare edges sooner during suspension compression. Negative offset is a build decision, not a cosmetic shortcut.

Check These Fitment Details Before Ordering

Offset alone cannot confirm that a wheel will fit. Verify the bolt pattern, center bore, load rating, brake-caliper clearance, wheel diameter, width, and lug-seat style. Wrangler JK, JL, and Gladiator JT applications do not all share the same wheel specifications, and older Jeep platforms have their own requirements.

Pay close attention to brake clearance when selecting smaller-diameter wheels. A 17-inch wheel is popular for off-road tire availability, but not every 17-inch design clears every brake package. Wheel spoke shape, barrel profile, and caliper dimensions all matter.

Also evaluate the tire at full lock and full compression, not just while parked. A Jeep can appear to have generous clearance in a driveway yet rub when the suspension cycles on a trail or when the steering is loaded during a tight turn. Test-fit one wheel and tire combination whenever possible before committing to a full build.

Why Spacers Are Not Always the Answer

Wheel spacers can create clearance when retaining factory wheels, and a quality hub-centric spacer installed to the correct torque specification has a place in some builds. Still, they add another bolted interface and do not change the fundamental limits of wheel width, tire size, fender clearance, or steering geometry.

If you are already buying wheels for a new tire package, selecting the correct offset is usually the cleaner approach. It reduces unnecessary complexity and lets you choose a wheel that supports both the vehicle’s mechanical needs and its finished appearance. FORTLUFT customers shopping wheels and related Jeep upgrades should treat fitment as a system, not an isolated specification.

A Practical Way to Choose Your Offset

Begin with your tire target. Decide whether the Jeep will remain on factory-size tires, move to 33s or 35s, or support a larger off-road package. Then choose wheel width that matches the tire manufacturer’s approved range. Only after those two decisions should you narrow the offset.

For a conservative street build, stay closer to positive factory-style numbers. For a versatile 33- or 35-inch setup, a moderate positive or near-zero offset frequently offers the best balance. For large tires and specialized suspension, negative offset may be justified, but it should be paired with realistic expectations about component wear, fender coverage, and steering behavior.

A wheel is more than a visual upgrade. Its offset determines how the Jeep carries its tires through every turn, bump, and articulation cycle. Choose the position that gives your build enough room to work hard, while keeping its stance purposeful and its mechanical demands honest.