Best Muffler Tips for Trucks That Fit Right

A truck can have the right wheels, a clean stance, and a well-kept bed, yet still look unfinished when a rusty or undersized exhaust outlet hangs below the bumper. The best muffler tips for trucks add a deliberate finishing detail where people notice it most: at the rear. More than a cosmetic add-on, the right tip protects the visible end of the exhaust system, complements the truck’s style, and gives a stock-looking outlet a more purposeful presence.

The best choice is not automatically the largest polished tip on the shelf. Proper inlet sizing, material quality, outlet shape, mounting method, and bumper clearance matter just as much as appearance. Start with the dimensions of your truck’s existing tailpipe, then choose a finish that matches how the truck is used and maintained.

Start With the Right Inlet Size

Muffler-tip fitment begins with the outside diameter of the existing exhaust pipe, not the size of the old tip or the opening in the bumper. Measure the tailpipe near its end with a caliper for the most accurate result. If one is not available, wrap a flexible tape around the pipe and divide the circumference by 3.14.

A slip-on tip needs an inlet sized for the pipe it will cover. Many clamp-on designs are made for a specific pipe diameter, such as 2.5, 3, or 3.5 inches. An inlet that is too large can shift, leak exhaust residue, or sit crooked. One that is too small simply will not install without modification.

Some exhaust systems use expanded pipe ends, reducers, or factory outlet sections that change diameter near the bumper. Measure the exact section where the tip will mount. This quick check prevents the most common purchasing mistake and keeps installation straightforward.

Check Outlet Size and Overall Length

Once the inlet is correct, consider the outlet diameter. A larger outlet creates a bolder visual effect, but it should remain proportional to the truck. A 4-inch outlet can give a midsize truck a clean upgrade, while full-size pickups with larger bumpers often carry 5- or 6-inch outlets well.

Length matters too. A tip that ends too far under the bumper may disappear visually and allow soot to collect on the lower valance. A tip that extends too far past the body can look improvised and may be more vulnerable to damage off-road, at loading docks, or in tight parking spaces. The outlet should sit visibly beyond the bumper line without becoming the furthest point of the truck.

Best Muffler Tips for Trucks by Material

Material determines how a tip holds up against heat cycles, road salt, moisture, and routine washing. For most truck owners, stainless steel is the practical premium choice because it offers a strong balance of corrosion resistance, durability, and finish quality.

Stainless Steel for Daily Use

Polished stainless steel delivers the classic bright exhaust look. It works especially well with chrome bumpers, polished wheels, and traditional truck builds. A mirror finish does show water spots and road film, so it rewards regular cleaning, particularly in northern states where winter road treatment is common.

Brushed or satin stainless steel is more restrained. It suits work trucks, overland builds, and modern pickups with black trim because it hides light dust and fingerprints better than a full polish. Stainless construction also holds its appearance far longer than basic plated steel when exposed to wet roads and changing temperatures.

Black and Carbon Fiber Styles

Black-finished exhaust tips bring a more aggressive, contemporary look to trucks with dark wheels, black badges, tinted glass, or blackout trim packages. They can make the exhaust outlet less visually dominant while still looking intentional. Finish quality matters here: a poor coating can fade, chip, or discolor after repeated heat exposure.

Carbon fiber-style tips add contrast and a performance-oriented detail, especially when paired with a dark exhaust outlet. They are best treated as a design choice rather than a cure for exhaust-system problems. Choose a well-built tip with a durable internal structure and secure mounting hardware, since the tip still lives in a high-heat, high-debris area.

At FORTLUFT, material selection is part of the visual decision as much as the functional one. A well-chosen exhaust component supports the idea that technology can be an art form, even on a truck that earns its keep every day.

Choose a Shape That Matches Your Truck

Round tips are the most versatile option. They work with nearly every truck body style, are easy to align, and pair naturally with single-exit exhaust systems. Angle-cut round tips add a little more motion and style without looking overdone.

Oval tips are a strong match for trucks with factory-style bumper cutouts or wider rear-end styling. They can create a refined OEM-plus appearance, particularly on luxury-trim pickups and SUVs. However, oval tips need more attention during installation because the orientation must be level with the bumper and body lines.

Rolled-edge tips create a thicker, more finished rim, while straight-cut designs look cleaner and more industrial. A slash-cut outlet emphasizes a sportier profile. There is no universal winner – the best shape depends on whether the truck is being built around a polished street look, a blackout appearance, or a rugged utility-first style.

Single, Dual, and Turn-Down Configurations

A single-exit truck usually needs one properly sized tip. Installing an oversized dual-outlet cosmetic tip on a single pipe can look forced unless the truck has a bumper and exhaust layout designed for it.

Dual-exit systems need symmetry. Match tip size, length, finish, and angle on both sides, then check clearance through the full range of suspension movement. On lifted trucks, the visual gap between the tip and bumper may change significantly from certain angles, making careful placement even more important.

Turn-down tips are useful when appearance is secondary to clearance or exhaust direction. They can help keep hot exhaust away from a trailer, bumper accessory, or sensitive trim. They are less visible by design, so they are generally not the choice for a show-ready rear-end treatment.

Clamp-On or Weld-On: Pick the Right Mounting Method

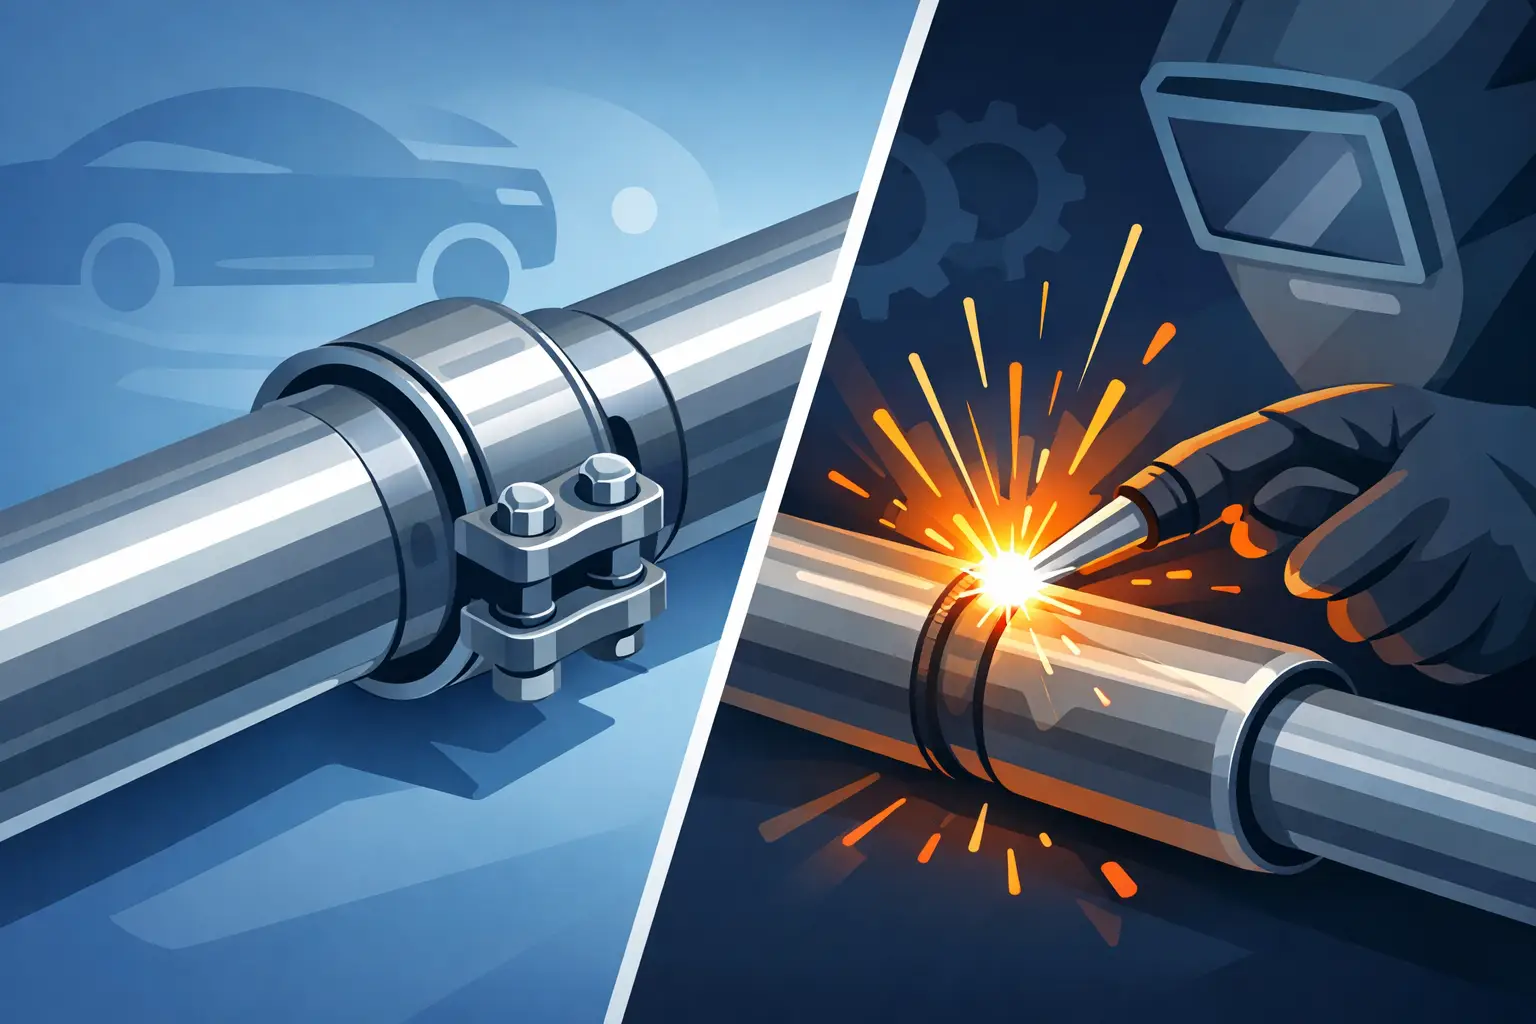
Clamp-on muffler tips are the sensible choice for most DIY installations. They allow adjustment before final tightening, can be removed later, and do not require welding equipment. Look for a secure clamp design and use quality hardware. Recheck tightness after the first few heat cycles and after several days of driving.

Weld-on tips provide the most permanent installation and can create a cleaner custom appearance. They are a good option for modified exhaust systems, trucks with limited mounting length, or builds where exact alignment matters. Welding should be handled by an experienced exhaust shop, especially with stainless components and thin-wall tubing.

Set-screw tips are quick to install, but they are usually best for light-duty applications or temporary styling changes. On a truck that tows, travels rough roads, or sees frequent vibration, a full clamp or weld is the more dependable approach.

What a Muffler Tip Can and Cannot Change

A muffler tip can alter the appearance of the exhaust outlet and, in some cases, create a slight change in exhaust tone at the tailpipe. It will not replace a muffler, transform a restrictive exhaust system, or create meaningful horsepower gains on its own. Claims that a tip alone delivers major performance improvements should be treated carefully.

If your goal is a deeper, louder, or more controlled exhaust note, evaluate the muffler, resonator, pipe diameter, and overall system design. If your goal is to finish the visible exhaust outlet with better material and a more tailored look, a quality tip is exactly the right upgrade.

Installation Details That Make the Difference

Clean the tailpipe before installing the tip. Remove rust scale, dirt, and loose exhaust residue so the clamp can grip evenly. Slide the tip into place, align it from behind and from both sides of the truck, then check that it clears the bumper, hitch equipment, spare tire, and any mud flaps.

Keep enough distance from painted surfaces and plastic trim to account for heat and movement. Exhaust components expand as they warm up, and a tip that barely clears the bumper when cold may touch once the system is hot. After tightening, start the truck and listen for rattles. A short test drive followed by a final alignment check is worth the extra few minutes.

For trucks used in snow, mud, or coastal conditions, clean the tip during regular washes. Stainless steel is highly resistant to corrosion, but it still benefits from removing salt and mineral buildup. Avoid harsh abrasives on polished finishes and follow the finish-specific care guidance when using metal cleaners.

A properly fitted muffler tip is a small upgrade with an outsized effect. Choose one that fits the pipe precisely, survives the conditions your truck sees, and looks like it belongs there. The result is not just a cleaner exhaust outlet – it is a rear-end detail that makes the whole truck feel finished.

Tax Exempt Auto Parts Purchasing Explained

A tax-exempt checkout can keep a shop’s parts budget focused on the repair, upgrade, or resale job at hand. But tax exempt auto parts purchasing is not a blanket discount for every business buyer. It depends on who is buying, why the part is being purchased, where it is delivered, and whether the required documentation is current.

For repair facilities, resellers, fleet operators, government entities, and qualifying nonprofit organizations, getting this right prevents checkout delays, unexpected tax charges, and avoidable accounting cleanup. The goal is straightforward: provide the correct exemption information before ordering, then buy the parts your operation needs with a clear record of the transaction.

What Makes an Auto Parts Purchase Tax Exempt?

Sales tax is generally charged on tangible goods, including replacement and performance parts. An exemption applies only when a state recognizes the buyer or transaction as exempt. The most common case in automotive purchasing is resale: a dealer, repair shop, or parts reseller buys inventory or components that will later be sold to a customer as part of a taxable retail transaction.

That distinction matters. A repair shop may be able to buy a replacement sensor, exhaust component, or set of wiper parts tax exempt when those items will be transferred to a customer during a repair. The same shop may owe sales tax on a pressure washer, office supplies, tools, or parts installed on its own delivery vehicle. Business use does not automatically mean tax-exempt use.

Other qualified buyers may include government agencies, schools, certain nonprofit organizations, and entities with a state-issued exemption. Their eligibility and the documentation they must provide vary by state. A federal tax ID or a nonprofit designation alone does not always establish sales-tax exemption at checkout.

Who Typically Qualifies for Tax Exempt Auto Parts?

Resellers are often the most familiar tax-exempt buyers. This group includes auto parts stores, online sellers, distributors, dealerships, and businesses that purchase inventory for resale. Many repair facilities also use resale certificates for parts incorporated into customer repairs, subject to the rules in their state.

Commercial fleets can be more nuanced. A fleet company purchasing brake components, tires, ignition parts, or exhaust replacements for vehicles it owns and operates is usually making a taxable end-use purchase. A fleet operator may qualify only if it has a separate, recognized exemption, such as a government or qualifying nonprofit status.

Government departments and qualifying organizations may have broader purchasing exemptions, but the certificate must match the purchasing entity. If an employee places an order personally and seeks reimbursement later, the exemption may not apply. Purchase orders, account names, payment methods, and delivery details should align with the exempt organization whenever possible.

Resale Certificates and Exemption Certificates Are Not the Same Thing

These terms are often used interchangeably, but they serve different purposes. A resale certificate states that the buyer is purchasing goods for resale rather than final consumption. The buyer collects applicable tax from its own customer when the product is sold at retail.

An exemption certificate supports a purchase by an organization or transaction that state law excludes from sales tax. Depending on the state, this could cover a government office, a charitable organization, or a specific exempt use. Some states provide their own forms, while others accept a multistate certificate or a properly completed alternative document.

Use the certificate that reflects the real purpose of the order. Applying a resale certificate to parts installed on your company-owned truck, for example, can create a use-tax liability and may expose the business to penalties during an audit. Accuracy protects both the purchaser and the seller.

Documents to Prepare Before You Order

Tax-exempt purchasing works best when paperwork is ready before parts are needed. A stalled order is especially frustrating when a vehicle is already on a lift or a customer is waiting for a repair estimate.

Have your completed exemption or resale certificate available, including the legal business name, business address, state registration details when required, exemption reason, signature, and date. Make sure the certificate is valid for the state where the sale is sourced or the order is delivered. Sales-tax rules are state-specific, and an out-of-state certificate is not accepted in every situation.

It also helps to keep your account information consistent. The name on your purchasing account, submitted certificate, shipping destination, and payment record should tell the same story. If your organization uses multiple locations, maintain documentation for each location when needed. Buyers placing orders for several legal entities should not assume one certificate covers them all.

A Quick Pre-Order Check

Before submitting a tax-exempt order, confirm that the parts are intended for resale, a qualifying exempt use, or an exempt organization. Then verify that your certificate is complete and current, that it applies in the delivery state, and that your account is registered under the proper entity. These few checks can prevent a correction request after an order has already been placed.

How Tax-Exempt Ordering Usually Works Online

Most online parts retailers require buyers to establish or update an account before tax can be removed. This allows the seller to review documentation, apply exemption status to eligible orders, and keep records required for tax compliance.

Start by creating a business account with accurate contact and billing information. Submit the requested resale or exemption certificate through the retailer’s tax-exempt process. Approval may be immediate or may require review, especially when the certificate is incomplete, expired, or issued by another state.

Once approved, confirm the tax treatment in the cart before finalizing the order. Do not assume a previous exempt purchase means every future order will process the same way. A new ship-to address, a different legal entity, or an order that does not meet the stated exemption purpose can change the result.

For recurring buyers, an approved account can make routine ordering more efficient. That is useful when stocking common maintenance items or sourcing customer-requested upgrades, from suspension and ignition components to stainless steel exhaust pipes and finishing details such as muffler tips. FORTLUFT supports account-based tax-exempt purchasing for qualified buyers, helping business customers keep ordering focused and organized.

Common Mistakes That Create Tax Problems

The most frequent error is treating a business purchase as automatically exempt. A business can purchase parts for resale and also buy taxable items for its own operations. The tax treatment follows the use of the product, not simply the type of company making the purchase.

Another issue is using outdated documentation. Certificates may expire, business addresses change, and state requirements can be updated. Review your records regularly, particularly if your shop adds locations, expands into new states, or changes its legal structure.

Buyers also run into trouble when they submit a certificate from one entity while paying or shipping under another. A parent company, DBA, franchise location, and independent shop may be related operationally but still have different sales-tax identities. Keep the purchasing entity clear from the first order through invoicing.

Finally, do not overlook use tax. If sales tax was not collected on a purchase that was ultimately used by your business rather than resold or used under a valid exemption, your state may require you to report and pay use tax directly. Your tax professional can help determine how that applies to your operation.

Keep Records That Match the Real Transaction

Tax-exempt purchasing is easier to defend when your records are simple and complete. Retain order confirmations, invoices, certificates, purchase orders, and any work order or resale record that explains how the parts were used. For a repair shop, the customer invoice can help show that a purchased component was transferred as part of a repair. For a reseller, inventory and sales records provide the same context.

This is not just paperwork for an audit. Clear records make it easier to reconcile parts costs, manage margins, and identify whether tax was applied correctly across locations and customer jobs. It also gives purchasing teams a cleaner process when multiple employees can place orders.

Tax rules change by jurisdiction and purchasing circumstances, so this information is a practical starting point rather than legal or tax advice. When an order involves an unfamiliar state, an unusual exempt use, or a large purchase, check with your accountant or state tax authority before relying on an exemption.

The right certificate does more than remove tax at checkout. It keeps your parts purchasing aligned with the work you sell, the vehicles you maintain, and the standards your business operates by – leaving more attention for fitment, finish, and the next job in the bay.

Why Is My Exhaust Louder All of a Sudden?

That deeper growl on startup might sound good for a second – until you realize you never asked for it. If you’re wondering, why is my exhaust louder, the answer usually comes down to a change somewhere in the exhaust system, engine operation, or the way gases are moving out of the vehicle. Sometimes it is minor. Sometimes it is the first clear warning that a part is failing.

A louder exhaust is not always about performance. In many cases, it points to a leak, rust, a loose connection, or a damaged component that is no longer controlling sound the way it should. For cars, trucks, Jeeps, and SUVs, the sound change can happen gradually or overnight depending on what failed.

Why is my exhaust louder than before?

Your exhaust system is built to do more than route gases away from the engine. It also manages pressure, heat, emissions, and noise. When one section stops doing its job, the whole system can sound sharper, raspier, deeper, or just noticeably louder.

The most common cause is an exhaust leak. A crack in a pipe, a hole from corrosion, or a broken gasket can let hot exhaust gases escape before they reach the muffler. When that happens, the muffler cannot quiet the sound effectively because the noise is already leaving the system early.

Muffler damage is another common reason. A muffler works by using chambers and internal passages to cancel out sound waves. If those internal parts break apart, rust through, or separate from the shell, the exhaust note gets louder fast. On some vehicles, it can go from normal to aggressive in a matter of days.

The location of the problem matters. A leak near the engine often sounds harsher and more urgent, sometimes like ticking, tapping, or a puffing noise. A problem farther back near the muffler or tailpipe usually sounds deeper and boomier.

Common reasons your exhaust got louder

Exhaust leak from rust or impact

Road salt, moisture, and daily heat cycles are hard on exhaust components. Over time, pipes and joints can rust from the inside and outside. If you drive a truck or SUV in areas with rough roads, debris or bottoming out can also damage sections underneath the vehicle.

Small leaks often start with a faint hiss or ticking sound during cold starts. As the metal expands with heat, the sound may change. Larger holes usually produce a steady rumble that gets louder under acceleration.

Failing muffler

A muffler can fail externally or internally. External rust-through creates obvious holes. Internal failure is less visible but just as real. If the baffles inside the muffler break loose, you may hear a metallic rattle along with more exhaust noise.

This is one of the most common reasons a vehicle suddenly sounds sportier without actually gaining any performance. It may feel dramatic, but uncontrolled noise is not the same thing as a tuned exhaust system.

Broken exhaust hangers or loose clamps

If the system is sagging or shifting, components can separate slightly at a joint or vibrate against the chassis. That can make the exhaust sound louder even when the pipe itself is not badly damaged.

Loose clamps, worn rubber hangers, and movement around connection points are worth checking, especially if the noise appeared after hitting a pothole or driving over rough terrain.

Cracked exhaust manifold or manifold gasket leak

When the exhaust is louder near the front of the vehicle, the manifold area is a prime suspect. A cracked manifold or failing gasket can create a sharp ticking noise that gets faster with engine speed.

This kind of leak is easy to mistake for valvetrain noise, especially when the engine is cold. The difference is that manifold leaks often become more obvious under load and may come with a noticeable exhaust smell.

Catalytic converter issues

A failing catalytic converter can change exhaust sound in a few ways. If the internal substrate breaks apart, it may rattle and affect flow. If the converter housing is damaged or a connection near it leaks, sound levels can rise.

There is a trade-off here. Not every louder exhaust means the converter is bad, and not every bad converter makes the exhaust louder. But if the noise change comes with sluggish acceleration, a check engine light, or a rotten egg smell, the converter or surrounding connections should be inspected.

Missing resonator or modified system

Some vehicles have had exhaust work done by a previous owner. If a resonator was removed, a muffler was swapped for a smaller one, or pipes were changed for appearance or flow, the sound can be louder than stock by design.

That is not automatically a problem. It depends on the quality of the parts, the fitment, and whether the sound level matches what you want from the vehicle. A clean, well-fitted aftermarket system can improve tone and appearance. A poorly chosen setup can create drone, harshness, or leaks that get old quickly.

What the sound can tell you

Not all loud exhaust noise means the same thing. The character of the sound often points you in the right direction.

A deep rumble from the rear usually suggests a muffler or rear pipe issue. A sharp ticking near the engine often points to the manifold or a front-side leak. A buzzing or metallic rattle may mean a loose heat shield, broken muffler internals, or catalytic converter damage. If the exhaust sounds louder only during acceleration, pressure is likely forcing gases through a crack or failed seal that is less noticeable at idle.

If the vehicle suddenly sounds like it has no muffler at all, inspect it quickly. In some cases, a section of pipe or the muffler itself may have separated.

Is it safe to drive with a louder exhaust?

Sometimes yes, but that does not mean you should ignore it.

A small leak at the rear of the system may not create an immediate breakdown risk, but it can still get worse fast. A front exhaust leak is more serious because gases can enter the cabin area, especially when stopped or driving with windows cracked. Exhaust fumes are not something to gamble with.

There is also the issue of heat. Leaking exhaust can direct hot gases toward nearby components that were never meant to take that exposure. Wiring, hoses, plastic shields, and underbody surfaces can all be affected over time.

If your vehicle is louder and you also notice reduced fuel economy, a burning smell, vibration, or a check engine light, it is smart to stop treating it like a cosmetic issue. At that point, you may be dealing with a system problem that affects drivability and emissions, not just sound.

Why is my exhaust louder after a repair or upgrade?

If the change happened after recent work, start there. Even quality parts can sound different from factory equipment. Replacement mufflers vary in internal design, and some aftermarket components are intentionally less restrictive than OE-style parts.

Installation quality matters just as much as the part itself. A poor seal at a flange, a misaligned clamp, or a pipe under tension can create leaks and vibration that make the system louder than intended. Material also plays a role. Stainless steel systems often deliver a cleaner, sharper tone than heavily aged factory components.

For buyers who care about both function and finish, this is where product choice matters. Exhaust components should fit correctly, resist corrosion, and support the sound profile you actually want – not just the one you end up with.

How to check what is causing the noise

Start with the basics while the vehicle is cool. Look underneath for hanging sections, rust holes, black soot around joints, or anything visibly separated. Soot marks are a strong clue because escaping exhaust leaves residue near the leak.

Then listen to where the sound is strongest. Front, middle, or rear gives you a much better starting point. If the exhaust note changes dramatically when you accelerate, there is a good chance pressure is exposing a crack or gasket failure.

You may also notice vibration through the floor, especially if a hanger has failed or a pipe is contacting the chassis. If you hear a rattle, lightly tapping suspect components when cool can reveal loose internal parts or shields.

Avoid putting your hands near hot or moving components, and do not crawl under a poorly supported vehicle. If the issue is not obvious, a shop can usually pinpoint it quickly with a lift and smoke testing.

When replacement makes more sense than patching

A clamp-on patch or quick weld can help in the right situation, but not every exhaust problem is worth repairing piece by piece. If the system is heavily rusted, one fix often leads to the next failure. That is especially true in older vehicles where pipes, flanges, and the muffler have all aged together.

Replacing the damaged section is often the cleaner move. It restores sound control, improves reliability, and avoids chasing leaks across a system that is already near the end of its service life. For many drivers, it is also a chance to choose materials and finishes that better match the way the vehicle is used and the way they want it to look.

A louder exhaust can be a personality upgrade when it is intentional and properly built. When it happens on its own, it is usually the vehicle asking for attention. Catch it early, and you have more control over the fix, the sound, and the final result.

Jeep Wheel Fitment Basics That Matter

A Jeep can look perfect on paper and still rub at full lock, chew through fender liners, or feel wrong on the road once new wheels go on. That is why jeep wheel fitment basics matter more than the wheel’s finish, diameter, or brand name. Fitment is what decides whether your upgrade looks right, clears correctly, and works the way your Jeep should.

For Jeep owners, wheel fitment sits at the intersection of function and stance. You are not just filling the wheel wells. You are managing suspension travel, steering angle, brake clearance, tire width, and the way the Jeep behaves on pavement and off it. A wheel setup that looks aggressive can improve capability in one area and create problems in another. Good fitment is not guesswork. It is a set of measurements that need to work together.

Jeep wheel fitment basics start with the wheel specs

When people talk about wheel fitment, they usually mean whether the wheel will bolt on and whether the tire will clear. That is part of it, but the full picture starts with five specs: diameter, width, bolt pattern, offset, and backspacing.

Diameter is the wheel size measured across the barrel, usually in inches. Width is measured between the bead seats, not the outer lips. A 17×8.5 wheel is 17 inches in diameter and 8.5 inches wide. Those two numbers affect tire options, sidewall height, and overall look, but they do not tell you where the wheel will sit in relation to the suspension and fender.

Bolt pattern is the number of lug holes and the distance between them. If the bolt pattern is wrong, the wheel is simply not going on. Many Jeep applications use familiar patterns like 5×5 or 5×4.5, but that depends on the model and year. A Wrangler JK, JL, TJ, Gladiator, Cherokee, and Grand Cherokee do not all share the same fitment details. Jeep is one of those brands where assuming can get expensive fast.

Offset and backspacing are where most fitment mistakes happen. Offset measures the position of the wheel mounting surface relative to the wheel centerline. Positive offset pushes the wheel farther inward. Negative offset pushes it outward. Backspacing measures from the mounting pad to the inner edge of the wheel. Both describe where the wheel sits, just from different angles.

On a Jeep, those measurements affect control arm clearance, inner fender clearance, scrub radius, and how far the tire sticks out past the body. Push the wheel too far inward and you can hit suspension components. Push it too far outward and you add stress, invite rubbing, and often throw more road spray down the side of the vehicle.

Why offset and backspacing matter so much on a Jeep

Jeeps are not built for static showroom fitment. They articulate, compress, and steer through a wider range of motion than a lot of daily drivers. That makes offset and backspacing especially important.

A wheel with less backspacing or more negative offset will move the tire outward. That can help clear wider tires from control arms and sway bar links. It can also create the wider, planted look many owners want. But there is a trade-off. The farther out the tire goes, the more likely it is to contact the fender edge during compression, especially if tire diameter also increases.

There is also a handling side to it. Moving the wheel outward changes leverage on wheel bearings, ball joints, and steering components. Plenty of Jeep owners run aggressive offsets successfully, but the more extreme you go, the less margin you have. A setup that works for light trail use and city driving may not be the best choice for a heavily loaded overland build or a daily driver that sees a lot of highway miles.

This is where design and function need to agree. A wheel should complement the Jeep, not force the rest of the vehicle to compensate for a bad measurement.

Tire size changes the fitment equation

A lot of wheel questions are really tire questions in disguise. You can bolt on the right wheel and still have fitment issues because the tire is too tall, too wide, or both.

For example, moving from a stock tire to a 33-inch or 35-inch tire changes more than appearance. Diameter affects vertical clearance at the fender and pinch points during suspension compression. Width affects lateral clearance to control arms, frame rails, and liners. Even the tread design matters. An aggressive mud-terrain often runs wider in real life than its listed size suggests.

That is why wheel width and offset should be matched to the tire you plan to run, not treated as separate choices. A narrow wheel can work well with many off-road tire sizes and can help protect the wheel lip, while a wider wheel may change sidewall shape and clearance behavior. There is no universal best answer. It depends on how the Jeep is used and how much suspension clearance you already have.

Brake clearance is easy to overlook

Not every wheel that matches your bolt pattern will clear your brakes. This is especially relevant when stepping down to a smaller wheel diameter or when dealing with trim packages that use larger brake components.

Wheel diameter matters, but spoke design matters too. Two wheels with the same size can have very different barrel and spoke clearance. That means a 17-inch wheel from one design may clear a brake package that another 17-inch wheel will not. If your Jeep has upgraded brakes, or if you are shopping across multiple generations and trims, this is not a detail to gloss over.

Hub bore also matters. Some wheels are hub-centric and designed to center tightly on the hub. Others are lug-centric and rely more on the lug hardware for centering. Either can work when engineered correctly, but the fitment needs to match the application.

Stock height or lifted changes what fits

One of the biggest fitment mistakes is assuming a wheel and tire combo that works on a lifted Jeep will fit the same way on a stock-height Jeep. Lift height changes available clearance, but it does not eliminate every problem.

A small lift may create room for a taller tire at ride height, yet rubbing can still happen during articulation or full steering lock. Bump stop length, control arm geometry, and fender design still matter. On the other hand, some owners fit larger tires with minimal lift by choosing the right wheel offset and accepting small adjustments like trimming or liner modification.

There is always an it-depends factor here. If your Jeep is a commuter with occasional dirt-road use, you may want conservative fitment with minimal poke and no trimming. If it is built for trails, you may prioritize clearance under articulation and accept a more aggressive stance. The best setup is the one that matches how the vehicle is actually used.

Common fitment mistakes Jeep owners make

Most bad wheel purchases come from chasing one spec while ignoring the rest. Buying for bolt pattern alone is the classic mistake. The wheel bolts on, but the offset is wrong and the tire contacts the suspension. The next common error is choosing a wheel based on appearance and assuming the tire size will sort itself out later.

Another issue is relying on generic fitment claims. “Fits Jeep Wrangler” is not enough information by itself. You need model, year range, brake compatibility, and the context of your tire size and suspension setup. Even within the same platform, aftermarket parts can change the clearance picture.

Spacer use also deserves a realistic view. Spacers can solve certain clearance problems or help achieve a desired stance, but they are not a shortcut around poor planning. Quality, proper torque, and application matter. They can be part of a sound setup, but they should not be used to patch over a wheel choice that was wrong from the start.

How to choose a setup that actually works

Start with your Jeep’s exact year, model, and trim, then confirm the factory wheel specs. From there, decide what matters most in the finished setup. Is the goal daily-driver comfort, a cleaner visual stance, larger all-terrain tires, or more serious trail performance? The answer shapes the acceptable range for wheel width, offset, and tire size.

Then build the package as a system. Match the wheel to the tire, and match both to the suspension and brake setup. If you are keeping stock ride height, stay realistic about tire growth and steering clearance. If you are lifted, think beyond the parking-lot look and account for articulation. If you want the wheel to sit flush or slightly outside the fender, know that this affects not only style but also debris spray, component load, and in some areas local compliance.

This is the point where product quality matters too. A properly engineered wheel with the right specs is not just easier to install. It is easier to live with. For buyers who care about both fit and finish, that combination is where style starts to feel like function rather than decoration. That is very much in line with how FORTLUFT approaches aftermarket parts – technology as an art form, but still built around the realities of the vehicle.

The smart move is not chasing the biggest tire or the most aggressive offset. It is choosing a setup that clears, performs, and still looks right every time you walk back to your Jeep in the parking lot.

How to Choose Aftermarket Wheels Right

A wheel can make a truck look planted, a Jeep look trail-ready, or a sedan look sharper before it even leaves the driveway. But the wrong wheel choice can also create rubbing, harsh ride quality, weak load support, or a fitment headache that costs more than the upgrade itself. If you are figuring out how to choose aftermarket wheels, the goal is not just style. It is getting the right balance of fit, function, durability, and visual impact.

Aftermarket wheels sit at the intersection of performance and design. That is exactly why the decision matters. The right set changes stance, handling feel, brake clearance, and overall presence. Technology as an art form only works when the engineering is right first.

How to choose aftermarket wheels without guesswork

The fastest way to narrow the field is to start with fitment, not finish. Many buyers shop by color or spoke pattern first, then try to force a wheel onto a vehicle afterward. That usually leads to compromises. Instead, confirm the non-negotiables before you think about style.

You need to know your vehicle’s wheel diameter, width, bolt pattern, center bore, offset range, and load requirements. If you are upgrading a truck, Jeep, or SUV, load rating matters even more than appearance. If you drive a performance-oriented car, brake clearance and tire compatibility move higher on the list.

Factory specs give you the baseline. From there, you can decide whether you want to stay close to stock for easy fitment or move to a more aggressive setup for a stronger visual stance.

Start with the wheel specs that actually matter

Diameter and width

Diameter affects both appearance and tire options. Moving from a 17-inch wheel to an 18- or 20-inch wheel can sharpen the look of the vehicle, but it usually means a shorter tire sidewall. That often improves steering response, yet it can also make the ride firmer and increase the chance of wheel damage on rough roads.

Width changes how the tire sits and performs. A wider wheel can support a wider tire and create a more substantial footprint, but only if the vehicle has room for it. Too much width can lead to fender rubbing, suspension interference, or uneven tire wear if the tire size is mismatched.

For daily drivers, a modest increase usually works best. For trucks and Jeeps, wider setups can look excellent and add presence, but clearance during turning and suspension travel becomes critical.

Bolt pattern and center bore

This is where fitment becomes simple or frustrating. The bolt pattern has to match exactly. A wheel with the wrong bolt pattern is not close enough. The same goes for center bore. If the center bore is too small, the wheel will not seat properly. If it is larger, hub-centric rings may be needed to ensure proper centering.

This is one of the most common reasons buyers end up with wheels that look right on paper but do not install correctly in the garage. Exact matching matters.

Offset and backspacing

Offset determines where the wheel sits relative to the hub. It affects inner clearance, outer poke, steering feel, and the chance of rubbing. Lower offset generally pushes the wheel outward for a more aggressive stance. Higher offset pulls it inward.

There is no universally better offset. It depends on the vehicle, suspension setup, tire size, and intended use. A more aggressive offset may be perfect for appearance, but if it causes tire rub on compression or full lock, it stops being an upgrade. Trucks, Jeeps, and lifted SUVs often tolerate different offset ranges than stock-height crossovers or sedans.

If you are changing wheel width and offset at the same time, treat them as one fitment decision, not two separate ones.

Match the wheel to how the vehicle is actually used

A show-focused street build and a work truck should not be shopping the same way. One of the best ways to choose aftermarket wheels is to be honest about daily use.

If the vehicle is a commuter, lighter wheels with easy-to-clean finishes and near-stock sizing usually make the most sense. If it is a truck that tows or hauls, load rating should be a priority ahead of visual stance. If it is a Jeep that sees trails, durability, sidewall support, and practical diameter matter more than a delicate finish or oversized wheel.

For performance street driving, weight becomes a bigger factor. Reducing unsprung weight can improve responsiveness and overall feel. That does not mean the lightest wheel is always the best buy, but it does mean construction quality matters.

In other words, choose for the miles you drive, not just the photos you like.

Material and construction change the experience

Most aftermarket wheels fall into a few broad categories, and each has trade-offs. Cast aluminum wheels are common because they are cost-effective and available in a wide range of styles. For many drivers, they deliver the best balance of price and appearance.

Flow formed wheels usually cost more, but they can offer better strength-to-weight characteristics than standard cast options. That can be a smart middle ground for buyers who want improved performance without stepping into premium motorsport pricing.

Forged wheels are typically the premium end of the market. They are known for strength, lower weight, and precision, but they come at a much higher price. For a daily driver, they may be more wheel than you need. For high-performance use or very specific build goals, they can make sense.

The right answer depends on budget and expectations. There is no value in paying for a top-tier construction method if your priority is mainly appearance on a daily-driven SUV. There is also no point buying purely on price if the wheel will be exposed to hard use and heavy loads.

Tires and wheels need to be chosen together

A wheel never works alone. Tire size, sidewall height, and intended use all affect whether the setup performs the way you expect.

If you increase wheel diameter too much, you may end up with a thin sidewall that looks sharp but rides harshly and offers less protection from potholes. If you go too wide without choosing the right tire width, the tire can look stretched or unsupported. On trucks and Jeeps, tire-to-wheel balance is even more visible. A wheel that is too large can take away the functional sidewall needed for off-road traction and impact absorption.

This is why plus-sizing should be done carefully. Keeping overall tire diameter close to stock often helps preserve speedometer accuracy, gearing feel, and clearance. A dramatic change can affect more than appearance.

Finish matters more than most buyers expect

Gloss black, bronze, machined, gunmetal, silver, matte finishes – style is personal, but maintenance is practical. A finish that looks perfect under showroom lighting may not be ideal for winter roads, brake dust, or regular trail use.

For year-round daily driving, easier-care finishes usually age better. Machined faces can look premium, but road salt and neglected maintenance may shorten the clean look. Matte finishes can be excellent on the right vehicle, though some require more care to avoid staining or uneven appearance.

Match the finish to the vehicle’s color, trim, and personality, but also match it to your cleaning habits. The best-looking wheel is the one that still looks good six months later.

Brake clearance and load rating are not minor details

Two specs get overlooked constantly: brake clearance and load capacity. Both can turn an exciting wheel upgrade into an expensive return.

Brake clearance is especially important on newer vehicles, performance trims, and trucks with larger brake packages. A wheel can have the correct diameter and still fail to clear the caliper because of spoke design or barrel shape.

Load rating is essential for trucks, SUVs, and heavier vehicles. If a wheel is not rated for the weight it needs to carry, it is the wrong wheel, no matter how good it looks. This is not a style decision. It is a safety and durability decision.

The best aftermarket wheel choice is usually balanced

A good wheel setup looks intentional because the proportions are right. It sits properly, clears correctly, supports the right tire, and fits the vehicle’s purpose. That may mean sticking close to factory diameter with a better width and finish. It may mean a more aggressive offset on a truck build. It may mean prioritizing strength and load rating over an ultra-light design.

If you are shopping a broad category mix like the one at FORTLUFT, the smartest approach is to narrow by fitment and use case first, then choose the design that delivers the look you want. That keeps the buying process clean and avoids paying for style at the expense of performance.

The wheel you choose should do more than fill the fender. It should make the whole vehicle feel more complete, more capable, and more like it was built on purpose.

Best Tire and Wheel Protection Plan Guide

A bent wheel usually shows up at the worst possible time – right after you hit a pothole you never saw, or when a low-profile tire meets a jagged curb edge in a crowded parking lot. If you’re shopping for the best tire and wheel protection plan, the real question is not whether road hazards exist. It is whether the coverage matches how you drive, what you drive, and how expensive your wheel and tire setup is to replace.

For many drivers, these plans sound interchangeable. They are not. The difference between a smart protection plan and an overpriced add-on often comes down to a few details buried in the fine print: what counts as road hazard damage, whether cosmetic wheel repair is included, how many claims are allowed, and whether the plan pays full replacement cost or uses prorated reimbursement.

What the best tire and wheel protection plan should actually cover

At a minimum, a strong plan should cover road hazard damage to tires caused by nails, glass, potholes, metal debris, and similar real-world threats. It should also cover wheel damage when the wheel itself becomes unusable or unsafe because of that same impact. If a plan only covers tires but markets itself heavily around wheels, that is your first red flag.

The best tire and wheel protection plan usually includes tire repair when repair is safe and legal, plus tire replacement when it is not. For wheel coverage, the key distinction is whether the plan covers structural damage only or also includes cosmetic repair. Structural damage matters most because that is what can make the vehicle unsafe to drive, but cosmetic coverage can be valuable if you run premium wheels and care about appearance as much as function.

Some plans also include mounting, balancing, valve stems, TPMS service, alignment checks, or towing reimbursement. Those extras can add real value, but they should never distract from the core coverage. If the plan fails on tire replacement terms, the extras will not save it.

Why vehicle type changes what “best” means

A commuter sedan on 17-inch all-season tires has a very different risk profile from a Jeep on larger off-road rubber or a truck with expensive aftermarket wheels. The best tire and wheel protection plan for one vehicle can be a poor fit for another.

If you drive a truck or SUV with heavier wheels and tires, replacement costs can rise fast. If you drive a performance-oriented vehicle with lower-profile tires, impact damage tends to happen more easily because there is less sidewall to absorb the hit. If you have upgraded to premium aftermarket wheels, a plan that limits reimbursement to basic OEM-style replacement may leave a gap.

That is why smart buyers look beyond the monthly or upfront price. They compare the likely replacement cost of their actual setup. A plan that looks expensive on paper can make sense if a single wheel-and-tire claim would recover most or all of the cost.

H3: Road hazard coverage is the part that matters most

Most tire and wheel plans are built around road hazard events. That means random, unavoidable damage from the road surface or debris during normal driving. A nail through the tread is usually covered. A cracked wheel from a pothole is often covered. Dry rot, worn tread, sidewall cracking from age, and damage from improper inflation usually are not.

This is where many buyers get tripped up. They assume a protection plan works like a blanket warranty. It does not. It is closer to targeted protection against sudden road-related damage. If your tires are already near the end of their life, the plan may have less value because normal wear remains your responsibility.

Exclusions are where bad plans hide

A plan can sound premium at checkout and still fall apart in practice. Read the exclusions before you pay. Some of the most common deal-breakers include mileage caps that end coverage sooner than expected, exclusions for vehicles used commercially, no coverage for previously damaged wheels, and claim limits so low that the plan stops being useful after one or two incidents.

Another common issue is prorated replacement. If the plan only pays part of the tire cost based on remaining tread depth, your reimbursement may be much smaller than you expected. Full replacement coverage is stronger, especially for newer tires.

Watch for requirements around maintenance too. Some providers require proof of tire rotations, proper inflation, or service records. Those requirements are not unreasonable, but they do matter. If the claims process depends on paperwork you do not keep, the plan gets weaker fast.

How to compare cost without guessing

The cleanest way to evaluate a plan is to compare three numbers: the cost of the plan, the replacement cost of one tire, and the replacement cost of one wheel. If the plan costs $400 and a single damaged wheel-and-tire combo on your vehicle could cost $700 to $1,200 installed, the math may work in your favor. If you run basic tires on affordable factory wheels, it may not.

Labor matters here. Mounting and balancing costs are easy to overlook, and premium fitments can push those numbers up. TPMS service or replacement can add more. If the plan covers the full installed cost, not just the part itself, its value improves.

The right comparison is not between the plan and zero dollars. It is between the plan and your likely out-of-pocket cost the first time real damage happens.

H2: Best tire and wheel protection plan features to look for

The strongest plans tend to share the same core traits. They cover road hazard tire repair and replacement, include wheel replacement for structural damage, and explain claims clearly. They also avoid small print that makes reimbursement hard to collect.

Look for nationwide claim support if you travel often or use your vehicle for work across different regions. Look for no-deductible or low-deductible terms if you want predictable costs. Look for transferability if you may sell the vehicle before the coverage ends. And if your wheels are a visible part of your build, cosmetic wheel repair can be worth adding if the price difference is reasonable.

There is also a practical point many buyers miss: speed. A good plan should let you get back on the road quickly. If approval takes too long, if reimbursement only happens after multiple reviews, or if authorized service locations are too limited, the plan creates friction when you need help most.

When the plan is worth it

These plans tend to make the most sense in a few specific situations. You drive in an area with rough roads, frequent construction, or severe winter damage. Your vehicle has low-profile tires or large-diameter wheels. Your replacement costs are above average because of tire size, wheel finish, or premium fitment. Or you simply want fixed, predictable ownership costs instead of absorbing surprise repair bills.

They can also make sense if you just upgraded your wheel and tire package. Enthusiast setups often cost enough that one bad pothole changes the economics immediately. For drivers who care about both performance and appearance, protection is not only about avoiding downtime. It is also about preserving the look of the vehicle.

When it probably is not worth it

If your vehicle runs inexpensive tires and standard factory wheels, and you mostly drive on well-maintained roads, the value case gets weaker. The same goes for drivers who replace tires frequently anyway due to mileage or seasonal changes. In that case, you may be better off setting aside the cost of the plan as a personal repair fund.

It also may not be worth it if the plan excludes the way you use the vehicle. Commercial delivery use, off-road use, towing-related abuse, and modified applications can complicate claims. If your driving reality does not match the provider’s assumptions, the plan is more likely to disappoint.

H2: The best tire and wheel protection plan is the one that fits your setup

That sounds obvious, but it is the point. A plan is only as good as its fitment to your vehicle, your roads, and your cost exposure. A daily-driven crossover in suburban traffic needs one kind of value. A customized truck or SUV with upgraded wheels needs another.

For buyers who care about materials, finish, and real replacement quality, that fit matters even more. Wheels are not just utility parts. They shape ride quality, stance, and the overall presence of the vehicle. Technology as an art form only works when the practical side holds up too.

Before you buy, ask direct questions. Does the plan replace with like-kind components? Are aftermarket wheels covered at their real value? Is cosmetic damage separate from structural damage? Are labor charges included? How many claims can you make? If the answers are vague, keep shopping.

The right plan should feel like good equipment – clear, dependable, and built for how the vehicle is actually used. If it does that, it is not a throw-in at checkout. It is part of a smarter ownership strategy.

How to Pick Wheel Offset That Fits Right

A wheel can look perfect on screen and still be completely wrong once it hits the hub. That usually comes down to offset. If you are figuring out how to pick wheel offset, you are really balancing four things at once – fitment, clearance, handling, and appearance.

Offset is not just a style number. It changes where the wheel sits relative to the suspension, fenders, brakes, and tires. Get it right and the vehicle looks planted and drives the way it should. Get it wrong and you can end up with rubbing, poor steering feel, extra stress on components, or a setup that simply does not sit right.

What wheel offset actually means

Wheel offset is the distance between the wheel’s mounting pad and the wheel’s centerline. It is usually measured in millimeters. A positive offset means the mounting surface sits closer to the outside face of the wheel, which pulls the wheel farther inward toward the suspension. A negative offset moves the mounting surface toward the back of the wheel, pushing the wheel outward toward the fender.

Zero offset places the mounting pad right on the wheel centerline. That sounds simple enough, but small changes matter. A 10 mm difference can be the line between clean clearance and constant rubbing.

For most late-model passenger cars and many crossovers, factory wheels tend to use positive offset. Many trucks, Jeeps, and off-road builds move toward lower positive offset or negative offset to create a wider stance and more outer clearance. That does not automatically make lower offset better. It depends on the wheel width, tire size, suspension geometry, and how the vehicle is used.

How to pick wheel offset for your vehicle

The cleanest way to choose offset is to start with your current setup, not the wheel you want to buy. Factory fitment gives you a working baseline. Once you know where the stock wheel sits, you can calculate how far in or out the new wheel will move.

Start with the original wheel width and offset. Then compare those numbers to the new wheel width and offset. Width and offset always work together. A wider wheel with the same offset will already sit closer to both the suspension and the fender. Change the offset too, and the wheel position shifts even more.

Here is the practical way to think about it. Lower offset pushes the wheel outward. Higher offset pulls it inward. More wheel width adds material on both sides of the mounting face unless offset changes to compensate.

If you are staying close to stock tire size and stock suspension, small offset changes are usually easier to manage. If you are also lifting, lowering, upsizing tires, or upgrading brakes, offset becomes much less forgiving.

Step 1: Know your factory wheel specs

Before you shop, confirm the stock wheel diameter, width, and offset for your exact trim. Do not assume every model in a platform uses the same setup. Brake packages, suspension options, and OEM wheel packages can change fitment.

This is your control point. Without it, every other decision is guesswork.

Step 2: Decide what matters most

Some drivers want flush fitment with the fender. Others need brake clearance for a performance build. Truck and Jeep owners may want a wider stance for larger tires or trail presence. Daily drivers may care more about clean steering feel and no rubbing in tight parking maneuvers.

That matters because the right offset for a show-focused street build is not always the right offset for a work truck or winter wheel package. The best fitment is the one that matches how the vehicle is actually used.

Step 3: Check inner and outer clearance

Inner clearance is the space between the wheel and suspension components like the strut, upper control arm, or inner liner. Outer clearance is the space between the tire and the fender edge or wheel arch. Offset affects both.

If you move the wheel inward too much with a high positive offset, you risk hitting suspension or brake components. If you push it outward too far with a lower or negative offset, you risk fender rubbing and debris spray, and in some states you may also run into tire coverage issues.

Step 4: Factor in tire size

A wheel does not rub. The tire does. That is why offset can never be chosen in isolation.

A wider tire section width can create problems even if the wheel itself technically clears. Sidewall shape also matters. Two tires with the same labeled size can measure differently by brand and model. On cars and SUVs, this often shows up at the strut perch or fender liner. On trucks and Jeeps, it often shows up at the bumper edge, body mount, or during full lock turns.

Common offset mistakes

One of the biggest mistakes is focusing only on stance. An aggressive offset may look excellent in photos, but if the tire catches the fender on compression or the steering gets heavier and less precise, the setup stops being practical fast.

Another common mistake is copying someone else’s specs without matching their full build. If another vehicle runs a certain offset with no issues, that does not mean it will work on yours. Tire brand, suspension height, alignment settings, brake package, and even fender tolerances all change the result.

The third mistake is ignoring scrub radius and load on steering and suspension parts. Moving the wheel farther outward changes leverage on wheel bearings and suspension components. On some builds, especially heavy trucks and SUVs, a dramatic offset change can affect tracking, steering feel, and long-term wear.

How wheel offset affects driving

Offset is not only about fit. It changes the way the vehicle behaves.

A wheel pushed farther outward can create a broader visual stance and sometimes improve outer brake clearance, but it may also increase steering effort, road feedback, and component load. On lowered street cars, it can make fender clearance tighter under compression. On lifted trucks, it can help clear inner suspension parts with larger tires, but may create more rubbing at the outer edges or during turns.

A wheel that sits farther inward can keep the tire tucked and protected, but too much positive offset may interfere with struts, control arms, or brake hardware. It can also leave the vehicle looking too narrow for the wheel width you chose.

There is always a trade-off. The cleanest setup is usually not the most extreme one.

How to pick wheel offset when changing wheel width

This is where many fitment problems start. If you move from an 8-inch-wide wheel to a 9-inch-wide wheel, half of that added width goes inward and half goes outward if offset stays the same. That means even before offset changes, clearance changes on both sides.

If you want the inner barrel to stay close to the same position as stock, you may need a lower positive offset as width increases. If you want the outer face to stay close to stock, you may need a higher offset. Which way you go depends on whether your tighter limit is inside or outside.

This is why width and offset should always be evaluated together, not as separate specs.

A simple example

Suppose your factory wheel is 18×8 with a +40 offset, and you want an 18×9 wheel. If you choose the same +40 offset, the new wheel will sit about half an inch wider overall, split inward and outward. If inner clearance is already tight, that may be a problem. Choosing a slightly lower offset can move some of that added width outward instead.

That may solve the strut issue, but it also brings the tire closer to the fender. Better inner clearance can mean worse outer clearance. That is the fitment game.

Cars, trucks, Jeeps, and SUVs need different thinking

Passenger cars usually have less room for aggressive offset changes, especially on lowered suspension. Fender clearance becomes the limiting factor quickly, and steering geometry is often more sensitive.

Trucks and body-on-frame SUVs tend to allow more flexibility, but larger tires complicate things. A lower offset can help clear upper control arms, yet still rub on the bumper or rear of the wheel well at full lock. Leveling kits and lifts change the equation, but they do not erase it.

Jeeps often run lower offsets for stance and tire clearance, especially with wider all-terrain or mud-terrain setups. Even then, the right number depends on backspacing, tire width, axle setup, and whether the build is aimed at street, trail, or mixed use.

The smartest way to buy wheels

If you want the shortest path to a setup that fits right, build from verified specs. Start with your exact vehicle, current wheel and tire size, and intended use. Then compare wheel width, offset, and tire dimensions together. If brake upgrades, suspension changes, or oversized tires are involved, treat offset as a fitment requirement first and a style choice second.

That approach is faster, cheaper, and cleaner than chasing a look and fixing the consequences afterward. It is also how experienced buyers avoid returns, spacers they did not plan for, and a vehicle that drives worse than it should.

At FORTLUFT, that same principle applies across every aftermarket category – the best upgrade is the one that fits the vehicle, the purpose, and the finish you want.

Wheel offset is one of those specs that rewards restraint. A few millimeters can change everything, and the best choice is usually the one that gives you the look you want without asking the rest of the vehicle to compromise for it.

Suspension Upgrade Buying Guide for Real-World Use

A suspension upgrade can make a truck feel controlled instead of floaty, a Jeep feel planted instead of unsettled, or a daily driver look right without ruining the ride. That is why a smart suspension upgrade buying guide starts with one question, not a product name: what do you want the vehicle to do better?

Too many buyers start with lift height, brand hype, or the most aggressive photo they saw online. The better approach is to match the parts to the job. Ride quality, tire clearance, towing stability, cornering feel, stance, and load support all pull the suspension in different directions. The right setup is the one that improves your actual use case, not the one with the loudest marketing.

What a suspension upgrade really changes

Suspension parts do more than alter ride height. They control how the vehicle handles weight transfer, absorbs bumps, keeps tires in contact with the road, and responds when you brake, turn, accelerate, or carry cargo. That means even a simple shock upgrade can change confidence behind the wheel more than many buyers expect.

The trade-off is just as real. A firmer setup can sharpen response but feel harsher on broken pavement. A taller setup can increase clearance but affect steering feel, center of gravity, and fuel economy. A lowered setup can improve appearance and road feel but reduce travel and ground clearance. There is no universal best option. There is only the right balance for the way you drive.

Start this suspension upgrade buying guide with your vehicle use

If your vehicle spends most of its life commuting, highway ride control and noise matter more than maximum articulation. If you tow, squat control and stability matter more than an ultra-soft ride. If you run trails, wheel travel, damping control, and clearance move up the list fast.

Be specific with yourself. A half-ton truck that tows a boat on weekends needs a different setup than a truck built mainly for appearance. A Jeep that sees forest roads and mild weekend trails needs something different than one built for rock crawling. A lowered SUV that still carries family and gear has to keep enough comfort to stay usable.

That clarity narrows the field quickly and helps you avoid buying parts twice.

The main suspension upgrade categories

Shocks and struts

For many vehicles, this is the smartest first move. Fresh, better-quality dampers can tighten body control, reduce bounce, improve braking stability, and make the ride feel more composed without dramatically changing geometry.

If your factory suspension feels worn out, underdamped, or too soft for cargo and highway speed, shocks and struts may solve most of the problem. They are often the highest-value upgrade because they improve function directly and do not force a major change in the rest of the system.

Springs

Coil springs and leaf springs support weight and set ride height. Changing springs is how you usually alter stance, load capacity, and sometimes ride character. The important detail is spring rate. Stiffer is not automatically better. If the rate is too high for the vehicle and load, the ride can become choppy and traction can suffer on rough surfaces.

For trucks and SUVs, rear spring changes are common when carrying tools, gear, or trailer tongue weight. For cars and crossovers, lowering springs are often chosen for appearance and handling. In both cases, the springs have to work with the dampers, not against them.

Leveling kits, lift kits, and lowering kits

These are goal-specific packages. A leveling kit typically raises the front of a truck to reduce rake and improve tire fitment. A lift kit raises overall height for clearance and off-road capability. A lowering kit reduces ride height for stance and a tighter on-road feel.

The package matters. A low-cost height change without the supporting components may give you the look you want while introducing poor ride quality, accelerated wear, or alignment limitations. Quality kits account for geometry, travel, and hardware rather than just forcing the vehicle higher or lower.

Air helper springs and load support parts

If your main issue is rear sag under cargo or towing, this category makes more sense than a full lift or stiff spring swap. Air helper systems, overload solutions, and related load-support components help keep the vehicle level under changing weight.

This is a practical upgrade for work trucks and SUVs that alternate between empty daily use and heavy weekend loads. You get support when needed without locking yourself into a harsh unloaded ride.

Fitment comes before features

A premium part that does not match the vehicle configuration is still the wrong part. Fitment is not just year, make, and model. You also need to account for drivetrain, cab or body style, factory ride package, existing modifications, wheel and tire size, and intended ride height.

This becomes even more important with trucks, Jeeps, and SUVs. A lift that works with stock wheels may behave differently with wider wheels and more aggressive tire offsets. A shock designed for stock height may top out or underperform with a taller spring. A lowered setup may require additional correction parts to maintain alignment and tire wear.

That is where a product-driven supplier matters. Buyers need suspension parts that are clearly organized by vehicle application and by function, not just marketed by appearance.

How to choose the right setup for common goals

Better daily driving

Start with quality shocks or struts, then inspect the rest of the wear items around them. If bushings, mounts, links, or springs are tired, new dampers alone will not deliver the full result. For a daily driver, balance matters more than extremes. You want controlled movement without turning every expansion joint into a reminder that you modified the car.

Towing and hauling

Focus on stability under load. Rear support and damping control should come first. You want less squat, more predictable braking, and less side-to-side motion. A small, smart upgrade in this category often does more for confidence than a cosmetic lift.

Off-road and overland use

Think in systems, not just inches of lift. Clearance matters, but so do suspension travel, shock quality, and component durability. An overbuilt setup for hardcore trails may feel unnecessary on a vehicle that mostly sees gravel roads and camping gear. Buy for the terrain you actually drive.

Street performance and lowered stance

A lower center of gravity can improve response and appearance, but the details matter. If you lower the vehicle without matching dampers and correcting geometry where needed, you may get a bouncy ride and uneven tire wear instead of a sharper feel. The best lowered setups look clean and still feel engineered.

Budgeting without buying twice

The cheapest route is often the most expensive after labor, alignment, and replacement parts add up. If you know you want a complete transformation, it usually makes more sense to buy a coordinated setup once than to stack random parts over time.

That does not mean you need the most expensive kit on the shelf. It means the parts should match your goal. Spend where performance and durability actually matter – damping quality, proper spring rates, complete hardware, and fitment confidence. Save money by avoiding unnecessary complexity, not by cutting the parts that make the system work.

Don’t ignore the supporting parts

Suspension upgrades put attention on the visible components, but the surrounding hardware determines how well the whole system performs. Worn control arm bushings, sway bar links, ball joints, mounts, and bump stops can undermine a new setup fast.

Alignment is also part of the upgrade, not an optional extra. Any meaningful height or geometry change should be followed by a proper alignment. If your wheel and tire package is changing too, check clearance at full lock and full compression before calling the job done.

A few mistakes that cost buyers time and money

One common mistake is choosing height based only on looks. Another is buying for the most extreme use case a vehicle might see once a year instead of the miles it drives every week. A third is assuming all kits at the same advertised height will ride and handle the same. They will not.

It is also easy to underestimate how much wheel and tire choice affects the final result. Offset, width, sidewall, and tire weight all change how the suspension feels and what it clears. Suspension and rolling stock should be planned together whenever possible.

For buyers who want a clean path from fitment to function, FORTLUFT’s approach to aftermarket parts makes that process easier to navigate. The goal is not just to add parts. It is to select components that work together, look right, and perform like they belong on the vehicle.

The best suspension upgrade buying guide ends with honesty

If you want one rule to keep, use this one: buy the suspension that fits your real-world miles. The setup that feels right on your commute, your jobsite route, your trail weekend, or your towing run is the one you will appreciate every time you drive. Style matters. Performance matters. The best upgrade is where both meet without compromise you will regret next month.

Spark Plug Replacement Guide for DIY Drivers

That slight stumble at idle, the slower cold start, the fuel economy that seems a little off – spark plugs are often behind it. A solid spark plug replacement guide helps you fix a small ignition issue before it turns into a bigger drivability problem, especially on higher-mileage cars, trucks, Jeeps, and SUVs.

Spark plugs sit at the center of combustion. They ignite the air-fuel mixture thousands of times per minute, and they do it under serious heat and pressure. When they wear out, the symptoms can be subtle at first. Then come rough starts, misfires under load, weak acceleration, and a check engine light that finally gets your attention.

For many vehicles, replacing spark plugs is a realistic DIY job. For others, especially V6 and V8 engines with tight engine bays, it can be more involved than it looks. The difference comes down to access, the engine design, and whether you approach the job with the right tools and the right expectations.

Why spark plug replacement matters

Fresh plugs do more than restore a smooth idle. They help the ignition system work as designed, reduce strain on ignition coils, and support clean combustion. If a worn plug forces the coil to work harder to jump an oversized gap, you can end up replacing more than just plugs.

This is where maintenance and performance overlap. A properly firing engine feels sharper, responds more cleanly, and runs with the kind of consistency every driver notices. Technology as an art form only works when the fundamentals are right.

Service intervals vary. Some copper plugs may need replacement around 20,000 to 30,000 miles, while platinum and iridium plugs can often go 60,000 to 100,000 miles or more. That said, mileage is only part of the story. Oil consumption, repeated short trips, poor fuel quality, and existing ignition problems can shorten plug life.

Signs you may need new spark plugs

A rough idle is one of the most common clues, but it is not the only one. Hard starting, sluggish throttle response, lower fuel economy, engine hesitation, and random or cylinder-specific misfire codes can all point toward worn or fouled plugs.

There is also some nuance here. Those same symptoms can come from bad coils, vacuum leaks, dirty injectors, or fuel delivery issues. Spark plugs are not always the root cause. But if the plugs are near the end of their service life, they are a smart place to start.

Pulling one plug and inspecting it can tell you a lot. A normal plug usually shows light tan or gray deposits. Heavy black soot may suggest a rich mixture or weak spark. Oily residue may point to oil entering the combustion chamber. A white blistered tip can indicate overheating or an incorrect heat range. In other words, the plug is not just a wear item – it is also a window into engine health.

Spark plug replacement guide: tools and prep

Before you touch the engine, make sure it is completely cool. Removing spark plugs from a hot aluminum cylinder head is a good way to create expensive problems.

You will usually need a spark plug socket, ratchet, extensions, a torque wrench, and possibly a swivel adapter depending on engine layout. A small amount of dielectric grease for the inside of the coil boot is commonly used, though not on the plug threads. Some vehicles also benefit from compressed air so you can clean debris out of the plug wells before removal.

The most important prep step is confirming the exact plug specification for your vehicle. Thread size, reach, seat type, heat range, and gap all matter. Even if two plugs look similar, using the wrong one can affect performance or damage the engine. Always match the plug to the engine application, not just the vehicle model line.

If your engine uses coil-on-plug ignition, each cylinder will typically have its own ignition coil mounted above the spark plug. On older setups, you may have plug wires instead. Either way, label anything you disconnect if there is any chance of mixing it up during reassembly.

How to replace spark plugs without creating new problems

Start by removing any plastic engine covers that block access. Then disconnect the ignition coil connector or remove the plug wire boot carefully. If you are working with wires, twist the boot slightly before pulling. Tugging on the wire itself can damage it.

Once the coil or wire is out of the way, blow out the spark plug well if dirt is present. This step matters more than many people think. You do not want grit falling into the cylinder once the plug is removed.

Use the spark plug socket and loosen the old plug carefully. If it feels unusually tight, slow down. Forced removal can strip threads in the cylinder head. In stubborn cases, patience is cheaper than repairs.

Compare the old plug to the new one before installation. Check length, thread design, and electrode style. If the replacement plug is adjustable and your application calls for checking the gap, use the proper tool and set it to spec. Many modern iridium and platinum plugs come pre-gapped, but that does not mean they should be handled roughly. Fine-wire electrodes are easy to damage.

Thread the new plug in by hand first. This is the safest way to avoid cross-threading. It should turn smoothly for several rotations before you use a ratchet. If it does not, back it out and start again.

Then tighten the plug to the manufacturer torque specification. This is one of the most overlooked parts of any spark plug replacement guide. Too loose, and you risk poor heat transfer, blow-by, or thread damage over time. Too tight, and you can stretch threads, crack the plug, or damage the cylinder head. Torque is not a detail. It is the difference between a clean service job and a comeback.

Apply a small amount of dielectric grease inside the coil boot if recommended, reinstall the coil or wire, reconnect the electrical connector, and move to the next cylinder. Working one cylinder at a time is the safest method because it keeps parts organized and prevents mix-ups.

Common mistakes that cost time and money

The biggest mistake is assuming all spark plugs are basically the same. They are not. Modern engines are sensitive to plug design, and the wrong part can create misfires fast.

The second mistake is skipping torque specs. Hand-tight plus guesswork might work on some jobs, but spark plugs are not the place to improvise.

The third is replacing plugs while ignoring worn ignition coils or brittle plug wires. If a coil boot is torn, oil-soaked, or heavily carbon-tracked, new plugs alone may not solve the issue. Sometimes the smart move is doing plugs and coils together, especially on higher-mileage vehicles where labor overlap makes that more efficient.

Another common error is using anti-seize on plug threads without checking the plug maker’s guidance. Many modern spark plugs have plated threads and do not require it. Adding anti-seize can change torque readings and lead to overtightening.

When spark plug replacement gets more complicated

Inline four-cylinder engines are often straightforward. Transverse V6 engines, turbocharged applications, and some trucks or SUVs with tight firewall clearance are a different story. Intake manifolds, braces, or other components may need to come off just to reach the rear bank.

That does not automatically make the job a bad DIY choice. It just changes the math. If access is poor, broken plastic connectors are likely, or you do not have a torque wrench and enough workspace, paying for labor may be the better move.

There is also the issue of seized plugs on certain older engines. If the vehicle has gone far beyond the recommended interval, plug removal can become risky. In that case, careful technique matters more than speed, and some owners will prefer professional service over gambling with cylinder head threads.

Choosing the right replacement plugs

Material matters, but matching the vehicle matters more. Copper plugs are typically less expensive and perform well in some older applications, though they wear faster. Platinum and iridium plugs usually last longer and are common in newer engines. Long life is a real advantage, especially when access is difficult.

Still, longer life is not the same as universal upgrade. Some engines are calibrated around a specific plug type and design. Use what the application calls for first, then consider premium options only when they align with fitment and spec.

For buyers who care about both reliability and clean fitment, this is where a focused aftermarket source earns its place. You want the right part the first time, not a close-enough option that creates another repair.

After installation: what to check

Once everything is reassembled, start the engine and listen. Idle should be stable, and there should be no flashing check engine light or obvious misfire. If the engine runs worse than before, recheck coil connections, wire routing, and plug torque.

If a check engine light was already present, you may need to clear the code and drive the vehicle to confirm the repair. And if the misfire remains on the same cylinder, the problem may be a coil, injector, compression issue, or something outside the ignition system.

A good spark plug job is not flashy, but you feel it immediately. Cleaner starts, smoother response, and the quiet confidence that the engine is firing the way it should. That is the kind of maintenance that keeps a vehicle ready for the daily commute, the jobsite, or the next long highway run.

Stainless Exhaust Corrosion Benefits Explained

A rusty exhaust usually announces itself before you ever see it. You hear the change in tone, notice the rough-looking pipe, or spot flaky metal around a weld. That is where stainless exhaust corrosion benefits stand out fast – not as marketing language, but as a real material advantage that affects service life, appearance, and replacement cost.

For drivers who expect more than a temporary fix, exhaust material matters. On a daily commuter, a work truck, or a Jeep that sees wet roads and seasonal grime, corrosion is one of the main reasons an exhaust system fails. Stainless steel does not make an exhaust indestructible, but it changes the timeline in a big way.

Why stainless exhaust corrosion benefits matter

Exhaust systems live in a harsh environment. Heat cycles are constant. Moisture collects inside the pipes during short trips. Road salt, mud, and water attack the outside. Add vibration, debris impact, and ordinary age, and mild steel starts losing ground quickly.

Stainless steel helps because it contains chromium, which forms a thin passive layer on the surface. That layer slows oxidation and helps the metal resist the kind of rust that spreads, weakens walls, and eventually creates leaks. In practical terms, that means less visible corrosion, fewer premature failures, and a better chance that your exhaust still looks presentable after years on the vehicle.

For many buyers, the payoff is simple: you replace it less often. For others, especially enthusiasts and shops, the appeal goes further. A stainless component supports a cleaner finish, a more premium appearance under the vehicle, and better long-term confidence in the parts they install.

The real-world benefits of stainless exhaust corrosion resistance

The biggest benefit is durability. A corrosion-resistant exhaust has a better chance of surviving wet climates, salted winter roads, coastal air, and repeated temperature swings. If your vehicle sees all-season use, stainless can be the difference between years of dependable service and an early replacement.

There is also a maintenance benefit. Rusted fasteners, seized connections, and weakened pipe sections turn a routine exhaust job into a frustrating one. Stainless systems are not immune to every installation headache, but they generally age in a more controlled way than lower-grade steel. That matters whether you are handling the work in your garage or ordering parts for a shop install.

Appearance is another factor, and it is not just cosmetic vanity. Clean material condition often reflects how well a part is holding up structurally. Stainless exhaust pipes and tips tend to maintain a sharper, more finished look over time, which fits vehicles where the exhaust is visible and part of the overall build. Technology as an art form only works when the hardware still looks like it belongs there.

Then there is value over time. Stainless usually costs more upfront than aluminized or basic steel options. But if it lasts significantly longer, especially in rust-prone conditions, the long-term cost can make better sense. Fewer replacements, fewer labor events, and less chance of a leak-related issue all add up.

Not all stainless exhaust materials perform the same

This is where the details matter. Stainless is not one universal grade, and buyers who understand that usually make better decisions.

409 stainless

409 stainless is common in automotive exhaust applications because it balances corrosion resistance, heat tolerance, and cost. It can develop surface discoloration and light surface rust over time, so it may not stay bright and polished like a show part. But compared with plain steel, it offers a clear upgrade in service life and rust resistance.

For many daily drivers and OE-style replacements, 409 is a practical choice. It is built for function first and tends to deliver strong durability where it counts.

304 stainless

304 stainless is often the premium step up. It generally offers stronger corrosion resistance than 409 and is favored for higher-end exhaust parts, polished finishes, and builds where long-term appearance matters as much as performance. If you want an exhaust component that holds up well and keeps a cleaner visual finish, 304 is often worth serious consideration.

That said, 304 usually costs more. If the vehicle is a basic commuter in a mild climate, the extra spend may not always be necessary. If the vehicle is a long-term keeper, sees harsh weather, or has visible performance styling, the case gets stronger.

Stainless exhaust corrosion benefits in different driving conditions

Where and how you drive has a major effect on exhaust life.

In snow-belt states, road salt is the obvious enemy. Salt accelerates corrosion on standard steel exhaust parts, especially at seams, clamps, and low points where moisture sits. Stainless offers a meaningful buffer against that attack, which is one reason it is such a smart material choice for year-round vehicles in northern climates.

In coastal regions, humid air and salt exposure create a similar challenge. Even if the roads are not salted in winter, the environment itself is harder on metal. Stainless helps slow the external corrosion that can make an exhaust look worn well before its time.

Short-trip driving is another overlooked factor. If the exhaust does not get hot enough long enough, condensation inside the system may not fully burn off. That trapped moisture can corrode the exhaust from the inside out. Stainless steel is not magic here, but it handles this kind of repeated moisture exposure better than lower-grade alternatives.

Off-road and utility use add their own stress. Mud, water crossings, gravel, and impact exposure can damage protective coatings on ordinary steel. Stainless does not rely on a simple surface coating in the same way, which gives it a more durable edge when the environment gets rough.

When stainless is worth the extra cost

If you plan to keep the vehicle for years, stainless usually makes sense. The same goes for trucks, Jeeps, and SUVs that see hard use or mixed weather. A premium material is easier to justify when replacement labor is inconvenient, downtime matters, or you simply do not want to repeat the job.

It also makes sense on vehicles where the exhaust is visible. Muffler tips, tailpipes, and performance-oriented systems contribute to the overall look of the build. Corrosion resistance protects that investment and keeps the visual finish aligned with the rest of the vehicle.

For shops and resellers, stainless can reduce comeback risk tied to early rust complaints. Customers notice when an exhaust still looks solid after real use. That kind of result supports confidence in the part choice.

The trade-off is budget. If the goal is the lowest initial cost on an older vehicle with limited expected service life, a lower-cost exhaust option may still be the right move. Material choice should fit the vehicle, the climate, and how long the owner plans to keep it.

What stainless steel does not solve

A smart buyer should know the limits. Stainless steel resists corrosion, but it does not eliminate every failure point.

Poor weld quality can still shorten the life of an exhaust part. Bad fitment can create stress and vibration issues. Hangers, clamps, and connected hardware may not all be stainless, so weaker supporting components can still become the problem first. And if the exhaust takes a hard impact off-road, corrosion resistance will not protect it from physical damage.

Surface color change is also normal with heat. Blueing, gold tones, and darker areas can appear on stainless after repeated use. That is not the same as destructive rust. It is simply part of how the material reacts to temperature.

How to choose the right stainless exhaust part

Start with the application. If you need a dependable replacement for a daily driver, focus on fitment, material grade, and overall construction quality. If you are buying for a performance or appearance upgrade, finish quality and visible design become more important.

Check whether the part is built from 409 or 304 stainless, and decide based on your climate and expectations. For harder environments or more visible components, higher corrosion resistance is usually money well spent. For practical replacement use, a well-made 409 part may be the right balance.

Also consider the complete setup. A stainless exhaust pipe paired with low-grade hardware can still create installation and service issues later. The best result comes from matching quality across the system, especially in clamps, tips, and connection points.

Stainless exhaust corrosion benefits are not theoretical. They show up in fewer rust-related failures, better long-term appearance, and a more confident ownership experience. If you want an exhaust part that works hard and still looks like it belongs on the vehicle, stainless is one of the clearest upgrades you can make.