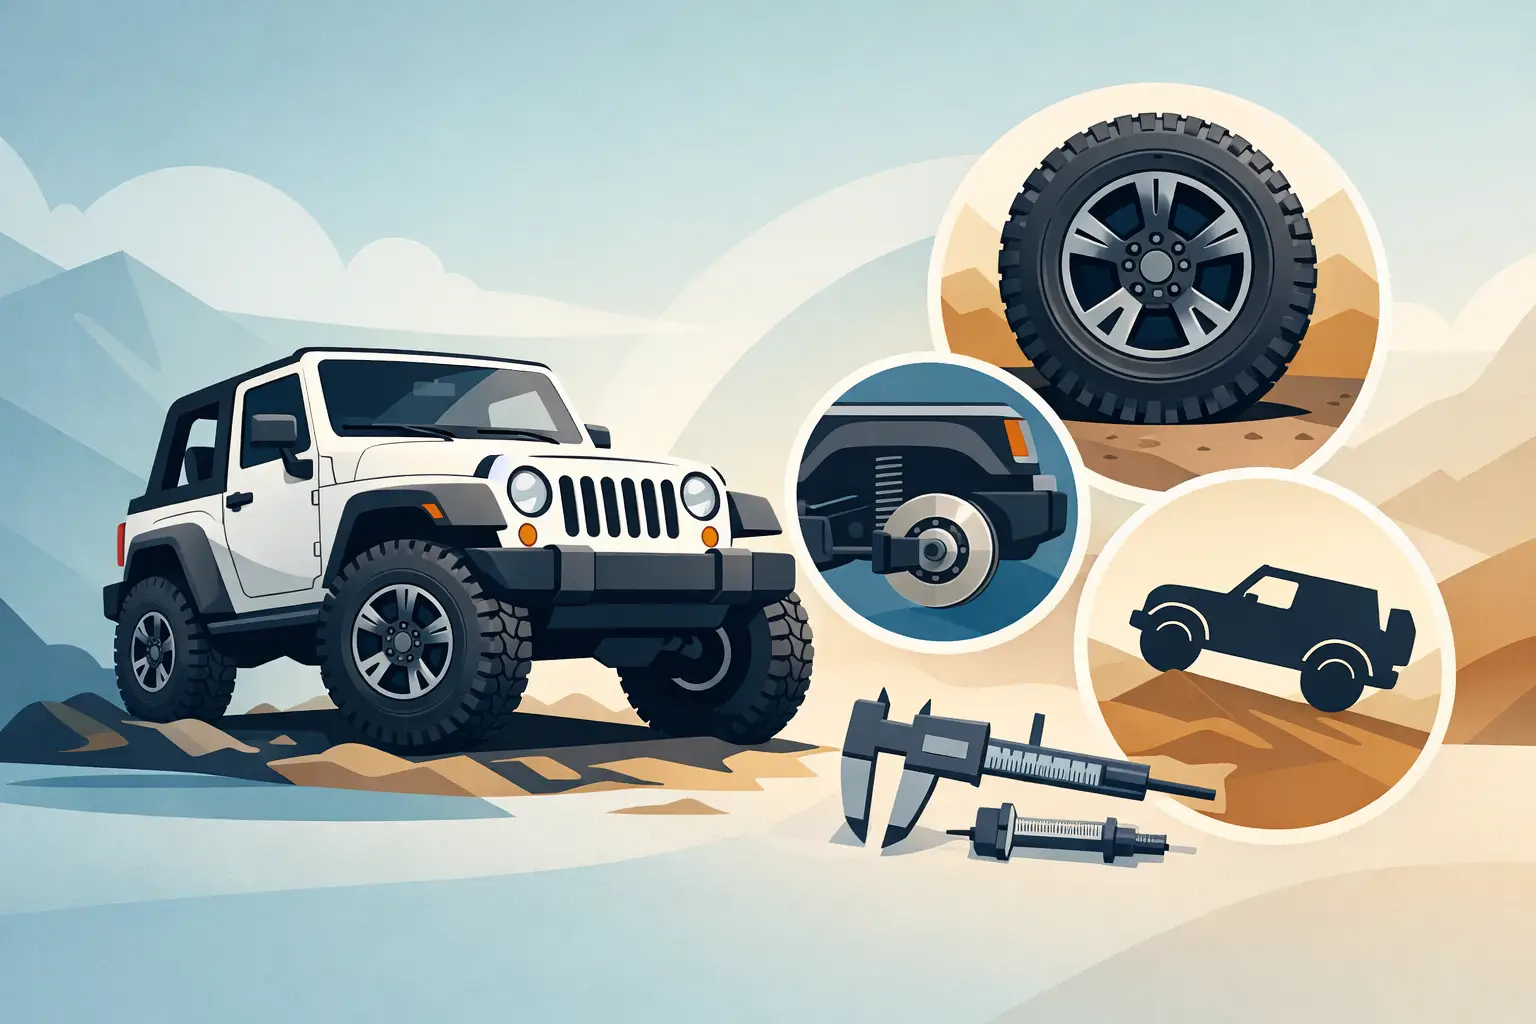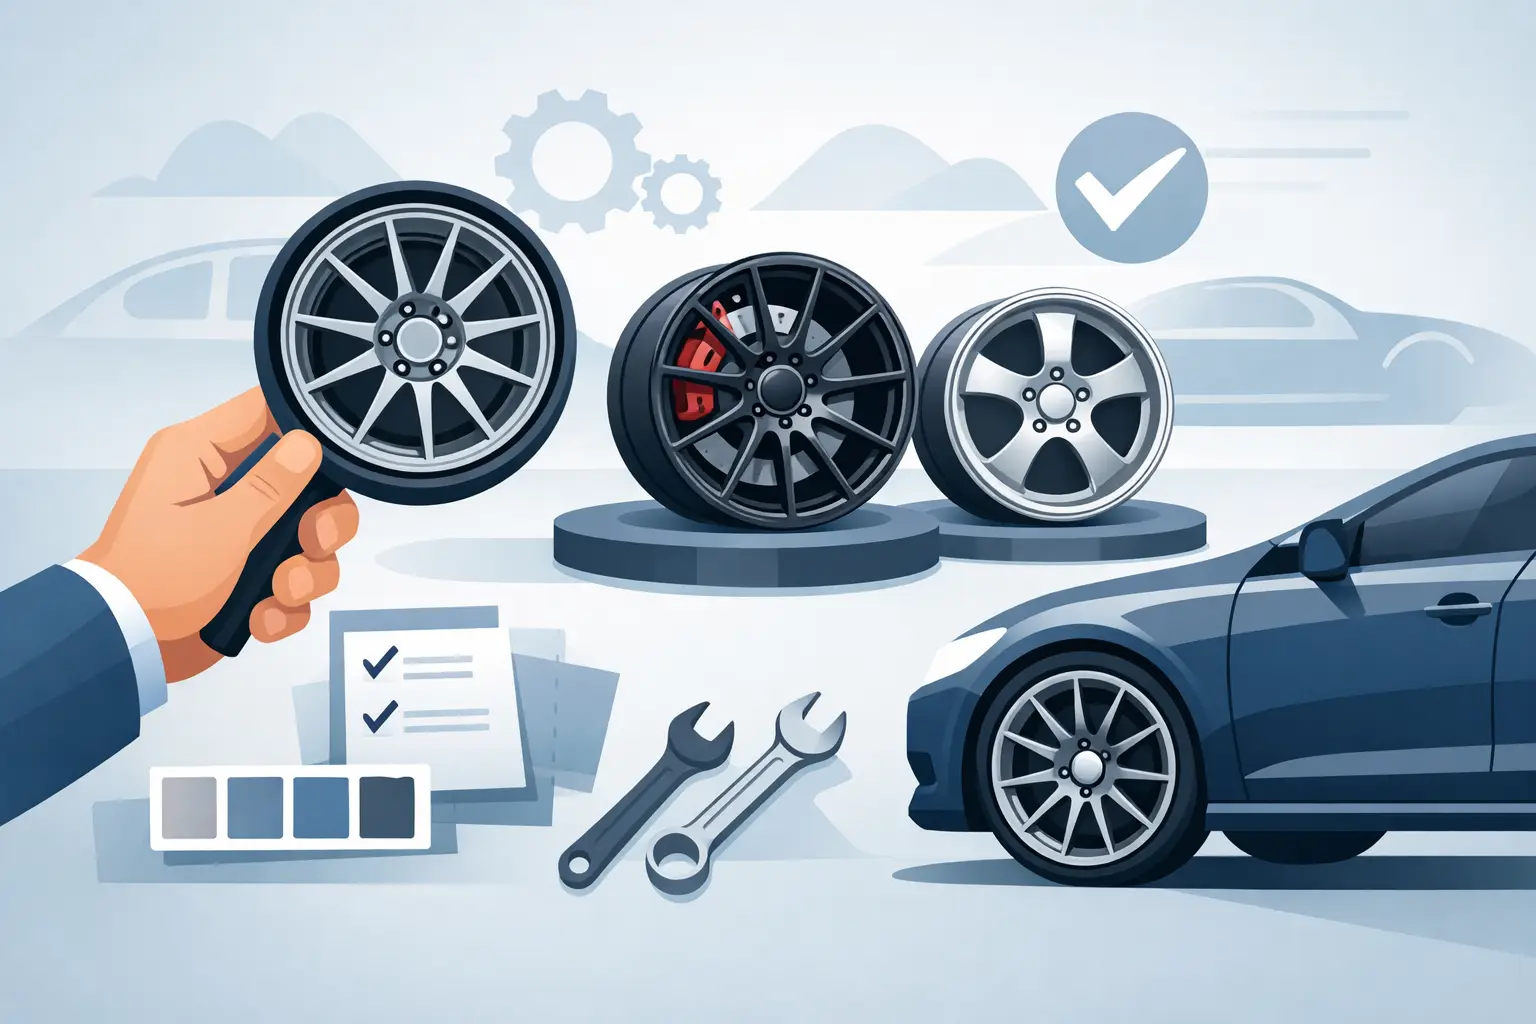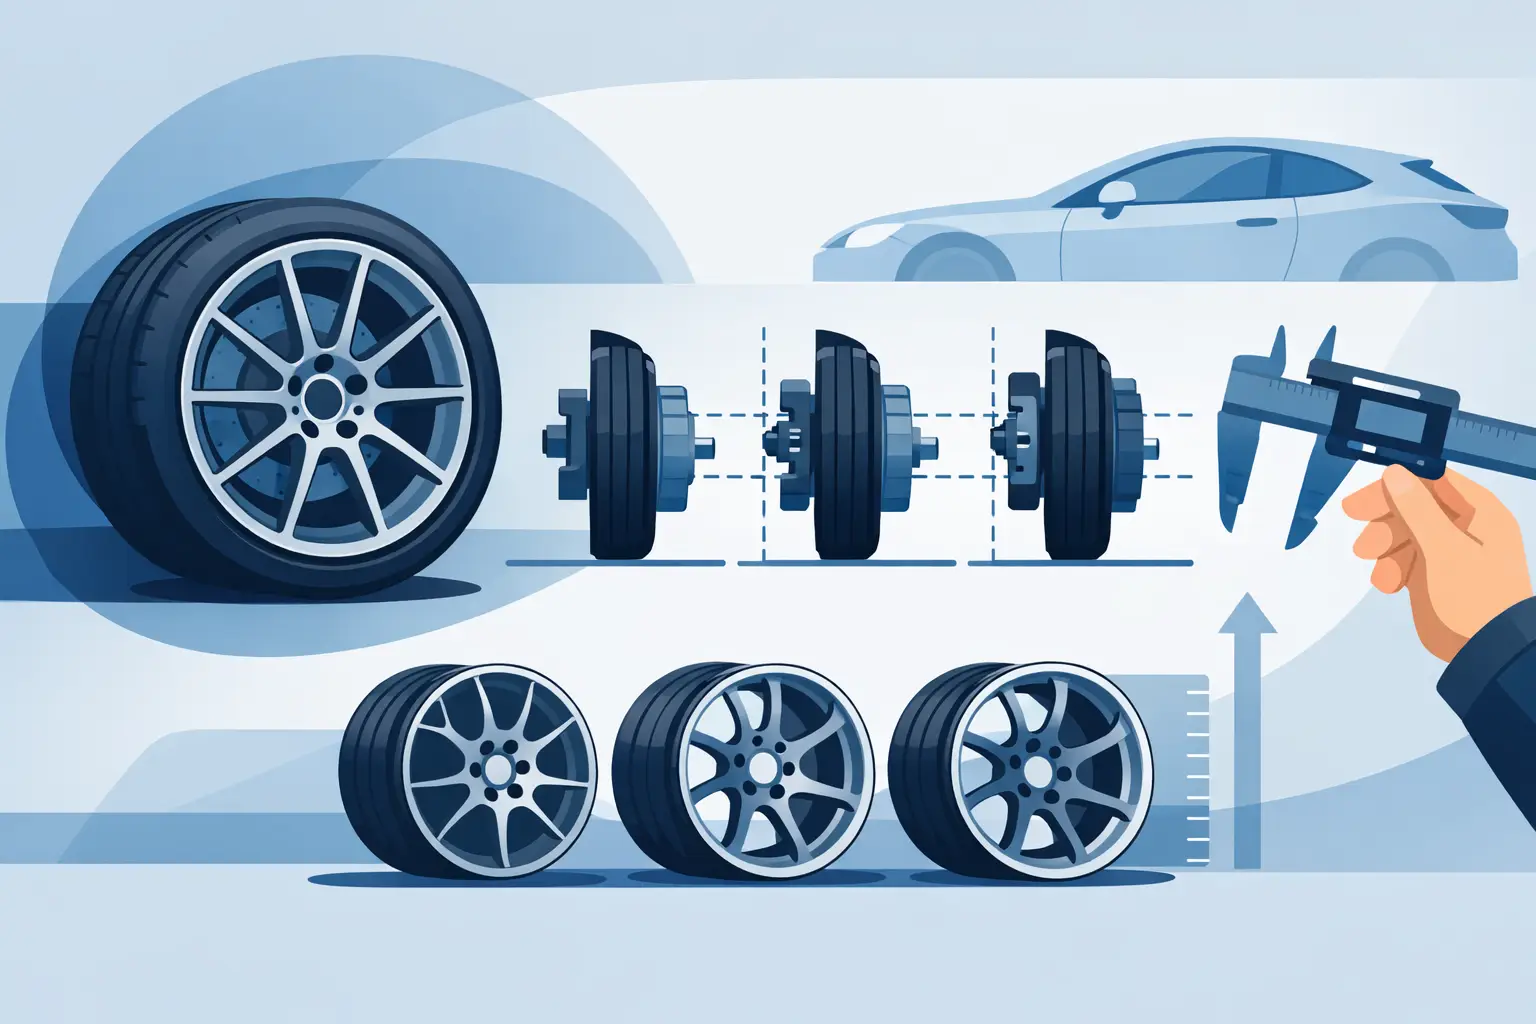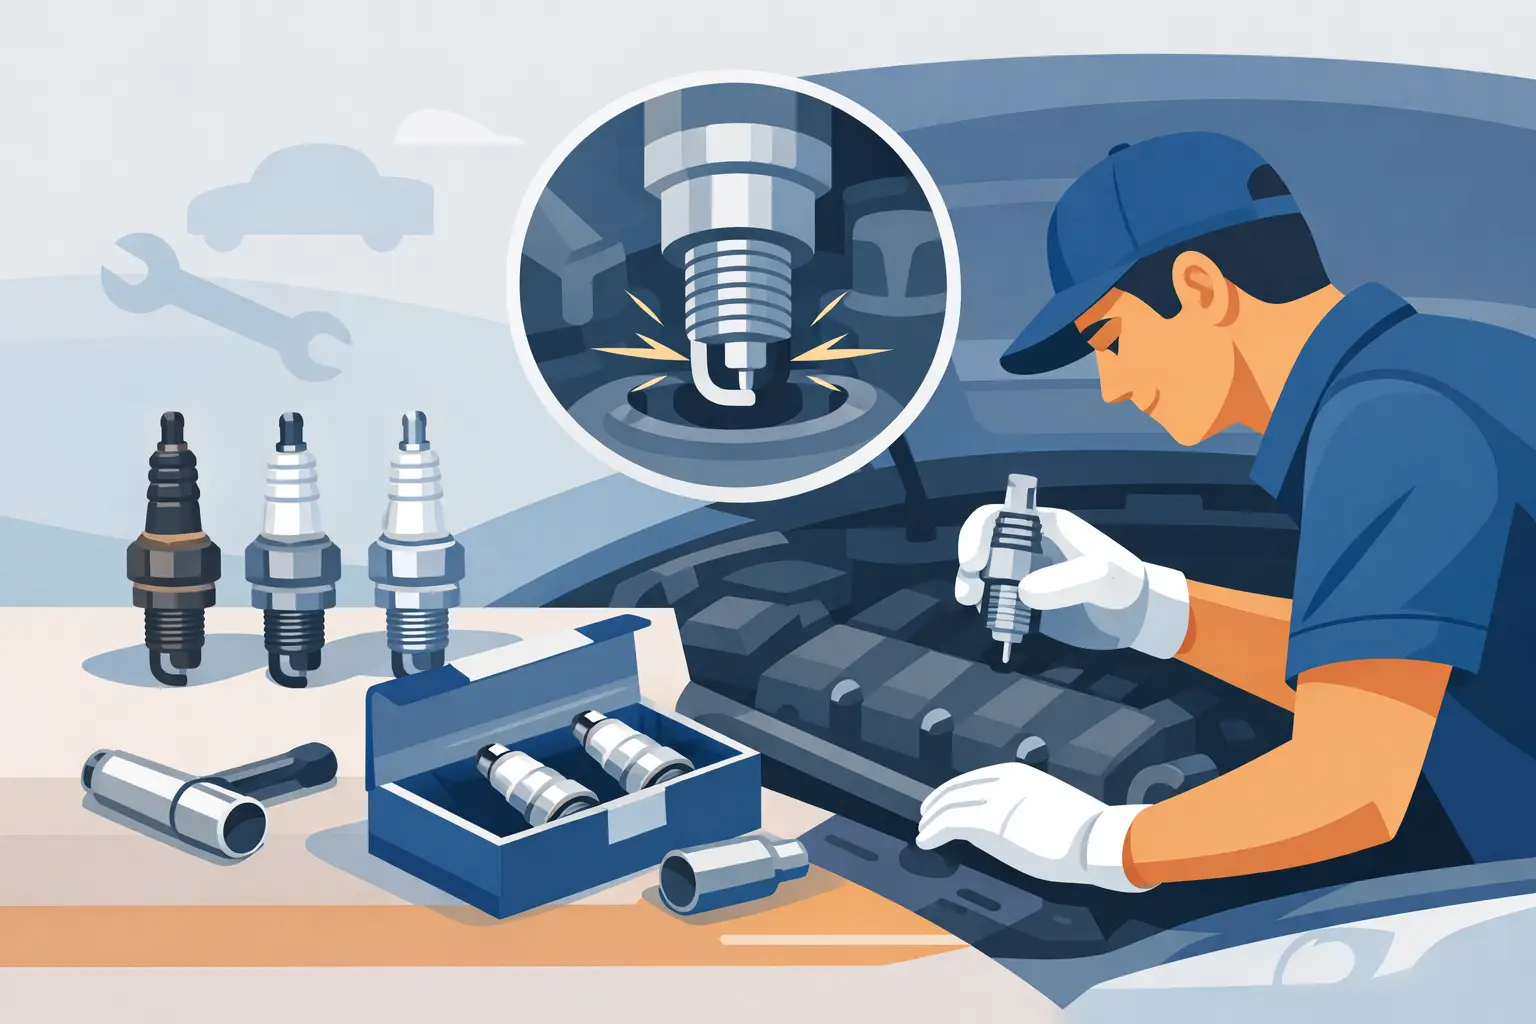
Truck Suspension Upgrade Guide for Real Use

A truck that squats under a trailer, crashes over broken pavement, or feels loose in a fast on-ramp is telling you something. This truck suspension upgrade guide is built for owners who want better control, better load support, and a setup that looks right without wasting money on parts that do not match how the truck is actually used.

Suspension upgrades are not one-size-fits-all. A leveled half-ton used for city driving needs a very different setup than a work truck that tows every week, and both are different from a trail-focused build on 35s. The best results come from choosing parts around use case first, then ride height, then tire and wheel plans.

Start with the job your truck actually does

Before you buy shocks, springs, spacers, or control arms, define the truck in plain terms. Is it a daily driver with occasional home-improvement runs? A tow rig carrying tongue weight and bed cargo? A weekend off-road truck that needs more articulation and tire clearance? That answer controls almost every smart suspension decision.

If towing and hauling are the priority, rear support matters more than chasing lift numbers. If ride quality and steering precision matter most, your money usually goes farther with quality shocks and properly matched springs than with a cheap lift kit. If appearance is part of the goal, that is valid too, but stance should still work with alignment geometry, tire clearance, and braking stability. Technology as an art form only works when the form does not compromise function.

Truck suspension upgrade guide: what each part changes

A lot of suspension confusion comes from parts being sold together even though they do very different things. Knowing what each component actually does helps you avoid buying overlap.

Shocks and struts

Shocks control motion. They do not hold the truck up, but they determine how quickly the suspension compresses and settles. Upgrading worn factory shocks is often the single biggest improvement in ride control, especially on trucks with miles, oversized tires, or added weight.

For daily driving, a quality gas shock can sharpen response without making the truck harsh. For towing, look for damping that controls rebound when the rear is loaded. For off-road use, heat capacity matters because repeated impacts can overwhelm a basic shock. More expensive does not always mean better for your truck, but bargain shocks are where many builds start feeling sloppy after the first few months.

Coil springs, leaf springs, and coilovers

Springs hold the truck up and determine ride height along with load support. If the truck squats too much with cargo, that is usually a spring-rate problem, not just a shock problem. Heavier-duty rear leaf packs or helper springs can make a big difference for work use, but they can also stiffen the empty-truck ride.

Coilovers combine a spring and shock in a more adjustable package. They make sense when you want tuned ride height, better damping, and a cleaner performance-oriented solution up front. They cost more, but for many late-model trucks they provide a more refined result than stacking budget lift components.

Lift kits and leveling kits

A leveling kit usually raises the front to reduce rake. It is popular because it changes stance quickly and creates space for a larger tire. The trade-off is that not every leveling kit improves ride quality, and some reduce droop travel or push factory components beyond ideal angles.

Lift kits go further by increasing ride height front and rear. A well-engineered lift can preserve geometry far better than a cheap spacer setup, but lift always affects more than looks. Center of gravity rises, step-in height changes, fuel economy can shift, and tire, wheel, and gearing decisions start to matter more.

Control arms, bushings, and steering components

These parts are easy to ignore because they are less visible, but they matter once ride height changes. Upper control arms can restore better alignment range and ball joint angle on lifted independent front suspension trucks. Fresh bushings can remove wandering and clunks that new shocks alone will not fix. If the truck already has play in tie rods or ball joints, suspension upgrades should not happen around worn steering parts. Fix the foundation first.

Air springs and helper systems

Air helper springs are one of the smartest solutions for trucks that tow or haul inconsistently. They let you add support when loaded without committing to a permanently harsh spring rate. They are not a substitute for badly overloaded operation, but they are extremely useful for trailers, slide-in setups, and bed cargo that changes week to week.

Match the upgrade to the use case

The most effective truck suspension upgrade guide is not built around the biggest lift or the most expensive hardware. It is built around the problem you are trying to solve.

For daily driving and better street manners

Start with quality shocks or struts, inspect bushings, and replace worn components before adding height. If you want a cleaner stance, a mild level paired with properly sized tires usually delivers the visual improvement people want without forcing major geometry compromises. This is often the sweet spot for owners who want a truck that looks sharper and feels more planted every day.

For towing and hauling

Focus on rear spring support, shock control, and load stability. Helper springs, upgraded leaf packs, or air support systems often do more for a tow rig than a front-end level. If you do level the truck, think about how it will sit with trailer weight attached. A truck that looks perfect empty can become nose-high or unstable once loaded.

For off-road and larger tires

Ground clearance and wheel travel matter, but so do damping, component strength, and alignment. A quality suspension system with matched shocks, springs, and arms is worth more than stacking spacers to clear a big tire. Off-road builds also need honest attention to tire rubbing, wheel offset, and driveline angles. The cleanest build is the one that works through full travel, not just the one that photographs well parked on level ground.

Common mistakes that cost money later

The first mistake is buying for appearance only. There is nothing wrong with wanting a better stance, but once the truck rides worse, wears tires unevenly, or loses towing confidence, that cheap visual upgrade gets expensive.

The second is mixing random parts with no plan. New front spacers, old rear shocks, oversized tires, and worn control arm bushings create a truck that feels patched together. Suspension works as a system. Even basic builds benefit from choosing parts that complement each other.

The third is ignoring payload and accessory weight. A steel bumper, winch, toolbox, rack, or larger wheel and tire package changes how the truck sits and responds. Added weight should be part of the spring and shock decision from the start.

The fourth is skipping alignment and fitment checks. Every height change deserves a proper alignment. Tire clearance should be checked at full lock and compression, not just at ride height in the driveway.

How to build the right package

Start by setting a clear priority: load support, ride quality, off-road control, or stance. Then inspect the current suspension honestly. If factory parts are tired, replacing them with quality components may transform the truck before any lift is added.

Next, plan around tire size. Many suspension decisions are really tire decisions in disguise. The jump from stock-size rubber to a wider or taller tire can change clearance, steering feel, road noise, and effective gearing. Pick the tire target first, then choose the suspension that supports it properly.

After that, decide how much adjustability you actually need. Some owners benefit from adjustable coilovers or air support because their use changes often. Others are better served by a fixed, durable setup with fewer moving parts and less maintenance.

Budget should include the supporting pieces, not just the headline kit. Alignment, hardware, control arms, bump stops, and installation all count. Spending slightly more on a complete setup usually costs less than correcting a compromised build later.

When stock-style replacement is the smarter move

Not every truck needs an aggressive upgrade path. If your truck is mostly stock, used for commuting, light hauling, and occasional trips, premium replacement shocks and springs may be the right call. You keep factory-like geometry, improve control, and avoid chasing secondary issues caused by unnecessary height.

That approach is especially smart for buyers who care about long-term reliability and clean fitment. A truck can feel tighter, carry itself better, and still maintain the balanced engineering that made it useful in the first place.

What a good upgrade should feel like

The right setup should make the truck feel more settled, not more dramatic. Steering should be more predictable. Impacts should be controlled instead of bouncy. Loaded behavior should inspire confidence. And if style is part of the plan, the truck should sit with intention rather than looking like parts were added one at a time without a final picture in mind.

That is the standard worth aiming for. Choose suspension parts the same way you choose any serious truck component – by material quality, fitment, and real-world purpose. When the setup matches the job, you do not just get more height or stiffer springs. You get a truck that feels finished.

How to Buy Aftermarket Ignition Coils

A rough idle after a rainy morning, a flashing check engine light under load, or a misfire that shows up only when the engine is hot – this is usually where the search begins. If you’re figuring out how to buy aftermarket ignition coils, the goal is not just to find a part that bolts in. The goal is to buy a coil that matches your vehicle, your engine’s demands, and the level of reliability you expect from a daily driver, work truck, Jeep, or performance-focused build.

How to buy aftermarket ignition coils without guessing

Ignition coils look simple from the outside, but they do a precise job. They step up battery voltage into the high voltage needed to fire the spark plugs. When the coil is weak, inconsistent, or poorly matched, the symptoms can mimic other problems: hard starts, hesitation, reduced fuel economy, and intermittent misfires. That is why buying on price alone is usually where mistakes happen.

Start with fitment first. Year, make, model, engine size, and sometimes production date all matter. Many vehicles have multiple ignition setups within the same model year, especially across trim levels or engine variants. A V6 and V8 version of the same truck may use completely different coil designs. Even within one engine family, connector shape, boot length, mounting points, and electrical characteristics can vary.

If your vehicle uses coil-on-plug units, precision matters even more because each coil sits directly on the spark plug. A small mismatch in dimensions or connector design can create installation issues or unreliable contact. For older distributorless systems or coil packs, mounting pattern and output specifications still need to line up exactly.

Know why you’re replacing the coil

Before you buy, be clear about the reason for replacement. If one coil has failed on a higher-mileage vehicle, you may be deciding between replacing the bad unit only or replacing a full set. There is no one rule here.

If the coils are aging evenly and the vehicle has a lot of miles, a complete set can make sense. It saves repeat labor and helps keep ignition performance consistent across all cylinders. If one coil failed because of an isolated issue, like oil intrusion from a leaking valve cover gasket or a cracked housing, replacing only the affected coil may be the smarter move. The trade-off is simple: lower up-front cost versus more uniform long-term reliability.

This is also the point where you should think about spark plugs and boots. A worn plug can overload a new coil. If the plug gap has opened up beyond spec, the coil has to work harder to produce enough voltage. Buying new aftermarket ignition coils without checking plug condition is one of the easiest ways to shorten coil life.

Quality matters more than marketing claims

The aftermarket gives you options, which is good, but it also creates noise. Some ignition coils are built to OE-style standards with strong insulation, stable winding quality, and durable boots. Others are built to hit a low price point and little else.

Look for details that actually matter: housing quality, heat resistance, proper insulation, connector integrity, and application-specific design. Good coils are built to handle thermal cycling and engine-bay vibration over time. Cheap coils may work out of the box and then become inconsistent once heat builds up.

Be careful with vague performance claims. A listing that promises huge horsepower gains from ignition coils alone should raise questions unless the vehicle is genuinely modified and the factory coils are a known limitation. On most stock daily-driven vehicles, the right aftermarket coil should restore proper operation, not transform the engine into something it is not.

That does not mean upgrade coils are never worth it. If you run forced induction, aggressive tuning, or a demanding towing setup, a higher-performance coil may make sense. But for most buyers, the best purchase is the coil that meets or exceeds OE performance, fits correctly, and delivers stable ignition under normal and heavy use.

Material and build details to pay attention to

Heat and vibration are the enemies. Coils live in a harsh environment, especially on modern engines with tight packaging. Better materials help manage that stress. The plastic housing should feel substantial, not brittle. The boot should be made from quality insulating material that resists cracking and carbon tracking. Electrical terminals should be cleanly finished and well protected.

You may not always see internal winding quality from a product page, but you can judge whether the part is presented with real application data and usable specifications. Clear fitment information usually signals a more serious product than generic copy with broad claims.

How to compare aftermarket ignition coil options

When you compare products, think in layers. First is exact fit. Second is intended use. Third is brand confidence and warranty support.

Exact fit means the part is listed for your specific vehicle and engine. Intended use means choosing between OE-style replacement and performance-oriented upgrade. Brand confidence means buying from a seller that treats ignition parts like critical components, not generic shelf inventory.

Warranty matters, but it should not be the only deciding factor. A long warranty looks good on paper, but it does not help much if installation is difficult, quality is inconsistent, or claim support is unclear. Product consistency and reliable fitment usually save more time than a generous warranty on a questionable part.

For shops and repeat buyers, supplier reliability matters just as much as product quality. Consistent inventory, clean application data, and straightforward ordering can be the difference between a quick repair and a vehicle taking up bay space longer than necessary.

Watch for the common buying mistakes

The biggest mistake is assuming all coils are interchangeable if they look similar. They are not. Small differences in resistance, output curve, connector style, or boot length can affect performance and durability.

Another common mistake is replacing the coil without diagnosing the cause of failure. If oil or coolant is getting into the spark plug well, the new coil may fail again. If the real issue is a bad plug, wiring problem, or PCM-related fault, the coil may not fix the misfire at all.

Buyers also get into trouble when mixing random coils across cylinders. On some vehicles, this may work temporarily, but mixed quality and inconsistent output can create uneven ignition behavior. If you’re replacing multiple units, it is better to keep the set consistent.

Then there is the temptation to choose the cheapest option available. That can work for some non-critical parts. Ignition coils are not where most drivers want to experiment. If the part fails, you are back to misfires, drivability complaints, and wasted install time.

A practical checklist for how to buy aftermarket ignition coils

Before you place the order, confirm the vehicle details exactly as they appear in registration or VIN-based fitment data. Verify the engine, ignition type, and whether your vehicle uses individual coils or a coil pack. Check whether your issue calls for one replacement coil or a full set, and inspect spark plugs and plug wells at the same time.

Next, choose the right level of part. For a stock commuter, OE-style quality is usually the correct move. For a modified engine, look at upgrade coils only if the application truly supports them. Compare housing quality, connector design, and fitment notes instead of buying from the biggest claim on the page.

Finally, buy from a source that understands both maintenance and performance categories. That matters because the best ignition part is not only electrically correct. It also needs to match the way the vehicle is used, whether that means school runs, jobsite miles, weekend trail duty, or long highway towing.

When aftermarket is the right move

Aftermarket ignition coils make sense when you want strong availability, competitive pricing, and options that match your vehicle and driving style. A good aftermarket part can deliver dependable OE-level performance, and in some cases a worthwhile upgrade path, without forcing you into limited choices.

That said, aftermarket is only a good value when the part is chosen carefully. Fitment accuracy, material quality, and honest application data matter more than flashy language. That is where a product-driven supplier earns trust. FORTLUFT approaches parts the same way enthusiasts and practical buyers do – function first, with the confidence that quality components should look and feel like they belong on the vehicle.

If you’re buying ignition coils, think beyond the checkout button. The right part should install cleanly, fire consistently, and disappear into the background the way a well-made component should. That is the standard worth paying for.

How to Diagnose Ignition Coil Problems

A rough idle that shows up out of nowhere, a flashing check engine light under load, or a crank-no-start that feels random – those are the moments when knowing how to diagnose ignition coil faults saves time, money, and a lot of guesswork. The coil sits at the center of spark delivery, and when it gets weak or fails outright, the engine usually tells you fast.

What an ignition coil actually does

Your battery only delivers low voltage. The ignition coil transforms that into the high voltage needed to fire the spark plugs. On older vehicles, one coil might feed multiple cylinders through plug wires. On many modern cars, trucks, Jeeps, and SUVs, each cylinder has its own coil-on-plug unit.

That design affects diagnosis. A single bad coil on a coil-on-plug setup may cause one-cylinder misfire symptoms. On a distributor or coil-pack system, one failing unit can affect multiple cylinders at once. Same basic part, different failure pattern.

Common signs before you diagnose ignition coil failure

An ignition coil rarely fails in a dramatic, cinematic way. More often, performance drops first. The engine may stumble under acceleration, idle unevenly, or hesitate during cold starts. Fuel economy can dip because the air-fuel mixture is no longer burning consistently.

You may also notice a check engine light with misfire-related trouble codes. Codes like P0300 for random misfire or P0301 through P0308 for cylinder-specific misfires are common clues. If the vehicle shakes at idle and smooths out slightly at higher rpm, that can point to a weak coil, but it can also be spark plugs, injectors, vacuum leaks, or compression issues. That is where real diagnosis matters.

Symptoms that often get mistaken for a bad coil

Spark plugs with excessive wear, oil in the plug wells, damaged connectors, low battery voltage, and even a failing fuel injector can mimic coil problems. A bad coil can also damage a plug, and a bad plug can overload a coil. If you replace one without checking the other, the fix may not last.

How to diagnose ignition coil step by step

The fastest way to diagnose an ignition coil is to combine scan data, visual inspection, and a targeted test rather than replacing parts based on symptoms alone.

Start with codes and freeze-frame data

Use a scan tool before touching anything. Look for active and stored codes, then note which cylinder is involved if the code is cylinder-specific. Freeze-frame data helps you see when the fault happened – cold start, idle, hard acceleration, or highway cruise. That context matters because some coils fail only when hot or only under load.

If you have a P0304, for example, cylinder 4 becomes your starting point, not your conclusion. The code tells you where the misfire is detected, not always what caused it.

Inspect the coil and surrounding parts

Remove the engine cover if needed and inspect the suspect coil. Look for cracks in the housing, carbon tracking, melted plastic, corrosion in the connector, or oil and moisture in the spark plug tube. On coil-on-plug systems, valve cover gasket leaks are a frequent hidden cause of ignition trouble because oil contamination can affect both the boot and the plug.

Check the harness too. A loose connector or damaged wire can interrupt the coil trigger signal and look exactly like a failed coil.

Check the spark plug before blaming the coil

Pull the spark plug from the affected cylinder. If the plug is heavily worn, fouled, oil-soaked, or has an incorrect gap, the coil may not be the root problem. Installing a fresh coil on a worn-out plug is like asking one new component to compensate for a failing one beside it. It can work for a moment, but it is not a clean repair.

This is one of the biggest trade-offs in ignition diagnosis. If mileage is high and plugs are overdue, replacing only the coil may get the engine running better, but not necessarily right.

Swap-test the coil when the system allows it

On coil-on-plug engines, the simplest field test is often a coil swap. Move the suspected coil to another cylinder, clear the codes, and run the engine again. If the misfire code follows the coil from cylinder 4 to cylinder 2, for example, you have strong evidence the coil is bad.

If the misfire stays on the original cylinder, the problem is more likely the spark plug, injector, compression, or wiring. This test is quick, practical, and hard to beat on modern engines.

It does have limits. Some intermittent coils fail only when fully heat-soaked, and some vehicles make coil access time-consuming. But when access is reasonable, this is one of the most efficient ways to diagnose.

Test for spark if the engine will not start

If the engine cranks but does not start, check whether the coil is producing spark. Use a proper spark tester rather than improvising with a loose plug against metal. A bright, consistent spark suggests the coil is at least functioning. Weak or absent spark points you toward the ignition circuit.

If there is no spark, do not stop at the coil itself. Verify power supply to the coil and confirm the control signal from the PCM. A coil cannot fire if it is not being commanded.

Use a multimeter carefully

Some service information includes primary and secondary resistance specs for ignition coils. If specs are available for your exact application, a multimeter can help identify an open or shorted coil winding. Measure resistance only according to the manufacturer procedure.

That said, resistance testing has limits on many modern coils. A coil can pass a basic ohms test and still fail under heat and load. This is why real-world symptom testing and swap testing are often more useful than bench-style resistance checks alone.

Consider heat-related failure

A vehicle that runs well cold and misfires after 20 minutes may have a coil breaking down internally as temperature rises. In those cases, diagnosis may require running the engine until the symptom appears, then testing immediately. Intermittent faults are frustrating because they reward patience more than speed.

When the problem is not the coil

If you have confirmed power and command at the connector, the spark plug is good, and the misfire does not follow the coil during a swap, expand the search. Fuel injector pulse, intake leaks near that cylinder, and compression loss all belong on the table.

A burned valve, for example, can trigger the same cylinder-specific misfire code as a bad coil. So can a leaking intake gasket on certain engines. Good diagnosis is not about forcing every symptom into one category. It is about eliminating the wrong categories quickly.

Should you replace one coil or all of them?

It depends on mileage, failure pattern, and budget. If one coil has clearly failed and the others are not showing signs of age or heat damage, replacing just the bad unit is reasonable. If the vehicle has high mileage and the coils are original, replacing multiple coils may reduce the chance of repeat repairs.

There is no universal rule here. For a daily driver where uptime matters, a broader refresh can make sense. For a lower-mileage vehicle with one isolated failure, targeted replacement is often the smarter move.

Parts quality matters more than it seems

Ignition parts are not a good place to gamble on questionable quality. A poorly made coil may work out of the box and still create a comeback issue weeks later. Fitment, connector quality, insulation, and heat resistance all matter, especially in modern engine bays where temperatures run high.

That is why buyers who care about reliable repair results tend to shop with the same discipline they use for performance upgrades. Whether the goal is clean drivability or dependable work-truck service, the right ignition components should perform with precision, not just fit the hole. That mindset is part of what makes aftermarket maintenance more than basic replacement – technology as an art form, done right.

A practical call on DIY vs. shop diagnosis

If your vehicle has easy coil access, a scan tool, and a clear cylinder-specific misfire, this is a realistic DIY job. If the intake manifold has to come off, the misfire is intermittent, or wiring diagnostics are involved, professional testing may save money in the long run.

The smart move is not always the cheapest move up front. It is the one that gets you to the actual fault without stacking unnecessary parts.

How to avoid repeat ignition coil failure

Once you fix the issue, look at the conditions that may have caused it. Replace worn plugs on schedule. Repair oil leaks into plug wells. Make sure connectors lock securely and battery voltage stays healthy. A new coil installed next to an old problem usually becomes an old problem too.

If you are sorting out a rough-running engine, stay methodical. The best answer to how to diagnose ignition coil trouble is not a shortcut – it is a clean process that tells you whether the coil is truly the weak link or just the first part that got blamed.

How to Replace Wiper Blades the Right Way

That streak across the windshield is not just annoying – it is your cue. If you are searching for how to replace wiper blades, the job is usually simpler than most drivers expect, but only if you get the fitment and attachment right. A clean, quiet wipe comes down to matching the correct blade style to your vehicle and installing it without forcing anything.

Wiper blades sit in that category of parts people tend to ignore until visibility drops in the middle of rain, sleet, or road spray. Then they become one of the most important safety items on the vehicle. For cars, trucks, Jeeps, and SUVs, replacing them on time is basic maintenance. Doing it correctly also protects your windshield from unnecessary scratching and your wiper arm from damage.

How to replace wiper blades without guesswork

The first step is not pulling the old blades off. It is confirming what your vehicle actually uses. Wiper blades vary by length, attachment style, and frame design. A blade that is close in size but not exact can chatter, miss sections of glass, or sit with uneven pressure.

Many vehicles use different lengths on the driver and passenger sides. Some also have a rear wiper with its own dedicated fitment. If you drive a truck or SUV, do not assume the front pair matches side to side. Check your owner’s manual or verified fitment data before you buy.

You also need to know the blade type. Traditional frame-style blades are common and cost-effective. Beam blades use a more streamlined design with even pressure across the windshield and usually perform better in heavy weather. Hybrid designs split the difference. There is no single best option for every vehicle – climate, driving habits, and windshield shape all matter.

Before you remove the old blades

Park on a level surface and turn the vehicle off. If your vehicle has a service position for the wipers, use it. On some newer models, especially those with wipers that park low under the hood line, you may need to activate a maintenance mode before lifting the arms.

Lift the wiper arm carefully. Do not let it snap back onto the glass. That metal arm can crack or chip a windshield fast. A folded towel on the windshield where the arm would land is cheap insurance.

Take a close look at how the old blade connects. This matters more than people think. The most common connector is a J-hook, but side pin, bayonet, top lock, and pinch tab styles are also out there. If the new blade includes several adapters, compare them carefully before removing anything. A rushed install usually turns into a blade that feels attached but is not fully locked in.

Removing the old blade

On a J-hook arm, rotate the blade so it is perpendicular to the arm. You will usually find a small tab where the hook meets the blade adapter. Press or lift that release, then slide the blade downward to free it from the hook. Once it disengages, the blade will come off.

On a pinch tab design, squeeze both sides of the adapter and slide the blade away from the arm. On top lock or side pin styles, the release method depends on the exact adapter, but it is usually a button, tab, or sliding cap. The key point is simple: if it does not move with moderate hand pressure, stop and reassess. Wiper hardware is not the place to use brute force.

Once the blade is off, set it aside and compare it to the replacement. Length should match exactly unless your fitment source specifically calls for a different updated size.

Installing the new blade correctly

If you are learning how to replace wiper blades for the first time, this is where patience pays off. Start by selecting the correct adapter for your wiper arm, if the blade does not come preconfigured. Most quality replacements are designed to work with multiple arm types, but only one adapter will be right for your vehicle.

For a J-hook, thread the hook through the adapter opening and pull the blade upward until it clicks into place. Give it a light tug to confirm it is locked. For pinch tab, side pin, or top lock systems, align the blade exactly with the arm and press or slide it in until the retention mechanism clicks. You should not have to bend the arm or twist the blade at an awkward angle.

Once installed, lower the arm gently back onto the windshield. Repeat the process on the other side. If your vehicle has a rear wiper, the procedure is often similar but scaled down. Rear blades are more likely to use model-specific designs, so fitment is especially important.

How to replace wiper blades on newer vehicles

Newer vehicles can add one extra layer: electronic park positions and tighter cowl clearances. On some models, the wiper arms cannot be lifted normally because the hood edge blocks them. In those cases, the vehicle may require a short ignition and stalk sequence to move the wipers into service mode.

That is not a complication so much as a detail. The real mistake is forcing the arm upward when it is not meant to move. If the arm feels blocked, do not pry it. Check the owner’s manual and move the system into its intended maintenance position first.

Vehicles with advanced driver assistance systems do not usually require recalibration after a blade swap alone, but it is still smart to avoid leaning heavily on the windshield near cameras or sensors while you work.

Common mistakes that cause noise and streaks

A new blade should improve visibility immediately. If it chatters, skips, or leaves lines, something is off. The blade might be the wrong length, the adapter may not be fully seated, or the windshield itself could be the problem.

Dirty glass is a major cause of poor performance. Road film, bug residue, wax overspray, and washer fluid buildup can all make a fresh blade act worn out. Before testing the new set, clean the windshield thoroughly with a proper automotive glass cleaner or soap and water. Wipe the rubber edge too if it picked up dust during installation.

Another issue is a bent wiper arm. If the old blade wore unevenly or the new one only contacts part of the glass, the arm spring tension or alignment may be off. At that point, replacing blades alone may not solve it.

And then there is the classic mistake: installing the protective shipping cover side or leaving a transport sleeve on the rubber element. It sounds obvious, but it happens.

When to replace wiper blades

Most drivers should inspect blades every few months and expect replacement roughly every six to twelve months, depending on climate and use. Hot sun hardens rubber. Ice and snow can tear edges. Dust and road grit wear the wiping surface faster than people realize.

If you hear squeaking, see streaking, notice split rubber, or find areas of missed contact, it is time. Waiting too long does not save money if poor blades reduce visibility when conditions turn bad.

This is also one of those maintenance items where premium materials can make a real difference. Better rubber compounds, stronger beam construction, and more precise fitment tend to hold up longer and perform better at highway speed. Not every vehicle needs the most expensive blade available, but the cheapest option is not always the best value either.

Choosing the right replacement blade

A practical choice starts with fitment, then moves to driving conditions. If your vehicle sees mostly city use in mild weather, a standard blade may do the job just fine. If you drive long highway miles, deal with winter storms, or want a cleaner low-profile look, beam blades are often worth the upgrade.

Design matters here too. On a vehicle where every visible component counts, even a maintenance part should look like it belongs. That is part of the appeal of modern aftermarket components – function first, but not at the expense of finish. A well-made blade should install cleanly, perform quietly, and complement the vehicle rather than look like an afterthought.

If you are sourcing replacement parts through FORTLUFT, that same mindset applies: practical maintenance with fit, quality, and presentation in balance.

Final check after installation

Once both blades are on, run the washer fluid and cycle the wipers at low and then medium speed. Watch for full glass contact, quiet movement, and secure attachment. If one blade seems loose or leaves a wide untouched section, stop and inspect the connection again.

The job only takes a few minutes, but the payoff shows up every time the weather turns. Clear visibility is not a luxury item. It is one of the simplest upgrades you can make to the way your vehicle feels on the road – controlled, ready, and finished the way it should be.

Catalytic Converter Replacement Guide

A failing converter rarely announces itself at a convenient time. More often, it shows up as a check engine light, a sulfur smell, sluggish acceleration, or a failed emissions test right when you need the vehicle working. This catalytic converter replacement guide is built for drivers and buyers who want a clear path from diagnosis to the right replacement part without wasting time or money.

The converter sits at the center of emissions control, but the buying decision is not just about compliance. Fitment, substrate quality, shell construction, sensor placement, and state requirements all matter. On trucks, Jeeps, SUVs, and daily drivers alike, the right replacement needs to do two jobs well – restore function and fit the vehicle correctly the first time.

What a catalytic converter actually does

A catalytic converter reduces harmful exhaust emissions by triggering chemical reactions inside the exhaust stream. Its internal substrate is coated with precious metals that help convert pollutants like carbon monoxide, hydrocarbons, and nitrogen oxides into less harmful gases before they exit the tailpipe.

When the converter is working properly, you usually do not think about it. When it starts to fail, performance and drivability can suffer along with emissions compliance. That is why replacement is often both a repair decision and a legal one, depending on your state and vehicle application.

Signs you may need a replacement

Some failures are obvious, while others overlap with ignition, fuel, or sensor issues. The most common warning sign is a check engine light tied to catalyst efficiency codes such as P0420 or P0430. That said, those codes do not automatically mean the converter itself is bad. Upstream engine problems can damage a good converter or trigger misleading readings.

You may also notice reduced throttle response, poor fuel economy, excess exhaust heat, rattling from a broken substrate, or a rotten egg smell. In more severe cases, a clogged converter can create backpressure that makes the engine feel choked under load.

If the converter was stolen, the symptoms are immediate and dramatic – louder exhaust, strong fumes, and often visible cut sections in the exhaust pipe. In that case, the replacement path is usually straightforward, but you still need to confirm the exact configuration before ordering.

Catalytic converter replacement guide: diagnose before you buy

The smartest replacement starts with confirming the root cause. If you skip diagnosis and install a new converter on an engine with unresolved misfires, oil burning, coolant intrusion, or a bad oxygen sensor, the new unit may fail early.

Start by scanning for codes and reviewing freeze-frame data if available. Check for misfires, rich or lean conditions, and sensor faults. Inspect the exhaust for leaks before and after the converter, since leaks can affect oxygen sensor readings and mimic catalyst issues. If the engine is consuming oil or coolant, address that first.

Physical inspection helps too. A converter that rattles internally often has a broken substrate. A unit that glows excessively after driving may be overheating due to unburned fuel entering the exhaust. If theft is involved, inspect nearby pipes, flanges, and sensor wiring so you know whether you need only the converter or additional exhaust components.

Choosing the right replacement converter

Fitment comes first. You need to match year, make, model, engine size, drivetrain where relevant, and emissions configuration. Some vehicles use direct-fit assemblies with flanges, bends, heat shields, and sensor ports positioned for a clean installation. Others can accept universal converters, but those require cutting and welding and are usually better suited to experienced installers or shop work.

Material and construction matter more than many buyers realize. A well-made shell resists corrosion and heat cycling better, especially in regions with road salt or vehicles that see heavy-duty use. Clean welds, consistent port placement, and proper hanger geometry all affect how smoothly the install goes.

Converter loading and certification also matter. Not every aftermarket converter is legal for every vehicle in every state. California and states following California Air Resources Board standards have stricter requirements than federal EPA applications. Before purchase, confirm whether your vehicle needs a CARB-compliant unit or an EPA-compliant unit. That detail is not optional.

Price is part of the equation, but it should not be the only filter. A lower-cost unit may work fine for an older vehicle in a federal-emissions state, while a stricter application may demand a more specific and more expensive replacement. The right choice depends on where the vehicle is registered, how long you plan to keep it, and whether you want the fastest install or the lowest upfront cost.

Direct-fit vs universal converters

Direct-fit converters are usually the better choice for most retail buyers. They are designed around the vehicle layout, which reduces fabrication work and lowers the risk of poor alignment, exhaust leaks, or sensor placement issues. On many modern vehicles, that convenience is worth paying for.

Universal converters can make sense if the vehicle is older, custom exhaust work is already in place, or you are working with a shop that can weld and fabricate properly. They can also be useful in certain repair scenarios where only a section of the system needs to be replaced. The trade-off is more labor, more room for installation error, and more responsibility to confirm compliance.

What replacement usually costs

Catalytic converter replacement cost varies widely by vehicle and by emissions standard. A straightforward aftermarket direct-fit unit on a common vehicle may be relatively manageable, while a multi-converter setup on a late-model truck or SUV can become expensive quickly.

Labor adds another layer. If rusted hardware, seized fasteners, damaged flanges, or stolen sections of pipe are involved, install time goes up. Oxygen sensors may also need replacement if threads are damaged or sensor faults contributed to the original problem. It is often smart to inspect gaskets, clamps, and adjacent exhaust sections at the same time so the repair is complete rather than temporary.

Installation basics that matter

If you are handling the repair yourself, work safely and verify you have the correct tools before starting. Exhaust components get extremely hot, so the system must be cool. Penetrating oil, proper support stands, and the right sockets can save a lot of frustration on corroded hardware.

Disconnecting oxygen sensors carefully is important. Cross-threaded sensors or damaged connectors can turn a simple job into a longer one. During installation, mating surfaces need to be clean, gaskets positioned correctly, and fasteners tightened evenly to avoid leaks.

After installation, clear any stored codes and complete a proper drive cycle if needed so the vehicle can run its emissions monitors. If the check engine light returns, do not assume the new converter is defective. Recheck sensor performance, fuel control, and any upstream engine conditions that may still be present.

Legal and emissions considerations

Converter replacement is one of those categories where legality and fitment are closely tied. Federal law prohibits tampering with emissions equipment, and state-level rules can be even more specific. That means the replacement part has to match the vehicle’s emissions certification requirements, not just the pipe diameter or engine size.

For buyers in emissions-testing states, this is especially important. Ordering the wrong unit can mean a second round of parts, labor, and downtime. For shops and resellers, accurate application matching protects both the customer and the business.

Buying with confidence

A good purchase process is simple on the surface and technical underneath. You want clear application data, transparent emissions information, and construction quality that supports real-world use on daily drivers, work trucks, and enthusiast vehicles. That is where a product-focused supplier stands out. FORTLUFT approaches exhaust components with the same mindset it brings to the rest of the catalog – practical fitment first, with attention to materials, finish, and long-term value.

When replacement is the right call

Not every catalyst code means immediate replacement, but a damaged, clogged, stolen, or legally failed converter usually does. The key is not rushing the wrong fix. Confirm the cause, verify your emissions standard, choose the right style for the vehicle, and pay attention to the surrounding hardware that makes the install hold up.

A converter is not the flashiest part under a vehicle, but when it is chosen correctly, everything feels right again – quieter operation, cleaner emissions, restored performance, and no guesswork hanging over the next inspection.

All Terrain vs Mud Tires: Which Fits?

You feel the difference before you even look at the tread. One tire hums on the highway, tracks clean in rain, and still handles a fire road on the weekend. The other announces itself with deeper voids, heavier lugs, and a clear message: it was built for mud first. When comparing all terrain vs mud tires, the right choice comes down to where your vehicle actually spends its time, and how much compromise you are willing to accept on pavement.

For truck, Jeep, and SUV owners, this is not just a styling decision. Tire choice changes braking feel, steering response, cabin noise, fuel economy, tread life, and off-road confidence. Aggressive sidewalls may look right at home under a lifted setup, but the best-looking tire is not always the best-performing one for your daily route.

All terrain vs mud tires: the real difference

At a glance, both tire types look more capable than a standard highway tire. The gap shows up in tread design and how that design behaves across different surfaces.

All-terrain tires are built to cover mixed use. They usually have tighter tread blocks than mud-terrain tires, smaller voids between lugs, and a pattern meant to keep enough rubber in contact with the road. That gives them more predictable on-road manners while still delivering solid traction on gravel, dirt, light mud, sand, and snow.

Mud-terrain tires are more specialized. They use larger tread blocks, deeper voids, and a more open pattern that helps eject mud rather than pack it in. Many also feature reinforced sidewalls and more aggressive shoulder lugs for better grip in ruts, rocks, and sloppy terrain. The trade-off is simple: the same design that bites harder off-road tends to ride rougher and sound louder on pavement.

If your truck is a commuter five days a week and a trail rig twice a month, all-terrain usually makes more sense. If your build regularly sees deep mud, soft ground, and low-speed technical trails, mud-terrain starts to justify its compromises.

Where all-terrain tires make the most sense

All-terrain tires are the better fit for most drivers because most drivers spend most of their miles on pavement. That does not make them soft or limited. A quality all-terrain tire can handle gravel roads, hunting land, construction access roads, forest trails, and moderate weather without turning the daily drive into a penalty.

The biggest advantage is balance. You get better ride comfort, lower road noise, and typically longer tread life than you would with mud tires. On wet pavement, many all-terrain tires also feel more composed because they keep more tread in contact with the surface. Steering is usually more stable, especially at highway speed.

This matters if your vehicle pulls double duty. A half-ton pickup that tows on weekends, a Jeep that sees commuting and camping, or an SUV that handles family miles plus seasonal backroads will often benefit more from an all-terrain setup than a mud-focused one.

There is also the winter question. Some all-terrain tires perform surprisingly well in snow, especially models designed with severe snow capability in mind. Mud-terrain tires can claw through loose slop, but they are not automatically better on packed snow or icy pavement. A more aggressive tread does not always mean a safer tire in winter driving.

When mud tires are worth it

Mud-terrain tires earn their place when the terrain is consistently loose, wet, uneven, and demanding. Deep mud is the obvious example, but they also shine in rocky trails, heavily rutted ground, and off-road conditions where sidewall strength and self-cleaning tread matter more than road comfort.

The open tread pattern helps the tire shed mud as it rotates. That keeps the lugs working instead of turning into smooth, packed rollers. On technical trails, the larger tread blocks and stronger carcass can offer better bite and more durability against cuts and punctures.

If your vehicle is built around off-road use, the noise and wear can be acceptable costs. For example, a weekend trail Jeep, a ranch truck that spends more time in wet fields than on interstate miles, or a purpose-built overland setup used in rough terrain may genuinely need mud tires.

The mistake is buying them for the look alone without accounting for the daily cost. Mud tires can be louder from day one and may get louder as they wear. They often weigh more, which can affect acceleration, braking, and fuel economy. Depending on the tire and rotation schedule, tread wear may also happen faster than expected.

On-road behavior: where most buyers feel the difference

This is where the debate usually gets settled. In normal driving, all-terrain tires are easier to live with.

They tend to track straighter, ride smoother, and create less vibration through the steering wheel and cabin. Road noise is generally lower, especially at highway speeds. For drivers who spend hours commuting, towing, or covering long interstate miles, that comfort adds up quickly.

Mud tires can still be street legal and roadworthy, but they usually ask for more tolerance. Expect more hum, a heavier feel, and sometimes less precise steering response. Braking distances on wet roads can also be a concern depending on the compound and tread design. Not every mud tire behaves poorly on pavement, but very few match a good all-terrain tire for all-around street manners.

Off-road traction: not all dirt is the same

A lot of buyers think off-road use automatically means mud tires. That is too broad.

On gravel, hard-packed dirt, and mixed-use trails, all-terrain tires often perform extremely well. They can conform better to varied surfaces while preserving decent control and stability. In sand, a less aggressive tread can sometimes be an advantage if aired down properly, because it helps the tire float rather than dig.

Mud tires take over once the terrain gets deeper and messier. Thick mud, slick ruts, and jagged rock gardens are where their tread pattern and sidewall design start paying off. If your tire is repeatedly getting clogged and losing traction in those conditions, that is usually the sign that an all-terrain tire is being pushed past its ideal use case.

Cost, tread life, and daily value

Tire pricing varies by size and brand, but mud-terrain tires are often more expensive to buy and more expensive to live with. Their aggressive tread can wear faster, and their extra weight may chip away at fuel economy. Some drivers also end up replacing suspension or steering components sooner when heavier wheel-and-tire packages become part of the build.

All-terrain tires usually offer better long-term value for mixed-use drivers. They tend to last longer, create less fatigue on long drives, and deliver stronger everyday versatility. If you are trying to get the most use out of one set of tires year-round, all-terrain is typically the more efficient purchase.

That said, value is about fitment, not just lifespan. A mud tire that gets you through the terrain you actually drive is a better value than an all-terrain tire that leaves you stuck.

How to choose between all terrain vs mud tires

Start with an honest split of your mileage. If 70 to 80 percent of your driving happens on pavement, all-terrain is usually the smarter answer. If your vehicle regularly sees deep mud, trail obstacles, and low-speed off-road work where traction is the priority, mud-terrain deserves a serious look.

Then think about your tolerance for compromise. Are you fine with more noise for more off-road grip? Do you care about clean highway tracking, wet-road confidence, and lower rolling resistance? Be realistic. A tire can be capable and still be wrong for your day-to-day use.

Vehicle type matters too. A lightly modified SUV used for commuting and outdoor trips has different needs than a lifted Jeep on beadlocks or a diesel truck working on rough land. Matching the tire to the job will always outperform choosing based on appearance alone.

Finally, consider your full setup. Wheel size, load rating, suspension geometry, and tire pressure all affect performance. The right tread pattern works best when the rest of the package makes sense. That is where a product-focused retailer like FORTLUFT fits the modern buyer – capability, fitment, and style should work together, not compete.

The better tire is the one that matches your real miles

There is no universal winner in all terrain vs mud tires. There is only the better match for how your truck, Jeep, or SUV is used. If you want broad capability with stronger on-road behavior, all-terrain is the proven choice. If your route includes serious mud and rough trail conditions often enough to justify the trade-offs, mud tires are doing exactly what they were built to do.

Choose for the miles you actually drive, not the image you want to project. A tire that fits your terrain, your vehicle, and your expectations will always look better once the road runs out.

10 Best Aftermarket Exhaust Tips

A good exhaust tip does two things at once – it cleans up the rear profile of the vehicle and finishes the exhaust system with intention. That is why shoppers looking for the best aftermarket exhaust tips usually are not just chasing a flashier look. They want the right material, the right fit, and a style that feels factory-level or better.

On a daily driver, truck, Jeep, or SUV, the wrong tip can look oversized, discolor too quickly, or sit awkwardly under the bumper. The right one makes the whole vehicle look more complete. Technology as an art form only works when the details are right.

What makes the best aftermarket exhaust tips?

The answer starts with material, then moves to fitment, finish, and shape. Stainless steel remains the safest choice for most buyers because it balances appearance, corrosion resistance, and long-term value. If you want a cleaner look that holds up through weather, road grime, and regular use, stainless is usually the standard to beat.

Carbon fiber styles can deliver a more aggressive, premium finish, especially on newer performance builds and modern SUVs. But this is also where trade-offs matter. A carbon fiber tip can look exceptional when the design is well executed and the vehicle suits it, yet it is often less universal in appearance than polished or black stainless. If the rest of the build is understated, carbon fiber can either elevate it or feel out of place.

Construction matters as much as the outer finish. Look for solid weld quality, smooth edges, and a thickness that does not feel flimsy. A cheap tip can look acceptable in product photos and still disappoint once installed. Thin metal, poor clamps, and weak finish quality tend to show up fast.

Best aftermarket exhaust tips by style

There is no single best option for every vehicle. The best aftermarket exhaust tips depend on the look you want and how the vehicle is used.

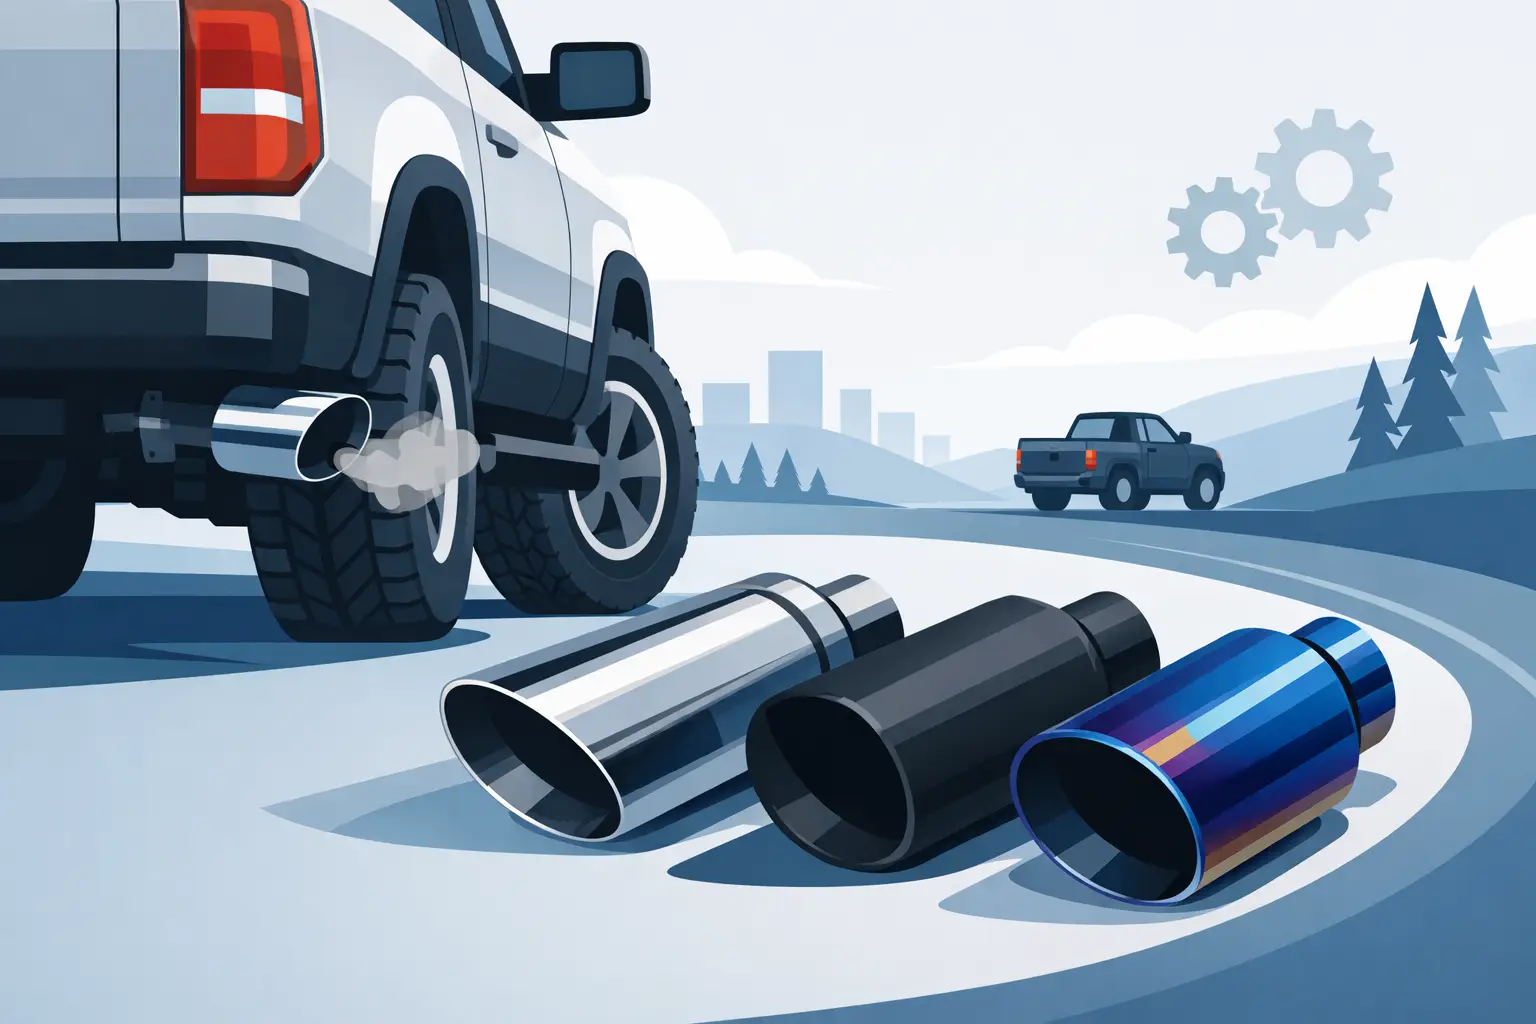
Polished stainless steel

This is the classic choice. Polished stainless works on almost anything – sedans, muscle cars, full-size trucks, Jeeps, and SUVs. It gives a clean, bright finish without trying too hard, and it pairs well with both factory and upgraded exhaust systems.

For buyers who want a safe, versatile option, polished stainless is hard to beat. It looks premium, resists rust well, and usually ages better than bargain chrome-plated alternatives.

Black exhaust tips

Black tips have become a go-to for modern trucks, blackout packages, and performance-oriented builds. They create contrast against lighter paint colors and blend neatly into darker rear valances. If the vehicle already has black wheels, trim, badges, or tow hardware, black tips usually make visual sense.

The trade-off is maintenance and finish quality. A low-grade black coating can fade or show wear faster than polished stainless. A well-made black stainless design is the better route if you want that stealth look to last.

Carbon fiber exhaust tips

Carbon fiber tips bring a sharper, more high-end visual edge. They work especially well on newer sport sedans, tuned imports, luxury SUVs, and builds with other carbon accents. Used correctly, they look intentional and refined.

They are not the most universal style, though. On an older truck or a basic daily driver, the look can feel mismatched unless the rest of the vehicle supports it. Buyers choosing carbon fiber should think about the whole rear-end design, not just the tip itself.

Rolled edge and angle-cut designs

These are shape details, but they change the final look more than many buyers expect. Rolled edge tips often feel more finished and substantial. Angle-cut designs can add a sportier look and better match certain bumper lines.

If you want an OEM-plus result, rolled edge stainless is often the smarter pick. If you want something more aggressive, angle-cut or slant-cut styles usually deliver that faster.

Choosing the right size

Size is where many purchases go wrong. Bigger is not automatically better. An oversized tip can dominate the rear of the vehicle and make the exhaust look added on instead of integrated.

Start with inlet diameter. That needs to match your exhaust pipe size correctly. A mismatch creates installation problems and can affect how securely the tip mounts. Then look at outlet size. This is the visible dimension, and it should fit the scale of the bumper opening and the vehicle itself.

A compact car usually looks better with a restrained outlet. A full-size truck or SUV can carry a larger, more pronounced tip without looking exaggerated. Length matters too. If the tip extends too far past the bumper, it can look unfinished. Too short, and it may disappear underneath the vehicle.

Clamp-on vs. weld-on exhaust tips

Both styles can be the right answer.

Clamp-on tips are practical for many DIY buyers because installation is simpler and replacement is easier later. If you want to update the look without committing to fabrication work, clamp-on makes sense. Quality still matters here. A poor clamp design can shift over time or fail to hold alignment.

Weld-on tips are often the better choice for a cleaner, more permanent result. They tend to sit more securely and can offer a more custom appearance. For shops and experienced installers, weld-on tips are often preferred when long-term fit and finish are the priority.

There is no universal winner. If convenience matters most, clamp-on is appealing. If permanence and presentation matter most, weld-on usually comes out ahead.

Material quality matters more than branding hype

When buyers compare exhaust tips, marketing language can get loud fast. The better approach is to focus on what actually affects performance and appearance over time.

304 stainless steel is widely favored for good reason. It offers strong corrosion resistance and maintains its finish better than lower-grade materials. That matters on vehicles exposed to rain, road salt, heat cycles, and daily grime. A tip may not change horsepower in most cases, but it absolutely changes how well the system holds up visually.

Lower-cost materials can still serve a purpose on budget builds, especially if the vehicle is not exposed to harsh conditions. But if you want a tip that keeps its shape, finish, and premium look, stainless is usually worth the extra investment.

Matching the tip to the vehicle

Cars, trucks, Jeeps, and SUVs do not wear the same exhaust tip equally well.

On a sport sedan or coupe, cleaner lines usually win. A polished double-wall tip, black slant-cut style, or compact carbon fiber design can sharpen the rear end without overwhelming it. The goal is precision.

On trucks, scale matters more. A larger outlet, black finish, or bold rolled-edge tip often looks right because the vehicle has the stance to support it. Trucks can also carry more visual weight at the rear, so a stronger tip design tends to feel balanced.

Jeeps and off-road-focused SUVs need a slightly different lens. Appearance matters, but durability and placement matter just as much. A tip that hangs too low or protrudes too far can become a practical issue on rough terrain. In those cases, a more compact, durable stainless design is often smarter than the flashiest option.

What buyers should avoid

The easiest mistake is buying on appearance alone. A tip may look impressive online, but if the inlet size is wrong, the finish is low quality, or the shape does not suit the vehicle, it becomes a poor value quickly.

Avoid ultra-thin construction, vague material descriptions, and finishes that seem designed only for photos. If the product listing does not clearly state dimensions, mounting style, and material type, that is usually a sign to keep moving.

It is also worth avoiding trends that clash with the rest of the build. The best result is not always the loudest one. A well-chosen tip should look like it belongs there.

How to choose the best aftermarket exhaust tips for your build

Think in this order: fitment first, material second, finish third, style last. That sequence protects you from buying something that looks good in theory but disappoints in person.

If you want the broadest all-around recommendation, polished or black stainless steel tips are still the strongest choices for most US drivers. They suit the widest range of vehicles, hold up well, and deliver the clean, upgraded look most buyers actually want.

If your build already leans premium or performance-focused, carbon fiber may be the right move. If your priority is a timeless appearance and dependable durability, stainless remains the benchmark. For buyers shopping a wide range of exhaust components and style-forward fitments, FORTLUFT reflects that same balance of function and finish.

The best exhaust tip is not the one that gets the most attention in a product grid. It is the one that fits correctly, wears well, and makes the rear of the vehicle look finished every time you walk up to it.

Aftermarket Wheel Fitment Guide Basics

A wheel can look perfect in the product photo and still be completely wrong for your vehicle. That usually comes down to fitment, not style. This aftermarket wheel fitment guide is built to help you sort the specs that actually matter before you buy, so your new setup clears the brakes, sits where it should, and drives the way it should.

What matters most in an aftermarket wheel fitment guide

Most fitment mistakes happen because buyers focus on diameter and finish first. Those matter, but they are only part of the picture. Real wheel fitment starts with bolt pattern, wheel width, offset, center bore, and brake clearance. Tire size then has to work with all of it.

If one of those numbers is off, the result can be rubbing on the suspension, contact with the fender liner, a wheel that sits too far inboard, or a setup that pushes too far outside the body. On trucks, Jeeps, and SUVs, aggressive wheel choices can also change steering feel and increase the chance of rubbing at full lock or during suspension travel.

That is why wheel fitment is not just cosmetic. It affects safety, drivability, and the finished stance of the vehicle.

Start with your factory specs

Before comparing aftermarket options, get clear on the original wheel and tire specs for your exact vehicle, trim, and brake package. Factory variations matter more than many buyers expect. A performance trim may have larger brakes. An off-road package may change wheel width or tire diameter. Even within the same model year, there can be differences that affect what fits.

The key factory dimensions to confirm are wheel diameter, wheel width, bolt pattern, offset, center bore, and the stock tire size. If your vehicle is already modified with a lift, leveling kit, lowering springs, spacers, or a brake upgrade, use the current setup as your starting point, not the original brochure specs.

Bolt pattern is non-negotiable

Bolt pattern tells you how many lug holes the wheel has and the diameter of the circle they form. Common examples include 5×114.3, 6×139.7, and 8×170. The first number is the lug count. The second is the bolt circle diameter in millimeters.

This is one spec you cannot approximate. A wheel either matches your hub pattern or it does not. Adapters exist, but they add complexity, change spacing, and are not the right answer for every build. For most buyers, the correct direct-fit bolt pattern is the cleanest and safest route.

If you are shopping for a truck, Jeep, or SUV, double-check this number. Many platforms look similar, but their bolt patterns are not interchangeable.

Offset and backspacing decide where the wheel sits

Offset is one of the most misunderstood wheel specs. It measures the distance between the wheel’s mounting pad and its centerline. Positive offset places the mounting surface closer to the outside face of the wheel, pulling the wheel farther inward. Negative offset pushes the wheel outward for a more aggressive stance.

Backspacing is closely related, but it measures from the mounting pad to the inner edge of the wheel. Both numbers help predict clearance to suspension components, inner fenders, and brakes.

A small offset change can have a big visual and mechanical effect. More aggressive offsets can give a wider stance and more presence, but they may also increase fender rubbing, add stress to wheel bearings over time, and throw more road debris along the body. A more conservative offset keeps the wheel tucked in, though it can create inner clearance issues if the wheel gets too close to struts or control arms.

There is no universal best offset. It depends on your vehicle, wheel width, tire size, ride height, and what kind of look and use you want.

Wheel width affects more than tire fit

Wheel width changes the tire’s shape and how the wheel fills the wheel well. A wider wheel can support a wider tire and sharpen the visual stance, but it also changes sidewall profile and clearance.

For example, a tire mounted on a wider wheel will often have a squarer shoulder and less sidewall bulge. That can improve response on the street, but it may reduce forgiveness over rough surfaces. On a truck or Jeep, too much wheel width can expose the rim more to trail damage if the tire sidewall does not extend beyond it.

The safest approach is to match the wheel width to the tire manufacturer’s approved range. That keeps the tire working as designed instead of stretching it too far or pinching it too tightly.

Center bore and hub fit still matter

The center bore is the hole in the middle of the wheel that fits over the vehicle hub. Some wheels are hub-centric, meaning the center bore matches the hub closely and helps support the wheel’s position. Others are lug-centric and rely on the lug hardware to center the wheel.

A wheel with a center bore that is too small simply will not fit. A wheel with a larger center bore may fit, but it often benefits from hub-centric rings to reduce the chance of vibration. This is one of those details buyers ignore until they feel a shake at highway speed.

For a clean installation and predictable road manners, center bore should be part of the fitment check from the start.

Brake clearance can stop a wheel choice fast

Not every wheel that matches the bolt pattern will clear the brakes. Spoke design, barrel shape, wheel diameter, and offset all affect brake clearance. This is especially important on performance trims, heavy-duty trucks, and vehicles with upgraded calipers or larger rotors.

A 17-inch wheel might fit one version of a model and fail on another because the brake package changed. Even if the diameter is technically large enough, the inside of the wheel may contact the caliper depending on the spoke profile.

This is why test-fit data and application-specific confirmation are so valuable. Brake clearance is one area where guessing gets expensive.

Tire size is part of the same decision

An aftermarket wheel fitment guide is incomplete without tire sizing. Wheels and tires work as a system. If you change wheel diameter or width, the tire size often needs to change too.

Many buyers want a larger wheel for a sharper look. That usually means using a lower-profile tire to keep the overall diameter close to stock. If overall diameter grows too much, you can run into rubbing, altered speedometer readings, slower acceleration, and shift behavior changes on some vehicles.

On the other side, truck and SUV owners often want a taller tire for added presence or off-road capability. That can work well, but it increases the need to check fender, liner, mud flap, and suspension clearance at full steering lock and under compression.

A good-looking fitment is one thing. A usable fitment is better.

Suspension changes shift the answer

Lift kits, leveling kits, lowering springs, coilovers, and spacers all change fitment math. A wheel and tire package that works on a stock vehicle may rub once it is lowered, or it may fit better after a mild lift. But suspension changes do not solve every conflict.

For example, lifting a truck can create more vertical room for a taller tire, but the tire may still rub at the rear of the front wheel well during turns. Lowering a car may reduce fender gap and improve appearance, yet require more careful offset selection to avoid contacting the fender lip.

This is where honest trade-offs matter. The most aggressive stance is rarely the easiest setup to live with every day.

Common mistakes buyers make

The first mistake is assuming same bolt pattern means full compatibility. It does not. Offset, center bore, and brake clearance still need to line up.

The second is copying a setup from another vehicle without matching trim, ride height, and tire brand. Two tires with the same labeled size can measure differently in the real world. That extra half inch can be the difference between clean clearance and constant rubbing.

The third is buying for appearance only. Deep lip, flush fitment, and oversized diameter can look strong, but they should not come at the cost of steering feel, ride quality, or reliable clearance.

How to choose the right setup for your goals

If your priority is daily driving, stay close to factory overall diameter and choose a conservative offset that improves the look without creating headaches. If your priority is performance street use, focus on brake clearance, tire support, and offsets that work with your suspension geometry. If your goal is an aggressive truck or Jeep stance, expect more compromise and confirm clearances carefully before going wider, taller, or more negative on offset.

This is also where material quality and finish matter. Wheels are a visual upgrade, but they are also exposed to road salt, brake dust, heat, and impact. A wheel that fits correctly and holds up well is always a smarter buy than one that only looks right for the first month.

FORTLUFT’s approach to aftermarket parts reflects that balance – functional fit first, finished style second, and both should work together.

The smartest way to read fitment specs

Treat every wheel listing like a technical product, not just a style choice. Look at the full specification set together. Ask how the wheel sits relative to stock, what tire size it is meant to support, whether your brakes will clear, and how your suspension setup changes the answer.

Fitment is where design meets engineering. Get it right, and the result looks sharper, drives properly, and feels intentional every time you walk up to the vehicle. That is the difference between a wheel upgrade and a wheel mistake.

Stainless Steel vs Aluminized Exhaust

If you have ever looked under a truck in the Rust Belt and then compared it to one that lives in Arizona, you already know why stainless steel vs aluminized exhaust is not a small decision. Exhaust material changes how long the system lasts, how it looks after a few winters, and how much value you get for the money.

For most buyers, the right choice comes down to climate, budget, and how long they plan to keep the vehicle. There is no one-size-fits-all answer. A daily driver that sees salted roads has very different needs than a weekend Jeep, a shop build, or a work truck that gets turned over every few years.

Stainless steel vs aluminized exhaust: what changes in the real world

On paper, both materials do the same job. They route exhaust gases, support emissions components, and help control sound. In practice, they age very differently.

Aluminized steel is regular steel coated with an aluminum-silicon alloy. That coating helps resist corrosion better than bare steel, and it keeps cost down. For many replacement systems, that makes aluminized exhaust a practical option.

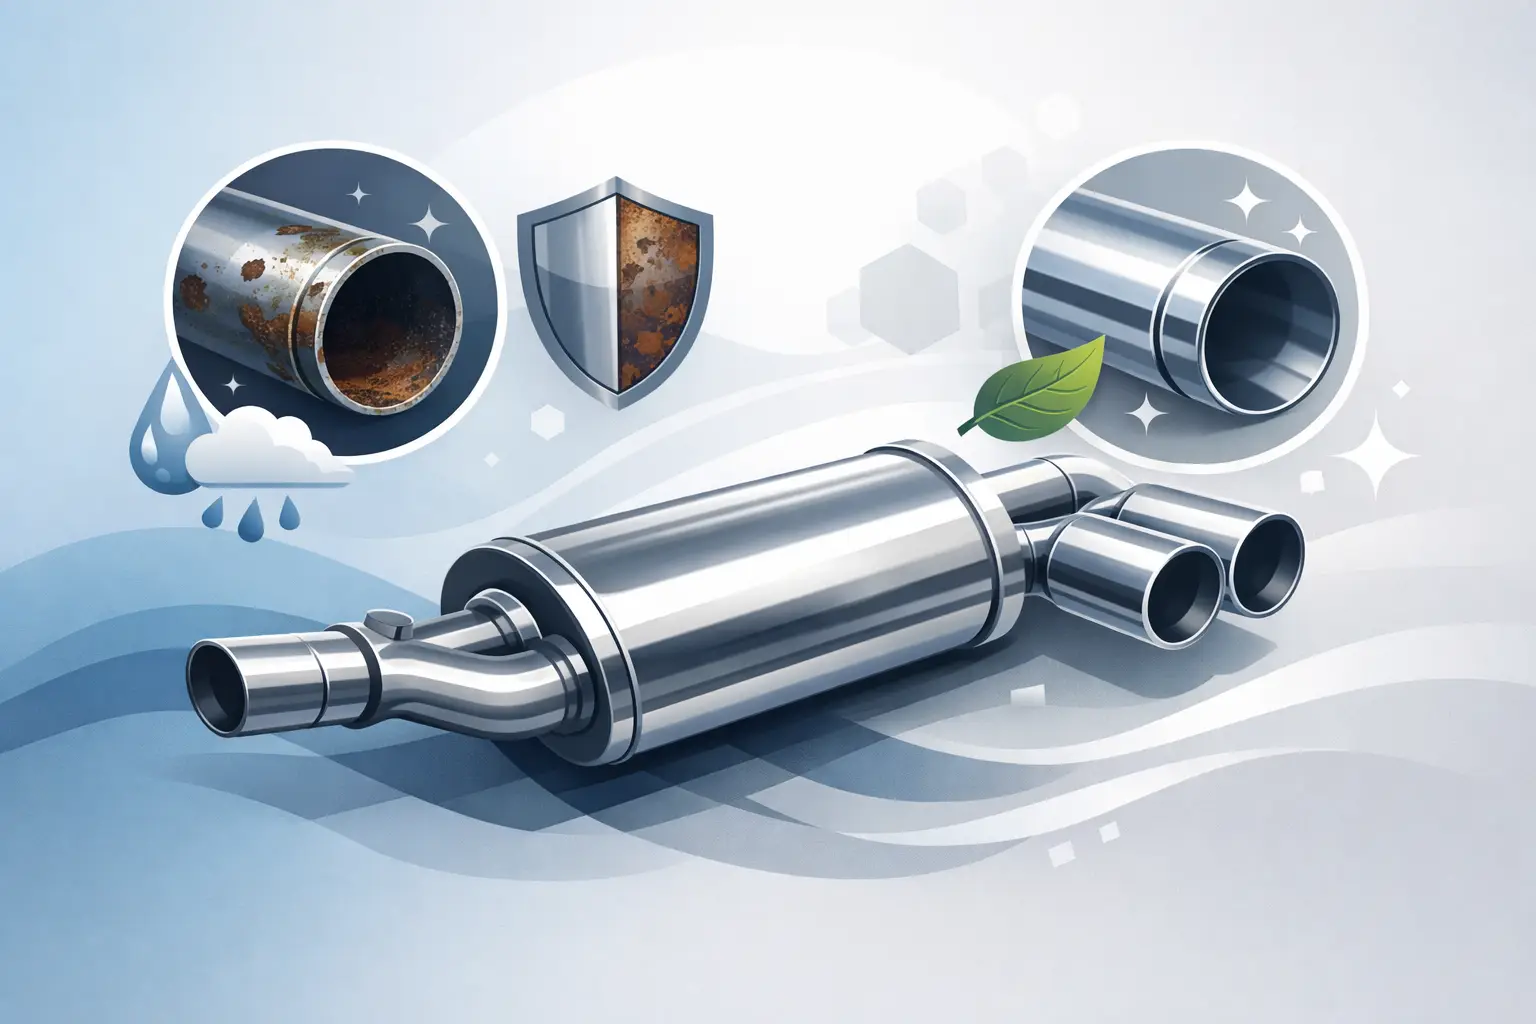
Stainless steel contains chromium and, depending on the grade, other alloying elements that improve corrosion resistance throughout the metal itself. That matters because an exhaust system gets scratched, heated, cooled, and exposed to moisture from both outside conditions and internal condensation. When the material has corrosion resistance built in, not just applied on the surface, it tends to hold up much better over time.

The result is simple. Aluminized exhaust usually wins on upfront price. Stainless steel usually wins on lifespan, appearance, and long-term durability.

Why aluminized exhaust still makes sense

Aluminized exhaust is not the cheap throwaway option some people assume it is. In the right use case, it is a smart buy.

If your vehicle lives in a dry climate, aluminized piping can last a long time. Heat cycles and normal road use still take a toll, but the lack of road salt and constant moisture changes the equation. If you are replacing a stock system on an older SUV, light-duty pickup, or commuter car and want solid function without paying a premium for material, aluminized steel is often enough.

It also makes sense when the vehicle is not a long-term keeper. If you expect to sell or trade in the next few years, the extra spend on stainless may not deliver a meaningful return. The same goes for budget-focused repairs where restoring quiet operation and dependable flow matters more than building a premium underbody.

That said, aluminized exhaust has limits. Once the coating is compromised by chips, abrasions, poor weld areas, or long-term exposure, corrosion can move faster than many drivers expect. That is where geography starts to matter.

The climate factor most buyers underestimate

Road salt is brutal. Snow, slush, humidity, and repeated short trips are also brutal. If your exhaust never gets fully hot for long enough to burn off internal moisture, condensation collects inside the pipes and mufflers. Add salt outside the system and you get corrosion from both directions.

This is why aluminized systems can look decent for a while, then fall off quickly in northern states. A truck used through multiple winters, parked outside, and driven on short city runs lives a much harder life than a highway-only vehicle in a dry region.

Where stainless steel earns its price

Stainless steel exhaust costs more, but it buys more than just bragging rights. It buys staying power.

For drivers in wet, snowy, or coastal areas, stainless can be the difference between replacing an exhaust once and replacing it again. It is especially attractive for trucks, Jeeps, and SUVs that see year-round use, towing, off-road exposure, or frequent washdowns. If the vehicle is part utility and part pride of ownership, stainless fits both roles.

It also has a visual advantage. A stainless exhaust system or stainless tip tends to maintain a cleaner, more premium appearance under the vehicle and at the rear exit. For many enthusiasts, that matters. FORTLUFT’s design-minded approach to exhaust parts speaks directly to this point – the material is not only functional, it becomes part of the vehicle’s finished look.

There is another value angle here. Stainless steel can reduce long-term replacement labor, especially for shops or fleet buyers who think beyond initial part cost. Paying more once can be cheaper than repeating the same repair cycle in a harsh environment.

Not all stainless is the same

This is where buyers need to slow down. “Stainless” on a product listing does not always mean the entire system offers the same level of corrosion resistance.

Two common grades in exhaust are 409 and 304 stainless. 409 is widely used because it is more affordable and still offers much better corrosion resistance than aluminized steel. It may surface discolor or develop cosmetic oxidation, but it generally holds together well. 304 stainless is more corrosion resistant and often more desirable for premium builds, show-quality appearance, or very harsh conditions, but it comes at a higher cost.

So if you are comparing options, ask what grade you are getting. Stainless is not a single category. It is a range, and the grade affects both price and performance.

Stainless steel vs aluminized exhaust on sound and performance

A lot of buyers want to know whether the material changes exhaust tone or horsepower. The honest answer is: a little, but usually less than system design.

Pipe diameter, muffler construction, resonator design, bends, and overall layout have a bigger impact on sound and flow than whether the pipe is stainless or aluminized. If two systems share the same dimensions and design, the material alone is not the main driver of performance.

Sound can vary slightly because different materials and wall thicknesses resonate differently, but it is not the deciding factor for most street vehicles. If your goal is a deeper tone, more aggressive note, or improved flow, focus first on the system’s design and fitment. Then use material as the durability and appearance decision.

Which option is better for your type of vehicle?

For an everyday commuter in a mild climate, aluminized exhaust can be the practical value play. It restores function, controls cost, and may last long enough to make perfect sense.

For a truck or SUV that works hard, racks up miles, or stays in service for years, stainless usually looks stronger. These vehicles often see more exposure to weather, payload, towing heat, and underbody abuse. Paying for better material is easier to justify.

For Jeeps and off-road builds, stainless has a clear appeal. Mud, water crossings, trail debris, and open exposure accelerate wear. A more corrosion-resistant system is not just cleaner looking – it is better suited to the environment.

For performance-minded owners, the answer depends on the build goal. If you are investing in upgraded tips, polished finishes, or a more refined rear-end appearance, stainless complements that direction better. Technology as an art form only works when the material supports both the engineering and the visual result.

How to choose without overbuying

The smartest way to decide is to match the exhaust material to the life your vehicle actually lives.

If you live in a dry state, drive moderate miles, and need a cost-effective replacement, aluminized is often enough. If you live where roads are salted, plan to keep the vehicle long term, or care about lasting appearance, stainless is usually worth the premium.

Also think about labor. On some vehicles, exhaust replacement is simple. On others, rusted hardware, seized clamps, and awkward routing make the job more expensive than expected. When labor is a factor, buying a longer-lasting material gets easier to justify.

Finally, be realistic about ownership. If this is a short-term repair on a vehicle nearing the end of its service life, premium stainless may be unnecessary. But if you are building a reliable daily, refreshing a truck you plan to keep, or upgrading with appearance in mind, stainless often aligns better with the bigger picture.

The better value is not always the lower price

Price matters, but value is what you keep after seasons of use. Aluminized exhaust can be the right answer when budget and climate line up. Stainless steel can be the better answer when durability, presentation, and long-term ownership matter more.

The best exhaust choice is the one that fits your vehicle, your environment, and your standards. Buy for the way you drive now, not just for the checkout total you see today.

What Size Muffler Tip Fits Your Exhaust?

A muffler tip that looks perfect on the screen can show up at your door and be wrong in two different ways – too loose to mount properly or too oversized for the rear of the vehicle. If you are asking what size muffler tip fits, the answer starts with one number that matters most: your exhaust pipe’s outside diameter.

The rest comes down to fit style, tip length, outlet size, and how much visual presence you want at the back of the car, truck, Jeep, or SUV. Get those details right, and the tip looks intentional instead of tacked on.

What size muffler tip fits your vehicle?

In most cases, the right muffler tip has an inlet size that matches your exhaust pipe’s outside diameter. If your tailpipe measures 2.5 inches across on the outside, you typically need a 2.5-inch inlet muffler tip. That is the core fitment rule.

Where buyers get tripped up is assuming every 2.5-inch exhaust setup uses the same tip. It does not. Some vehicles have rolled pipe ends, some have limited bumper clearance, and some need a clamp-on design while others are better suited to weld-on installation. The correct size is not just about the pipe diameter. It is also about how the tip sits under the vehicle and how it finishes the rear profile.

Start with the inlet size, not the outlet

The inlet is the side of the muffler tip that slips over or attaches to the exhaust pipe. This is the fitment measurement. The outlet is the visible opening at the end of the tip, and that dimension is more about appearance than compatibility.

A lot of shoppers focus on the outlet because that is what they see in photos. A 4-inch or 5-inch outlet can look aggressive and clean, especially in polished stainless or carbon fiber, but it does not matter if the inlet does not match the pipe. If the inlet is wrong, the tip is wrong.

For clamp-on tips, the match needs to be especially close. For weld-on tips, there can sometimes be a little more flexibility depending on the installer and the pipe condition, but the cleanest result still comes from choosing the proper inlet size from the start.

How to measure your exhaust pipe correctly

Measure the outside diameter of the tailpipe, not the inside. That point matters because muffler tips are commonly sized by the pipe they fit over.

Use a tape measure or caliper at the very end of the exhaust pipe. If the pipe is rusty, damaged, or has an expanded end, measure a clean and consistent section near the outlet. On some factory systems, the end of the pipe may be slightly shaped or flared, so checking more than one point is smart.

If you only have circumference, divide that number by 3.1416 to get diameter. It is more accurate to use a caliper, but a careful tape measurement is usually enough for selecting a tip.

Common inlet sizes

Most aftermarket muffler tips are built around a few standard inlet sizes, including 1.75 inches, 2 inches, 2.25 inches, 2.5 inches, 3 inches, and 3.5 inches. Passenger cars often land in the 2-inch to 2.5-inch range, while trucks and performance applications may use 3-inch or larger outlets.

That said, there is no universal size by vehicle type. A compact sport sedan with an aftermarket cat-back may use a larger pipe than a stock full-size SUV. Measure first, buy second.

The part most buyers overlook – tip length and clearance

Even when the inlet size is correct, a muffler tip can still fit poorly if the body is too long or the outlet is too wide for the space around the bumper cutout.

Tip length changes the final look more than many people expect. A shorter tip usually gives a tighter, more factory-style finish. A longer tip pushes the design outward and can create a more custom or performance-focused appearance. The trade-off is heat exposure near the bumper and the risk of the tip sticking out too far.

Clearance matters on lifted trucks, SUVs with molded rear valances, and vehicles with tight factory exhaust exits. Before buying, look at the available space above, below, and around the pipe. If the tip is too large in diameter, it may interfere with the bumper line or simply look out of scale.

Clamp-on vs weld-on fit

If you want straightforward installation, clamp-on muffler tips are the practical choice. They are easier for many DIY buyers and let you change styles later without cutting and rewelding. The downside is that they depend heavily on accurate sizing and proper tightening. If the inlet is even slightly off, the tip may not seat securely or may sit crooked.

Weld-on tips offer a more permanent finish and can look cleaner once installed. They are often preferred when building a polished custom exhaust setup or when long-term durability is the priority. The trade-off is less flexibility and more installation effort.

For either style, the fit still starts with the tailpipe diameter. That is the non-negotiable dimension.

Choosing the right outlet size for the look you want

Once you know what size muffler tip fits at the inlet, you can choose the outlet based on design. This is where function meets style.

A smaller outlet tends to look closer to OEM-plus – refined, understated, and clean. A larger outlet creates more presence and works well on trucks, Jeeps, muscle cars, and performance builds. Stainless steel gives a sharp, technical finish. Black coatings can blend more cleanly into dark trim. Carbon fiber tips push further into the premium performance look.

There is no single correct outlet size because visual balance depends on the vehicle. A 5-inch outlet may look right on a full-size truck and oversized on a small crossover. The best fit is the one that matches both the exhaust pipe and the vehicle’s rear design.

What size muffler tip fits if your exhaust has dual outlets?

Dual exhaust setups are simple in one sense and easy to mess up in another. You need to measure each tailpipe independently, because not every system is perfectly symmetrical after years of use, modification, or repair.

If both pipes measure the same, use matching tips for a consistent finish. If one side sits tighter to the bumper or tow hardware, you may need to account for body length or outlet shape even if the inlet size is identical. On dual systems, small visual differences stand out fast.

Angle-cut, rolled-edge, and straight-cut designs can all work, but they create different impressions. Rolled-edge tips often feel more finished and upscale. Straight-cut tips lean more performance-oriented. Angle-cut tips can help complement certain bumper lines but need to be positioned carefully.

When a “universal” muffler tip is not really universal

Universal fitment usually means the tip is designed to work across a broad range of vehicles, not that it fits every pipe without checking measurements. That language can be useful for browsing categories, but it should never replace an actual measurement.

This is especially true if your vehicle has an aftermarket exhaust, a trimmed pipe, or a factory outlet hidden behind the bumper. In those cases, the tip may technically mount but still fail to look right. Good fitment is part measurement and part proportion.

That is where material and finish also come into play. A well-sized nonmagnetic stainless steel tip can sharpen the rear view of the vehicle without looking excessive. If you want the appearance upgrade to feel intentional, size and finish should work together.

Quick mistakes to avoid before you buy

The most common mistake is measuring the inside diameter instead of the outside. The second is buying based only on outlet size. The third is ignoring length and bumper clearance.

Another issue is assuming a larger tip always looks better. Sometimes it does. Sometimes it overwhelms the rear of the vehicle and draws attention for the wrong reason. Clean fitment almost always looks more premium than oversized hardware.

If you are shopping for a style-driven upgrade, think about the full rear profile. The best results come from matching inlet diameter correctly, choosing an outlet size that suits the vehicle, and selecting a material that holds up to heat, weather, and daily use. That is the difference between a quick add-on and a finished exhaust detail.

A muffler tip is a small part, but it changes the final impression of the whole vehicle. Measure carefully, respect the clearances, and choose a size that fits both the pipe and the design. That is how a functional exhaust part becomes technology as an art form.