How to Choose Muffler Tips That Fit Right

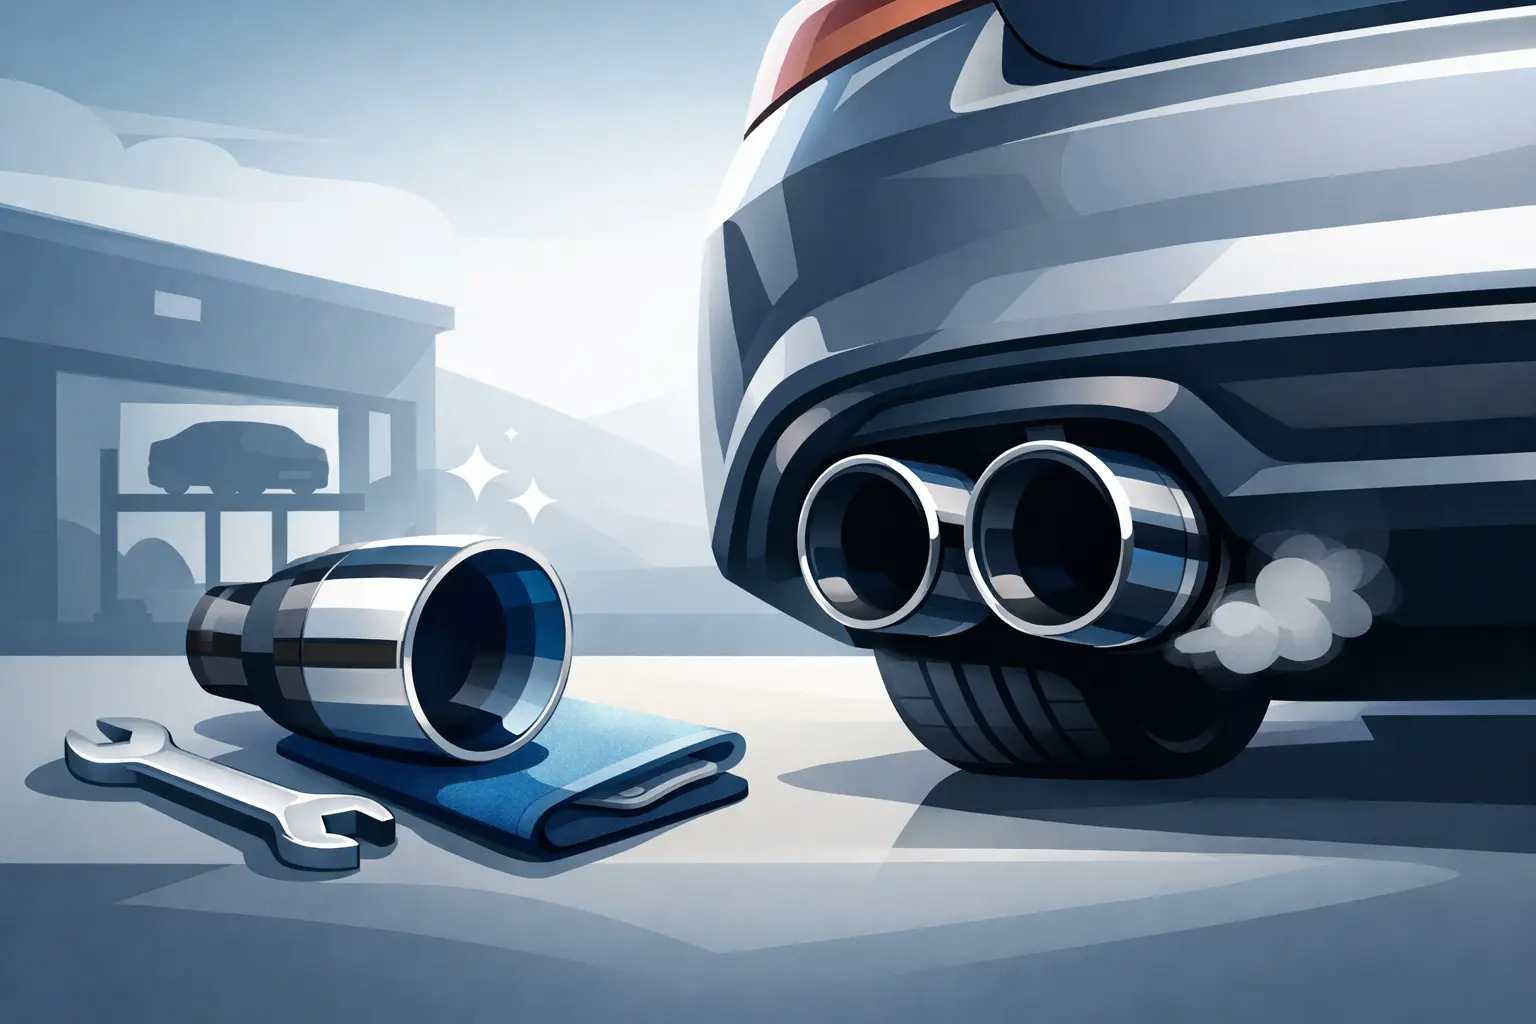
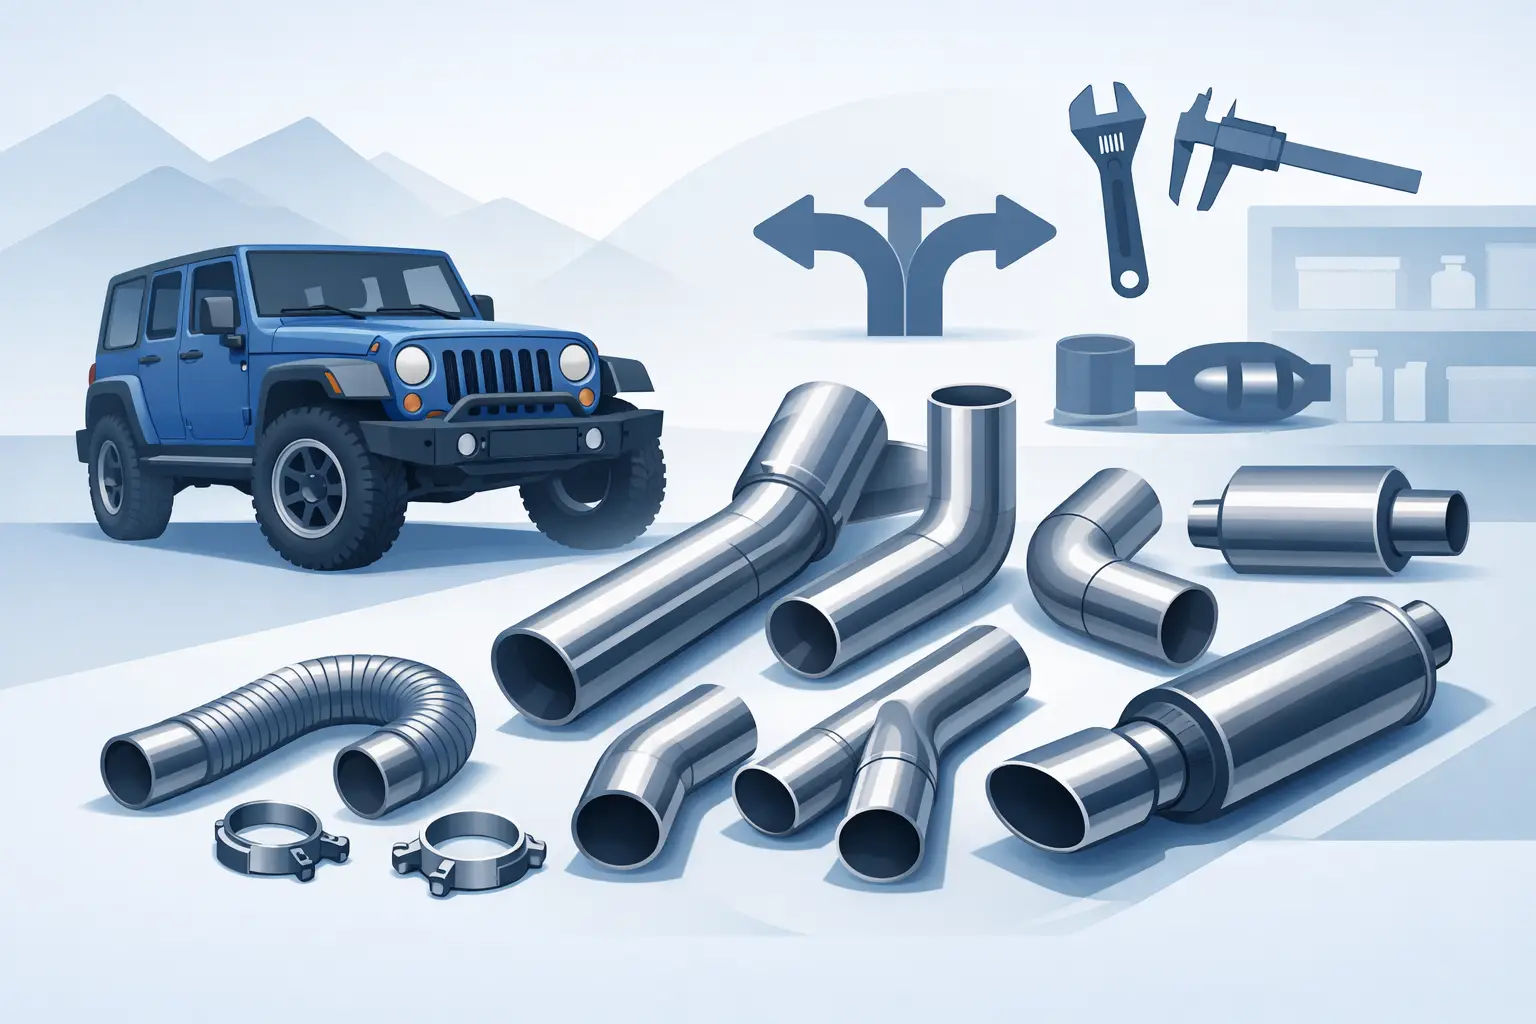
The wrong muffler tip stands out for all the wrong reasons. It can look too small under a truck bumper, hang too far past the valance, or clash with the lines of the vehicle. If you are figuring out how to choose muffler tips, the best approach is to balance fitment, material, finish, and style instead of shopping by appearance alone.

A muffler tip will not usually transform horsepower on its own, but it absolutely changes the way the rear of the vehicle looks. On a daily driver, that may mean a cleaner, more finished exhaust exit. On a truck, Jeep, or SUV, it may mean a tougher, more intentional stance. On a build with other exterior upgrades, the right tip helps the whole package feel complete.

How to choose muffler tips starts with sizing

Before comparing shapes or finishes, measure the exhaust outlet. This is the part that decides whether the tip fits correctly or becomes an avoidable return. Most muffler tips are sized by inlet diameter, outlet diameter, and overall length.

The inlet diameter needs to match your exhaust pipe’s outside diameter. If your tailpipe measures 2.5 inches, you need a tip designed for a 2.5-inch inlet unless the product specifically uses an adapter approach. Guessing here is where most fitment mistakes happen. Measure with a tape measure or caliper, and if the pipe has corrosion, clean the area first so the reading is accurate.

Outlet diameter is about visual impact. A larger outlet creates a bolder look, but bigger is not always better. A 5-inch outlet can look right on a full-size truck with a wide rear bumper opening. That same tip may look oversized on a compact sedan. The goal is proportion. You want the tip to complement the rear profile, not overpower it.

Length matters more than many buyers expect. A short tip can disappear under the bumper. One that is too long can stick out awkwardly and collect soot where it is most visible. In most cases, the best look is a tip that sits close to flush or slightly proud of the bumper line, depending on the vehicle’s design and your preference.

Pick a shape that matches the vehicle

Round tips are the most versatile option. They work on almost anything, from muscle cars to SUVs, and they suit both OEM-style replacements and more aggressive upgrades. If you want a safe choice that rarely looks out of place, round is usually it.

Angle-cut tips add motion to the design. They tend to look sharper and a little more custom, especially on sportier builds or trucks with a more assertive exterior setup. The trade-off is that they can feel too stylized on vehicles with softer factory lines.

Rolled-edge tips have a thicker, more finished appearance. They often give the exhaust a premium look and can suit higher-end builds well. Straight-cut tips feel cleaner and more technical. Neither is universally better. It depends on whether you want the exhaust to look refined or more performance-focused.

Dual-wall construction is another visual decision worth noting. A dual-wall tip appears fuller and more substantial than a single-wall version. It usually presents better on vehicles where the exhaust is easy to see. Single-wall tips are more understated and can be a smart fit if you prefer a simpler finish.

Material is where looks and durability meet

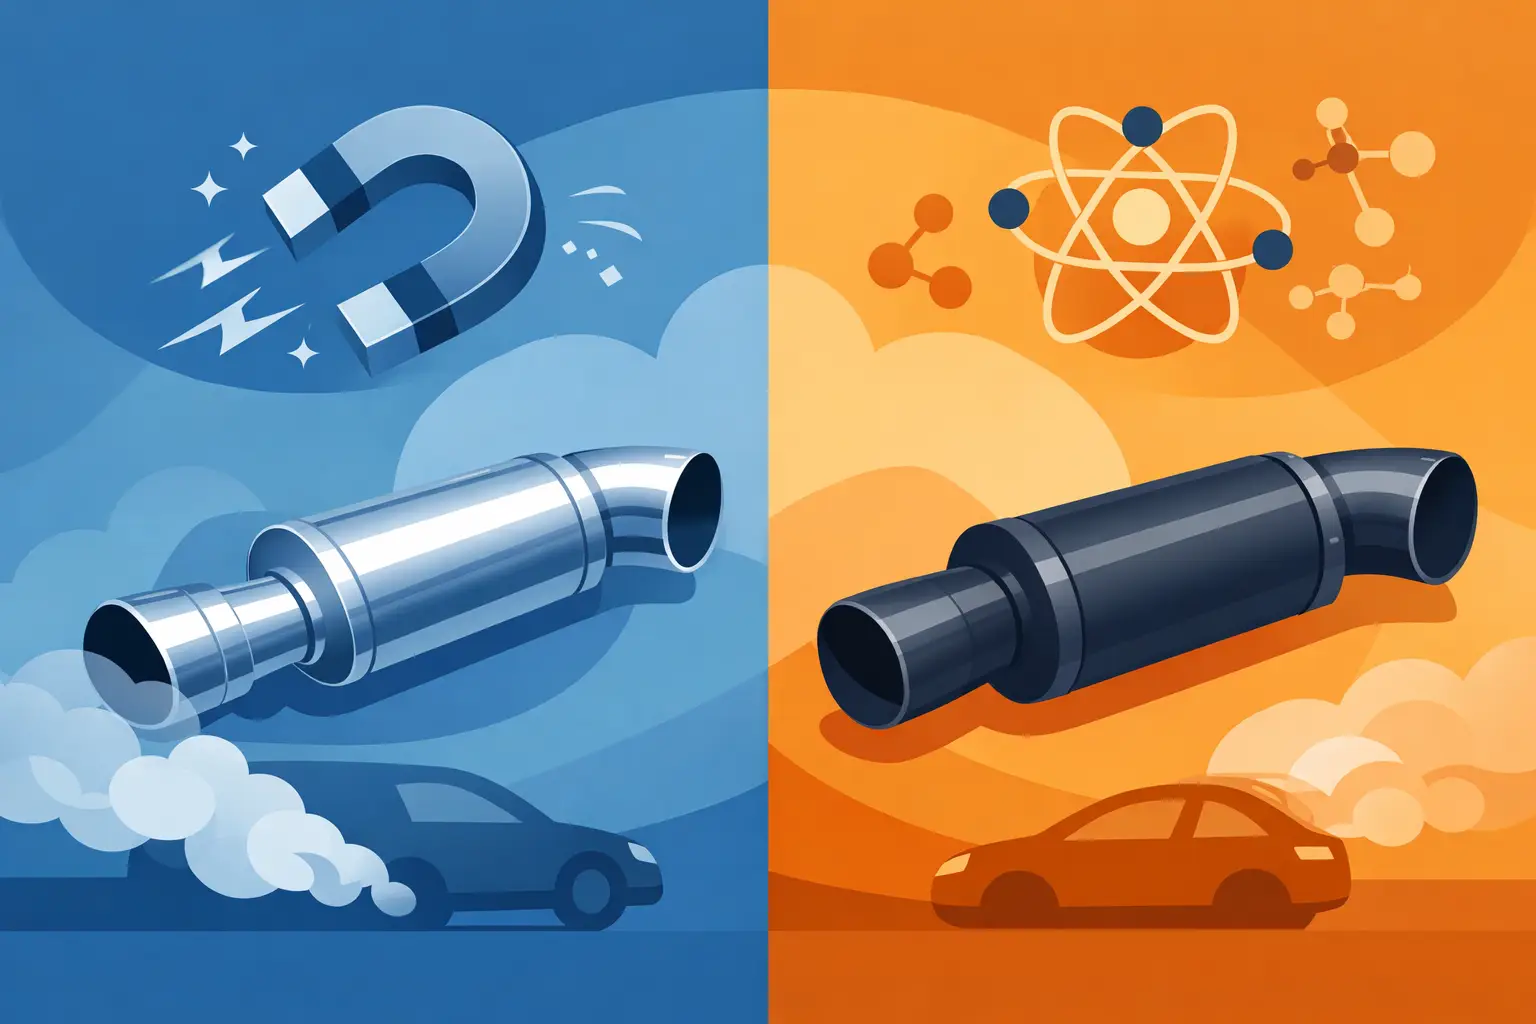
If you drive year-round, material should not be an afterthought. Stainless steel is the standard choice for good reason. It resists corrosion better than plain steel, holds its finish longer, and fits both replacement and upgrade use. For most buyers, stainless is the right balance of durability, appearance, and value.

Carbon fiber styles bring a more modern, high-end look, especially when paired with black trim, dark wheels, or other contemporary exterior details. They can look exceptional on the right build, but they are also more style-specific. If the rest of the vehicle is mostly stock and traditional, carbon fiber may feel visually disconnected.

Polished finishes give the brightest, most reflective appearance. They suit chrome accents and classic exhaust styling. Black or powder-coated tips create a more aggressive and current look, especially on trucks, Jeeps, and SUVs with blackout packages. The trade-off is maintenance. Gloss black can show dirt and residue differently than polished stainless, while polished metal tends to reveal discoloration if neglected.

This is where FORTLUFT’s approach to materials makes sense for buyers who care about both function and presentation. Exhaust components do a job, but they are also visible design elements. Technology as an art form only works when the material can hold up in the real world.

Clamp-on or weld-on depends on your priorities

Clamp-on muffler tips are the easier choice for most DIY installs. They are straightforward, require fewer tools, and make future removal simpler. If you like to update parts yourself or want a faster install, clamp-on designs are hard to beat.

Weld-on tips offer a more permanent attachment and can provide a cleaner integrated look. They are often preferred for custom exhaust work or for buyers who do not want any chance of movement over time. The downside is less flexibility. Once welded, changing the tip later is more work.

Neither option is automatically superior. If convenience and adjustability matter most, go clamp-on. If long-term permanence and a shop-finished appearance are the priority, weld-on may be worth it.

Think about bumper clearance and daily use

A tip can fit the pipe and still be wrong for the vehicle. Rear bumper shape, valance cutout, tow equipment, and suspension height all affect how the tip will sit once installed.

On trucks and SUVs, larger tips often look great because the vehicle has the scale to support them. But if the outlet sits too close to plastic trim, heat and exhaust residue can become an issue. On lowered cars, a long or low-hanging tip may be more exposed to scraping. On Jeeps and off-road builds, departure angle and trail clearance can matter more than a dramatic finish.

This is one of those areas where restraint usually pays off. A well-fitted tip that respects the vehicle’s lines will look better long term than an oversized one chosen only for showroom impact.

How to choose muffler tips for your style

There is a practical side to fitment, and there is a visual side that is just as real. The right tip should match the personality of the vehicle.

If you want an OEM-plus look, stick with a moderate outlet size, stainless steel, and a shape close to factory styling. This works well for daily drivers where you want a cleaner finish without making the exhaust the center of attention.

If your build leans sport or street performance, angle-cut, black, or larger-diameter tips can add the right amount of edge. Just make sure the rest of the vehicle supports that statement. Dark tips with factory wheels and no other visual changes can sometimes look like an isolated mod rather than part of a complete design.

For trucks, Jeeps, and SUVs, bolder sizing often works better because the vehicle already has visual mass. Rolled-edge stainless tips can feel premium and durable, while black finishes can reinforce a tougher, more modern look. Again, proportion matters. You want presence, not excess.

Don’t ignore the sound question

Many buyers assume a muffler tip will dramatically change exhaust tone. Usually, it will not. The muffler, resonator, pipe diameter, and overall exhaust design do most of that work. A tip may slightly affect tone or perceived sound character, but it is not a substitute for a full exhaust change.

That is not a reason to skip upgrading the tip. It just keeps expectations realistic. Buy a muffler tip for appearance, fit, finish, and durability first. If you get a subtle sound difference, treat it as a bonus rather than the main reason for the purchase.

Common buying mistakes to avoid

The biggest mistake is ordering by outlet size without checking inlet size. A tip can look perfect in photos and still be unusable if it does not match the pipe. The second mistake is choosing a finish that fights the rest of the vehicle. Polished chrome-like shine is not always the right move on a blackout build, and a stealthy black tip may look too muted on a bright, classic exterior.

Another common issue is forgetting installation style. Buyers sometimes choose a weld-on tip when they really want a quick DIY upgrade, or pick a clamp-on without checking whether there is enough straight pipe for a secure fit. Small details decide whether the install feels easy or frustrating.

A final mistake is overcommitting to trend over fit. Oversized tips, extreme cuts, or ultra-aggressive finishes can look great on the right build. On the wrong vehicle, they look temporary. A good muffler tip should still look right a year from now.

If you want the cleanest result, start with exact measurements, then match the shape and finish to the vehicle instead of forcing a style that does not belong there. The best muffler tip is not the loudest-looking option on the page. It is the one that fits your exhaust correctly, suits your vehicle’s design, and still looks intentional every time you walk up behind it.

What Is Tire Rotation and Wheel Alignment?

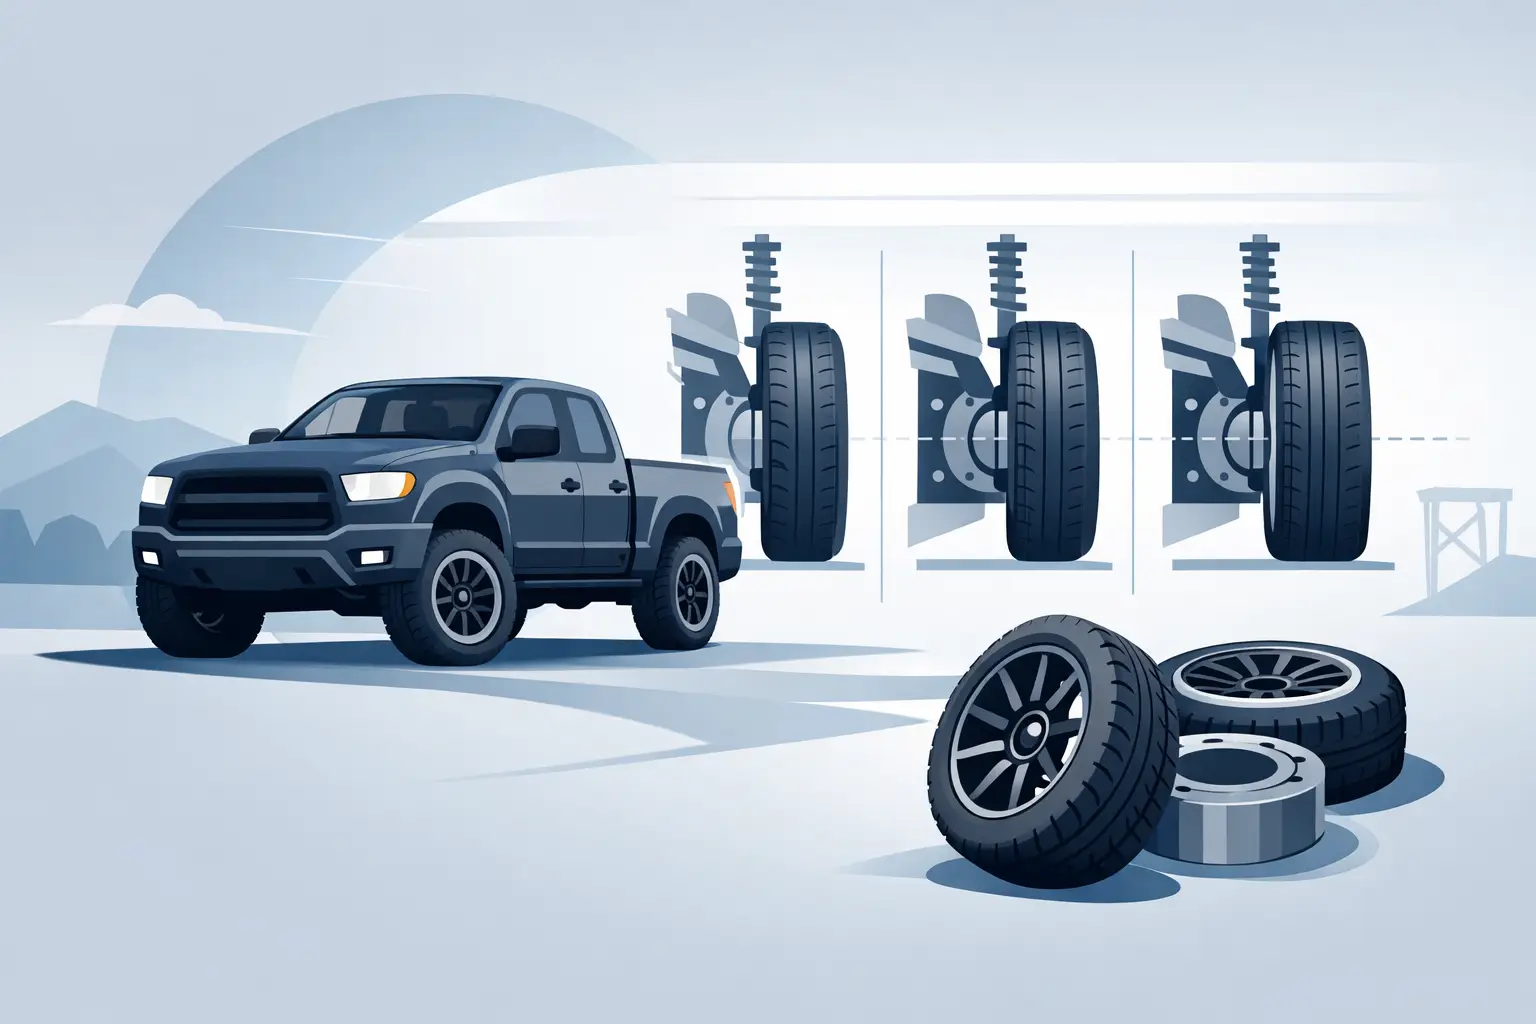
A steering wheel that sits a little off-center, a tire edge wearing faster than the rest, or a highway vibration you did not notice last month – that is usually when drivers start asking, what is tire rotation and wheel alignment, and do I need both? The short answer is yes, often you do. But they are not the same service, and treating them like they are can cost you tire life, ride quality, and money.

For any car, truck, Jeep, or SUV, tires are a major wear item and a major style element. They affect stance, handling, braking, and the way the vehicle feels every time you pull out of the driveway. Rotation and alignment are two of the simplest ways to protect that investment.

What is tire rotation and wheel alignment?

Tire rotation is the process of moving tires from one position on the vehicle to another, usually front to rear or in a specific pattern recommended by the manufacturer. The goal is even out tread wear because each wheel position wears tires differently.

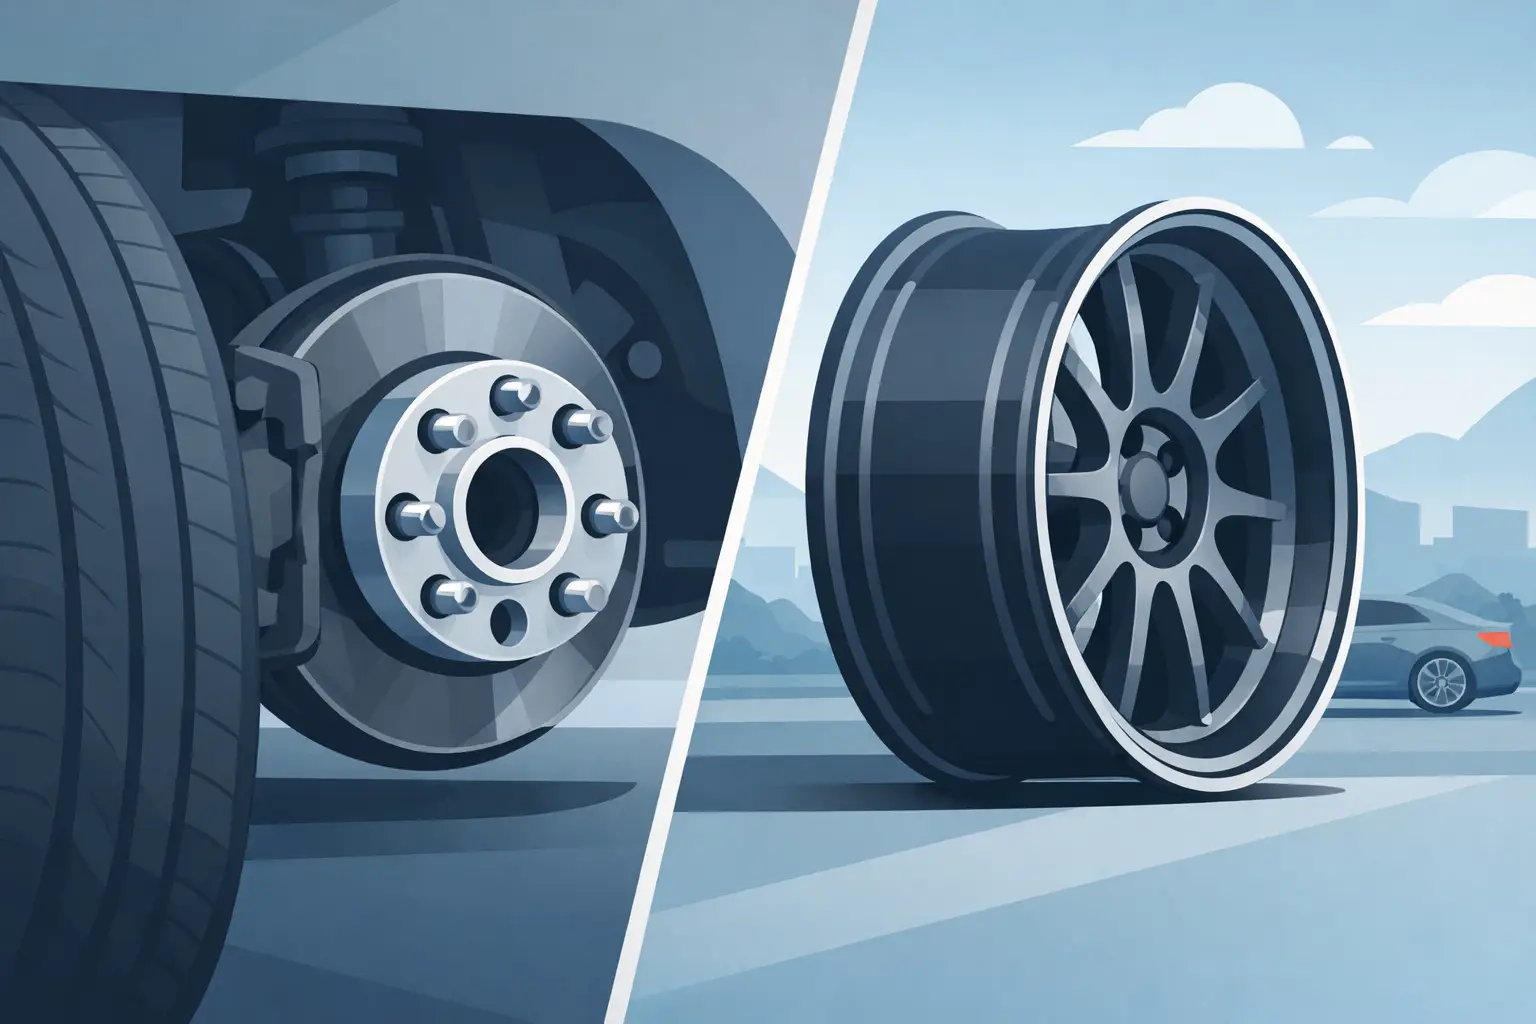
Wheel alignment is the adjustment of the suspension angles that determine how your tires meet the road. Despite the name, an alignment does not really adjust the wheels themselves. It adjusts angles such as camber, caster, and toe so the tires track correctly and the vehicle drives straight.

That difference matters. Rotation manages wear that naturally happens over time. Alignment corrects geometry when the vehicle is no longer tracking as designed.

Why tire rotation matters more than many drivers think

Front and rear tires do different jobs. On many vehicles, the front tires carry more engine weight, handle steering forces, and often do more braking work. On front-wheel-drive vehicles, they also put power to the road. That means front tires usually wear faster than rears.

If you leave every tire in the same position for too long, one pair can wear down much earlier than the other. Rotation spreads that wear across all four tires so you get more even tread depth and a more balanced feel.

This is especially useful on trucks and SUVs that see mixed driving, towing, rougher pavement, or larger wheel and tire packages. Uneven wear can show up sooner than drivers expect, and once a wear pattern gets aggressive, rotating late will not fully fix it.

A typical rotation interval is every 5,000 to 7,500 miles, often lining up with an oil change or regular inspection. Some vehicles, tire types, and driving conditions may call for a different schedule. If you use directional tires or a staggered wheel setup, rotation options can be limited. It depends on your vehicle and tire design.

Common signs you may be overdue for rotation

If road noise has increased, one end of the vehicle feels less planted, or your tread depths are noticeably different front to rear, rotation may be overdue. You might also notice feathering or more wear on specific blocks of tread, although that can overlap with alignment issues.

The key point is simple: rotation is preventative. It is not a repair for damaged suspension geometry or badly worn tires. It works best when done consistently.

What wheel alignment actually changes

Alignment is about angles, not tire placement. When those angles drift out of spec, your tires stop rolling in the clean, controlled way they were designed to.

Toe describes whether the tires point slightly inward or outward when viewed from above. A bad toe setting can scrub tread quickly, sometimes in a surprisingly short time.

Camber is the inward or outward tilt of the tire when viewed from the front. Too much negative or positive camber can wear one edge of the tread faster than the rest.

Caster affects steering stability and return-to-center feel. It usually does not create tire wear as directly as toe or camber, but it can influence handling and steering confidence.

When alignment is correct, the vehicle feels settled. It tracks straight, the steering wheel centers properly, and the tires wear more evenly. When it is off, you may feel the vehicle pull left or right, notice a crooked steering wheel, or see inside or outside edge wear.

Why alignment can go out of spec

Wheel alignment does not only change after a crash. Real-world driving is enough. A hard pothole hit, curb contact, worn suspension parts, lifted or lowered ride height, and even normal component wear can all affect alignment.

For trucks, Jeeps, and SUVs, suspension modifications make alignment even more important. Changing ride height or wheel-and-tire fitment can alter steering and suspension angles. That does not mean modifications are a problem. It means the geometry has to be corrected afterward so the vehicle looks right and drives right.

This is where practical maintenance meets design-aware ownership. A strong stance and upgraded wheel setup can transform a vehicle, but if the alignment is off, the tires will show you fast.

Tire rotation vs. wheel alignment: not interchangeable

A lot of drivers book one service thinking it covers the other. It does not.

Rotation moves tires to different positions to manage normal wear. Alignment adjusts suspension settings to correct how the tires contact the road. One does not replace the other, and often the best results come from doing both at the right time.

If your tires are wearing unevenly because of alignment problems, rotating them alone may just move the problem around. If your alignment is perfect but you never rotate, you can still wear out one pair much faster than the other.

That is why shops often recommend checking both whenever new tires are installed. Fresh tires deserve a clean start.

When should you get each service?

Tire rotation is usually scheduled by mileage. For most drivers, every 5,000 to 7,500 miles is a solid range, but always check the vehicle owner manual and tire manufacturer guidance.

Wheel alignment is more condition-based. You should have it checked if the vehicle pulls, the steering wheel is off-center, you see unusual tread wear, you hit a major pothole, replace steering or suspension parts, or install new tires. Many drivers also choose an alignment check once a year as cheap insurance against premature tire wear.

If you drive a lifted truck, a Jeep with larger tires, or an SUV used for towing or rough roads, it makes sense to stay more proactive. Those vehicles often place greater demands on suspension and tire setup.

Signs you may need an alignment soon

A pull to one side is the classic sign, but not the only one. A steering wheel that is crooked while driving straight, rapid wear on one edge of the tread, wandering at highway speed, or a slight loss of steering precision can all point to alignment issues.

Not every pull is alignment, though. Tire pressure differences, tire construction differences, worn suspension components, and even brake drag can create similar symptoms. That is why a proper inspection matters.

Can rotation or alignment fix vibration?

Sometimes, but not always. Tire rotation can change where you feel a vibration, especially if one tire has a wear pattern developing. Alignment can improve tracking and reduce scrub-related issues. But a true vibration often comes from tire balance, a bent wheel, uneven tire wear, or suspension problems.

That is the trade-off with symptom chasing. Similar driving complaints can come from different causes. Good service is not about guessing. It is about measuring tread, checking pressures, inspecting components, and verifying alignment angles before parts and labor stack up.

How these services protect your tire investment

Tires are not cheap, especially for larger trucks, SUVs, and enthusiast wheel setups. A missed rotation schedule or ignored alignment issue can cut tire life dramatically. That means replacing tires earlier than planned and potentially dealing with weaker handling or longer braking distances along the way.

Proper rotation helps each tire carry its share of the workload over time. Proper alignment helps each tire use its full contact patch as intended. Together, they protect tread life, maintain driving confidence, and support the look and performance of the vehicle.

That balance matters whether your build is purely practical or more refined. At FORTLUFT, that philosophy is simple: the parts that keep a vehicle performing should also support the way it presents on the road. Tires and wheel setup do both.

The smartest way to think about maintenance here

Do not wait for obvious problems. By the time a tire is loudly cupped or worn through one edge, the cheap fix has already passed.

Think of tire rotation as routine maintenance and wheel alignment as precision correction. One is scheduled care. The other is a geometry check that becomes essential whenever the vehicle starts telling you something has changed.

If your vehicle drives straight, your steering wheel is centered, and your tread is wearing evenly, stay on top of rotation and keep alignment on your radar. If anything feels off, address it early. Tire life, handling, and ride quality all respond better to timely adjustments than delayed repairs.

The road gives feedback through your tires first. Paying attention to that feedback is one of the cleanest ways to keep your vehicle looking sharp, driving correctly, and wearing its hardware the way it was meant to.

What Is Tire Wheel Lock and Why Use It?

A clean set of wheels can change the whole look of a car, truck, Jeep, or SUV. They also happen to be one of the easiest high-value parts to steal. If you have ever asked what is tire wheel lock, the short answer is this: it is a security lug nut or bolt designed to prevent someone from removing your wheel with a standard socket.

That basic idea matters more than it sounds. Wheels, tires, and accessories are expensive, and theft can happen fast in a driveway, parking lot, or even outside a shop. A wheel lock adds a barrier between your vehicle and a thief who expects a quick job.

What is tire wheel lock?

A tire wheel lock is a specially shaped lug nut or wheel bolt that replaces one standard fastener on each wheel. Instead of using a common hex shape that any regular socket can remove, it uses a unique pattern. To install or remove it, you need a matching wheel lock key.

Most sets include four locks, one for each wheel, plus the key. On some vehicles, especially heavy-duty or high-theft targets, owners may use more than one lock per wheel, but one per wheel is the common setup.

The term can be a little confusing because some people say “tire lock” when they really mean “wheel lock,” and others use it to describe a clamp that attaches to the outside of a wheel. In everyday aftermarket parts language, a tire wheel lock usually means the locking lug nut or locking wheel bolt system.

How a tire wheel lock works

The concept is simple. A regular lug nut can be removed with an ordinary lug wrench or impact socket. A wheel lock cannot, at least not easily, because its outer shape is different from standard hardware.

The key fits over the lock’s pattern and allows the fastener to turn like a normal lug nut. Without that key, removal takes more time, more tools, and more noise. That delay is the whole point. Most thieves are looking for speed. If your wheels take longer to remove than the next vehicle’s, they may move on.

That does not make a wheel lock a perfect anti-theft device. It makes it a deterrent. That distinction is worth keeping in mind when you are deciding how much protection you want.

Why wheel locks are worth considering

If your vehicle has factory steel wheels and basic all-season tires, wheel theft may not be your top concern. But if you have aftermarket wheels, oversized truck wheels, off-road setups, premium finishes, or fresh tire-and-wheel packages, the value rises quickly.

Wheel locks make the most sense when the replacement cost of your wheels and tires would be painful. They also help when your vehicle is parked outside, left in public lots, or used in areas where theft is more common. For enthusiasts, the visual side matters too. A great-looking wheel setup is part of the build. Protecting that investment is just good sense.

There is also a practical insurance angle. Even when coverage applies, a theft claim can still mean deductibles, downtime, and the hassle of sourcing replacements. A simple lock set is far cheaper than dealing with all of that.

What wheel locks do well, and what they do not

Wheel locks are effective because they create friction in the theft process. They force a thief to stop, assess, and either have the right removal method or spend extra time improvising. That alone reduces risk.

Still, they are not invincible. Given enough time and the right tools, many locks can be defeated. Some designs are stronger than others, and some low-quality lock sets are easier to compromise. If someone is specifically targeting your vehicle and comes prepared, a wheel lock may not stop them completely.

That is why the best way to think about wheel locks is layered security. They work best when combined with smart parking habits, alarms, cameras, and common sense. Security is rarely about making theft impossible. It is about making your vehicle a harder target.

Types of wheel locks

Most passenger vehicles use one of two basic fastener styles: lug nuts on wheel studs or wheel bolts that thread directly into the hub. Your lock set has to match that design.

Beyond that, wheel locks vary by seat type, thread pitch, finish, and key pattern. Seat type is especially important. Common options include cone seat, ball seat, and mag seat. If the seat does not match your wheel, the lock may not clamp correctly, and that can create both fitment and safety issues.

Material and finish matter too. Good wheel locks are made to handle torque, weather, and repeated service without rounding off or corroding quickly. If you drive in snow, salt, mud, or coastal conditions, cheap hardware tends to show its limits fast.

How to choose the right wheel lock set

Fitment comes first. You need the correct thread size, seat style, shank length if applicable, and overall dimensions for your wheel. A lock that almost fits is not good enough.

You should also think about the wheel design itself. Some aftermarket wheels have narrow lug recesses, which means a bulky lock or key may not fit into the hole cleanly. That is a common issue on style-focused wheels with tighter lug pockets. In those cases, the outside diameter of both the lock and the key matters as much as the thread spec.

Finish is partly functional and partly visual. Chrome and black are common choices, and many owners want the lock to blend in with the rest of the lug hardware. On a design-conscious build, that detail matters. Technology as an art form applies here too – security hardware should protect the wheel without disrupting the look.

Brand quality matters as well. Better lock sets usually offer more precise machining, stronger materials, cleaner fitment, and key patterns that are less vulnerable to basic removal tricks. That does not mean the most expensive set is always the right one, but ultra-cheap security hardware is usually cheap for a reason.

Installation details that matter

Installing wheel locks is straightforward, but it needs to be done correctly. The lock replaces one lug nut or bolt per wheel, and it should be tightened to the vehicle or wheel manufacturer’s torque specification.

The biggest mistake is over-tightening, especially with an impact gun. That can damage the lock, damage the key, or make roadside removal much harder than it needs to be. Wheel locks should be torqued properly with the right tool, just like the rest of your wheel hardware.

You also need to store the key somewhere you can actually find it. Not loose in the trunk where it can disappear under tools and gear. Not in a random drawer at home that you will forget six months later. Keep it in a secure, memorable place in the vehicle, especially if you ever expect to deal with a flat tire, brake service, or tire rotation.

What happens if you lose the key?

This is the downside people usually discover at the worst possible time. If you lose the wheel lock key, removing the wheels becomes much more difficult. Shops can sometimes remove locks using specialty tools, but the process may damage the lock, take extra labor, or delay service.

Some manufacturers offer replacement keys if you have the original key code. That is worth keeping if your set includes one. If not, your backup plan is usually professional removal and replacement.

This is one of those trade-offs that makes wheel locks slightly less convenient than standard lug nuts. You gain security, but you take on one more part that needs to be managed correctly.

Are wheel locks right for every vehicle?

Not always. If your wheels are low-value, your vehicle stays in a locked garage, and theft risk is minimal, wheel locks may not be necessary. For some owners, the added inconvenience is not worth it.

But for a large number of drivers, especially those with aftermarket wheels, newer trucks, Jeeps with upgraded wheel-and-tire packages, or vehicles parked outside overnight, they make a lot of sense. They are relatively affordable, easy to install, and effective enough to justify the small extra step.

There is also a middle ground. Some owners use wheel locks only during certain seasons or after upgrading wheels. Others add them to daily drivers but skip them on work vehicles that need frequent wheel service. It depends on vehicle value, parking conditions, and how often the wheels come off.

What is tire wheel lock really for?

At its core, the answer to what is tire wheel lock is simple: it is a low-profile security upgrade for one of the most visible and valuable parts on your vehicle. It does not change performance, and it does not add style in the usual sense. What it adds is resistance.

For anyone investing in better wheels, better tires, or a more complete vehicle look, that resistance is worth having. The right lock set fits properly, looks right, and adds protection without overcomplicating routine maintenance.

If you are building a vehicle with intention, security should be part of the plan, not an afterthought. Good parts deserve the same level of protection as the rest of the build.

What Is Tire and Wheel Insurance?

Hit a pothole hard enough, and the damage can get expensive fast. One bent wheel, one ruined sidewall, one tow bill – and suddenly that rough patch of road costs a lot more than a routine commute. That is why many drivers ask, what is tire and wheel insurance, and is it actually worth adding to the cost of a vehicle?

Tire and wheel insurance is an optional protection plan that helps pay for repairing or replacing tires and wheels damaged by road hazards. In most cases, that means things like potholes, nails, glass, metal debris, or broken pavement. It is not the same as standard auto insurance, and it is not the same as a manufacturer warranty. It sits in its own category – part financial protection, part convenience product.

For drivers who care about both function and finish, especially on trucks, Jeeps, SUVs, and wheel-upgraded daily drivers, the details matter. A scratched or cracked wheel is not just cosmetic when it affects sealing, balance, or structural integrity. And when replacement tires are expensive, the right coverage can make sense. The key is understanding exactly what you are buying.

What is tire and wheel insurance and how does it work?

At a basic level, tire and wheel insurance reimburses or directly covers the cost of fixing damage caused by road hazards. If you hit a pothole and the tire bubbles or blows out, the plan may pay for a replacement. If the wheel bends or cracks from the same impact, the plan may also cover repair or replacement, depending on the terms.

Most plans are sold at the dealership when you buy or lease a vehicle, but some are available through third-party warranty companies, credit unions, or insurers as add-on products. You pay either a one-time upfront fee or a monthly amount. In return, covered claims are handled according to the contract.

Some plans pay the repair shop directly. Others require you to submit receipts for reimbursement. Some have no deductible, while others charge a small per-claim fee. The value is not just in the payout amount. It is also in how quickly the claim gets approved, whether your preferred shop can do the work, and whether the replacement parts match the original fit and finish.

What tire and wheel insurance usually covers

Coverage varies, but most plans are built around road hazard damage. That usually includes a tire damaged by a nail, pothole, or debris if the tire cannot be safely repaired. It may also include wheels that are bent, cracked, or otherwise damaged from the same event.

Many plans also cover mounting, balancing, valve stems, and disposal fees tied to the replacement. Some include cosmetic wheel repair for curb rash, though that is less universal. Others extend to towing, flat tire assistance, or trip interruption if the damage leaves you stranded away from home.

That sounds straightforward, but the fine print matters. Some providers replace with comparable aftermarket parts if identical originals are unavailable. Others limit coverage to factory wheels only. If your vehicle runs upgraded wheels or oversized tire packages, that can change the equation.

What it usually does not cover

This is where buyers get tripped up. Tire and wheel insurance generally does not cover normal wear. If your tread is worn down and the tire fails, that is not a road hazard claim. Cosmetic issues with no structural damage may also be excluded unless the plan specifically includes appearance repair.

It usually will not cover damage from collisions, vandalism, off-road use, racing, improper inflation, or poor maintenance. If a wheel is damaged because the suspension is worn out or the vehicle was overloaded, the provider may deny the claim. The same goes for damage linked to manufacturer defects – that falls under warranty territory, not hazard protection.

Modified vehicles can be another gray area. Some plans are strict about non-OEM wheel and tire sizes. If the car, truck, or SUV is running a setup outside factory spec, read the contract carefully before assuming you are covered.

Tire and wheel insurance vs. warranty vs. auto insurance

The confusion usually comes from overlap in the language. A tire warranty often covers defects in materials or workmanship. If the tire fails because it was built incorrectly, that is a warranty issue. If it fails because you hit road debris, that is usually a tire and wheel insurance issue.

Standard auto insurance is different again. If you damage a wheel in an accident, collision coverage may apply, but you would still face your deductible. For many drivers, that deductible is far higher than the cost of a single tire or wheel claim, which is why they would not use auto insurance for minor road hazard damage in the first place.

Tire and wheel insurance fills that gap. It is designed for smaller but still painful incidents that happen in ordinary driving conditions. The trade-off is that it only applies to a narrow set of problems.

When tire and wheel insurance may be worth it

If you drive in an area with rough roads, winter freeze-thaw damage, construction zones, or constant potholes, this type of coverage becomes more compelling. The same is true if your vehicle uses low-profile tires, large-diameter wheels, or premium wheel finishes that cost a lot to replace.

Lease customers often find it attractive because wheel damage can become a turn-in issue. Owners of trucks and SUVs may also see value if replacement tires are expensive and the vehicle sees heavy daily mileage. Drivers who simply want predictable ownership costs sometimes like the convenience, especially if the plan includes roadside help and easy claims handling.

It also tends to make more sense when the wheel and tire package itself is high value. A basic steel wheel and common tire size are one thing. A premium alloy wheel paired with a more specialized tire is another.

When it may not be worth it

If you rarely drive, live where roads are in good shape, or run affordable replacement tires and wheels, the math may not work in your favor. Some plans cost enough upfront that you could set aside the same amount as a repair fund and come out ahead if you never file a claim.

It may also be a weak value if the contract has tight exclusions, low payout caps, or limited repair network options. Coverage sounds impressive until you realize the plan only pays for damage under very specific conditions. If your wheel setup has already been changed from stock, the chance of a denied claim can be higher.

This is one of those products where usage patterns matter more than marketing. The best plan on paper still needs to match the way the vehicle is actually driven.

What to check before you buy

The strongest question is not just what is tire and wheel insurance, but what does this specific plan cover for this specific vehicle. Start with whether the coverage applies to your exact wheel and tire package, including any optional upgrades.

Then look at claim limits. Check whether there is a cap per repair, a cap per wheel, or a total contract maximum. See if there is a deductible and whether labor, balancing, taxes, and towing are included. Ask how cosmetic wheel damage is handled, because some providers cover refinishing while others cover structural repair only.

Also check whether replacements must be authorized in advance. If you hit a pothole on a weekend trip and need immediate service, preapproval rules can matter. So can the provider’s parts policy. If appearance, material, and fitment are priorities, you want to know what kind of replacement standard the contract uses.

For enthusiast-minded owners, this part matters more than the sales pitch. Wheels are not just hardware. They affect stance, ride quality, brake clearance, and visual finish. At FORTLUFT, that balance of function and style is central to how drivers think about parts in the first place.

A practical way to think about the cost

Do a simple comparison. Price one replacement tire for your vehicle. Then price one wheel. Add mounting, balancing, alignment check if needed, and a tow if the damage leaves you stuck. Compare that realistic out-of-pocket number against the plan cost.

If one claim would nearly equal or exceed the price of the coverage, the plan may be reasonable. If it would take multiple claims before the plan pays off, then self-funding may be the better move. There is no universal answer because tire sizes, wheel finishes, and driving conditions vary so much.

The smartest buyers treat tire and wheel insurance like any other automotive protection product – not as an automatic yes or no, but as a fitment question. If the coverage matches your roads, your vehicle, and your wheel and tire costs, it can be a practical layer of protection. If the contract is vague or the numbers do not work, keeping that money for future parts and repairs may be the cleaner choice.

Before you sign anything, ask for the full terms and read them like you would a spec sheet. Good protection should be as precise as the components on your vehicle.

What Is Tire and Wheel Warranty Coverage?

A pothole at 45 mph can ruin a wheel faster than most drivers expect. One hard impact, and suddenly you are dealing with a bent rim, a sidewall bubble, or a tire that will not hold air. That is usually the moment people ask, what is tire and wheel warranty coverage, and whether it could have saved them money.

The short answer is simple. A tire and wheel warranty is a protection plan that helps cover the cost of repairing or replacing tires and wheels damaged by road hazards. That usually means things like potholes, nails, glass, debris, and uneven road surfaces. It is different from a manufacturer’s warranty, which generally covers defects in materials or workmanship rather than damage from normal driving conditions.

That distinction matters. If a wheel cracks because it was poorly made, that may fall under the product manufacturer’s warranty. If the same wheel gets bent because it slammed into a deep pothole, that usually does not. Tire and wheel warranty coverage exists for that second scenario.

What is tire and wheel warranty protection meant to cover?

At its core, this kind of coverage is built around road hazard damage. For most drivers, that means unexpected impact damage that happens during regular use on public roads. If a tire gets punctured by debris and cannot be safely repaired, the warranty may pay for replacement. If a wheel is bent or cracked from an impact, it may cover repair or replacement there too.

Coverage often extends beyond the part itself. Many plans also include mounting, balancing, valve stems, and sometimes even sales tax or disposal fees. Some premium plans go further and include cosmetic wheel repair, though that is far from universal. If appearance matters to you as much as function, that is worth checking before you buy.

There is also a practical difference between tire-only protection and combined tire-and-wheel protection. Tire-only plans are common, especially at the point of sale for new tires. Combined plans matter more if you drive on larger wheels, low-profile tires, or vehicles that are simply harder on wheel assemblies, like trucks, Jeeps, and SUVs used on rough roads.

What it usually does not cover

This is where buyers get tripped up. A tire and wheel warranty is not a blanket promise against every kind of damage. Most plans exclude damage caused by collisions, racing, off-road use, vandalism, theft, improper installation, poor maintenance, and intentional abuse.

Wear-related issues are usually excluded too. If your tires wear out early because alignment was off, air pressure was neglected, or suspension components were worn, the warranty probably will not help. The same goes for cosmetic issues unless the plan specifically says cosmetic damage is included.

There is often fine print around vehicle condition as well. Some plans require that tires meet minimum tread depth at the time of the claim. Others will prorate replacement based on remaining tread. That means the warranty may cover a smaller portion of the cost as the tire gets older.

How it differs from a standard tire warranty

A standard tire manufacturer warranty typically focuses on defects and tread life. If the tire was built incorrectly or wears out far earlier than promised under normal, properly maintained use, that is the manufacturer’s lane.

A tire and wheel warranty covers external damage from the road. Think of it as impact protection rather than quality assurance. One deals with whether the product was made right. The other deals with what happened after it was on the vehicle.

That separation is why some drivers assume they are covered when they are not. They hear the word warranty and expect all failures to be treated the same. In reality, the source of the damage decides almost everything.

When this coverage makes the most sense

Not every driver needs it, and not every vehicle benefits equally. The value depends on where and how you drive, along with the wheel and tire setup on your vehicle.

If you drive in a city with rough pavement, frequent construction zones, or harsh winter freeze-thaw cycles, the odds of road hazard damage go up. If your vehicle runs larger diameter wheels with shorter sidewalls, the risk goes up again. Low-profile tires may look sharp and improve response, but there is less sidewall cushion between the wheel and the road. That can turn one hard hit into an expensive replacement.

For trucks, Jeeps, and SUVs, the equation shifts a bit. Heavier vehicles can hit harder and put more stress on wheels and tires during impacts. If they are also used for commuting, hauling, and occasional rough-road driving, the protection can make sense. Still, some plans draw a hard line on true off-road use, so it is smart to confirm how the provider defines that.

Drivers with basic commuter setups on smaller wheels may find the math less compelling. If replacement tires are affordable and local roads are in decent shape, self-funding the occasional repair might be the better move.

What to look for before you buy

The strongest tire and wheel warranties are not always the ones with the biggest promises. They are the ones with terms that are easy to understand and realistic for the way you actually drive.

Start with the coverage period. Some plans last one to three years, while others are tied to the life of the tire. Then look at whether the plan offers repair first or immediate replacement. Repair can be efficient for simple punctures, but replacement terms matter more when the damage is severe.

Pay close attention to claim limits. Some plans cap the number of claims, limit reimbursement per incident, or exclude replacement if the wheel can technically be repaired. Others require pre-authorization before any work begins. If you buy online and use your own installer, that process matters.

You should also check whether coverage is transferable, whether it applies nationwide, and whether it works with aftermarket wheels and tires. Not every plan treats aftermarket fitments the same way, especially if the setup is oversized, staggered, or outside factory specifications.

Is it worth the cost?

Sometimes yes, sometimes no. The right answer depends on replacement cost and risk exposure.

If you are running expensive wheels, specialty tires, or a larger wheel package, one damaged component can cost more than the warranty itself. In that case, the protection can be a smart buy. The same is true if your local roads are bad enough that damage feels likely rather than hypothetical.

On the other hand, if your tires are modestly priced, your wheel setup is durable, and your roads are relatively smooth, the plan may not return much value. A lot of coverage decisions come down to how painful an out-of-pocket replacement would be. Some drivers would rather pay once for peace of mind. Others would rather keep the money and accept the risk.

That is not just a budget question. It is also a product question. Premium wheel and tire setups are part function, part style. If you care about how your vehicle looks and performs, protecting that investment can be more compelling than it would be for a purely basic replacement setup. That design-conscious angle is part of why buyers shopping performance or appearance upgrades often pay closer attention to protection plans.

How claims typically work

Most claims start with inspection and documentation. You notice damage, stop driving if safety is in question, and take the vehicle to an authorized shop or follow the warranty provider’s claim process. The provider may ask for photos, proof of purchase, tire tread depth, and a diagnosis showing the damage resulted from a covered road hazard.

If approved, the plan may cover repair, replacement, or reimbursement, depending on the terms. Some providers pay the shop directly. Others reimburse you after the fact. Timing matters here. If the plan requires approval before repair and you skip that step, you could end up paying for everything yourself.

That is one more reason to read the fine print before you need it. Warranty value is not just about what is covered. It is also about how easy the coverage is to use when something goes wrong.

What is tire and wheel warranty coverage really buying you?

At a practical level, it buys protection against road hazard costs. At a broader level, it buys predictability. Instead of wondering whether one bad pothole will blow up your maintenance budget, you know the risk is partially managed.

That predictability matters more than people think, especially when parts are not cheap and vehicles are expected to work hard every day. Whether you are maintaining a daily driver, outfitting a truck, or upgrading a Jeep or SUV with a more aggressive wheel-and-tire package, the right warranty can protect both utility and appearance.

The smart move is not to assume every plan is good or every driver needs one. It is to match the coverage to the vehicle, the roads, and the real replacement cost. When the fit is right, a tire and wheel warranty is less about selling fear and more about protecting a part of the vehicle that takes a beating every mile.

What Is Tire and Wheel Protection?

A bent rim after one hard pothole hit can turn a normal commute into an expensive afternoon. A sidewall bubble from road debris can do the same. If you have ever looked at a repair bill for a damaged wheel or a ruined tire, you have probably asked: what is tire and wheel protection, and is it actually worth paying for?

What is tire and wheel protection?

Tire and wheel protection is a service contract or coverage plan that helps pay for repair or replacement when a tire or wheel is damaged by road hazards. In plain terms, it is designed for the kind of damage drivers cannot always avoid – potholes, nails, broken pavement, metal debris, glass, or other objects in the road.

This is not the same thing as a manufacturer warranty. A tire warranty usually covers defects in materials or workmanship. Tire and wheel protection is focused on accidental damage that happens during normal driving.

That distinction matters. If a wheel cracks because of an impact, or a tire is punctured by a nail and cannot be safely repaired, standard product warranties often will not help. A protection plan may.

What tire and wheel protection usually covers

Coverage varies by provider, but most plans are built around road hazard damage. That usually includes punctures, impact breaks, sidewall damage, bent wheels, and in some cases cracked wheels. If a tire can be safely repaired, the plan may pay for that repair. If it cannot, the plan may cover replacement.

Wheel coverage often applies when the wheel becomes structurally compromised and can no longer hold air or operate safely. Cosmetic damage is a separate issue. A scraped wheel face from curb contact may not be included, even if the wheel looks rough afterward.

Some plans also cover related costs such as mounting, balancing, valve stems, and disposal fees. Higher-tier coverage may include alignment checks or even roadside assistance, but that is not standard across the board.

The key point is simple: tire and wheel protection is usually about functional damage from road hazards, not every form of wear or appearance issue.

What is not usually covered

This is where many buyers get tripped up. Tire and wheel protection sounds broad, but every plan has exclusions.

Normal tread wear is almost never covered. Neither is damage caused by improper inflation, overloading, racing, off-road abuse, vandalism, collision damage, or neglected maintenance. If a tire wears out because alignment was off for 15,000 miles, that is a maintenance problem, not a road hazard claim.

Cosmetic wheel damage is another common exclusion. If you curb a wheel while parking and the finish is scraped, many plans will not pay for refinishing or replacement unless the damage also affects safe operation.

There is also a fitment angle. If you are running oversized wheels, low-profile tires, or a custom setup, you need to read the contract carefully. Some plans are built for factory-size replacement only. Others allow upgraded aftermarket wheel and tire packages, but not all.

Why drivers buy it

The value of tire and wheel protection comes down to one thing: modern wheel and tire packages are not cheap. Larger diameter wheels, lower-profile tires, and performance-oriented fitments can look sharp and improve handling response, but they also tend to leave less cushion between the road and the rim.

That means one pothole can do more damage than many drivers expect. Trucks, Jeeps, and SUVs are not immune either. Heavier vehicles put more load into the wheel and tire assembly, and urban roads, construction zones, and winter pavement damage create risk no matter what you drive.

For buyers who care about both function and appearance, this matters even more. A wheel is not just a rolling component. It is part of the vehicle’s stance, fit, and overall visual finish. Protecting that investment can make sense when replacement costs are high.

When tire and wheel protection makes sense

If you drive in areas with rough roads, recurring potholes, or constant construction, coverage is easier to justify. The same goes for drivers who log serious mileage, commute daily, or travel on roads where debris is common.

It can also make sense if your vehicle uses expensive tires, large wheels, or low-profile fitments. A single replacement on a premium setup may cost enough to offset much of the plan price.

Newer vehicles are another case where buyers often consider it. Repair costs tend to feel more frustrating when the vehicle is new, and many owners want predictable expenses during the first few years.

For business buyers, shops, and fleet operators, the math is different but still practical. Downtime costs money. If coverage speeds up replacement decisions and limits surprise expenses, it may support smoother operations.

When it may not be worth it

Not every driver needs it. If you drive limited miles, stay mostly on well-maintained roads, and use affordable replacement tires in common sizes, a protection plan may offer less value.

It may also be unnecessary if the plan cost is high relative to the actual wheel and tire package on the vehicle. Spending heavily to protect a low-cost setup does not always pencil out.

The same caution applies if the coverage has a long list of exclusions, a difficult claims process, or low reimbursement caps. A cheap-looking plan is not a good deal if it does not pay out when you need it.

This is one of those areas where the right answer depends on your vehicle, your driving environment, and the replacement cost of the parts involved.

What to check before you buy

If you are comparing plans, do not stop at the headline price. Read the details with the same attention you would give wheel specs or tire load ratings.

First, verify whether the plan covers repair only, replacement only, or both. Then check whether it covers both tires and wheels, or just tires. Some buyers assume wheel damage is included when it is not.

Look at claim limits, deductible requirements, and the number of claims allowed. Some plans cover unlimited eligible repairs but limit replacements. Others are prorated, which means reimbursement may change over time.

You should also confirm whether aftermarket wheels are eligible. For enthusiasts and style-conscious buyers, this is a major point. If your vehicle runs an upgraded package, the contract needs to match the setup actually on the vehicle.

Finally, check the claim process. Fast approvals, clear documentation requirements, and straightforward reimbursement matter. Good coverage on paper loses value if it is a hassle to use.

What is tire and wheel protection compared with road hazard warranty?

These terms are often used interchangeably, but they are not always identical. A road hazard warranty is usually tied directly to the tire purchase and covers damage from hazards encountered on the road. Tire and wheel protection may be broader because it can include wheel repair or replacement and related service costs.

Still, providers use different language. One company may market road hazard coverage as part of a tire package, while another sells a separate tire and wheel protection contract. The real answer is in the coverage terms, not just the label.

How claims usually work

Most claims start with an inspection. The damaged tire or wheel is evaluated to confirm that the issue came from a covered road hazard rather than wear, neglect, or misuse. If the tire is repairable under industry safety standards, the plan may approve a repair. If not, replacement may be authorized.

For wheels, the provider may determine whether repair is safe and appropriate or whether full replacement is required. Structural damage typically matters more than surface appearance.

Documentation is usually part of the process. Expect to keep your original purchase records and maintenance history. If the plan requires proper tire rotations or inflation maintenance, missing records can create problems.

The bottom line for real-world buyers

What is tire and wheel protection? It is a way to reduce the financial hit from road hazard damage to one of the most exposed and expensive parts of your vehicle. For some drivers, it is smart insurance against bad pavement and bad luck. For others, it is an add-on they may never use.

The best approach is to look at the actual wheel and tire package on your car, truck, Jeep, or SUV, then compare that cost against the price and terms of the plan. If the coverage is clear, the claims process is reasonable, and your roads are rough enough to make damage likely, it can be money well spent.

A wheel and tire setup does more than keep a vehicle moving. It affects safety, ride quality, and the way the vehicle presents itself on the road. Protect it with the same level of attention you give every other part that matters.

Can You Paint Wheels With Tires On?

A wheel can make a clean truck or SUV look finished, or make the whole vehicle feel tired. That is why the question comes up so often: can you paint wheels with tires on? Yes, you can – and plenty of DIY owners do it successfully – but the result depends almost entirely on prep, masking, and realistic expectations.

If you want a quick cosmetic refresh, painting wheels with the tires still mounted is usually possible. If you want a near-factory finish that will hold up to road salt, brake dust, and close inspection, removing the tire from the wheel is still the better route. The difference is not just convenience. It is about how much of the wheel you can properly clean, sand, and coat.

Can You Paint Wheels With Tires On Without Ruining the Tire?

You can paint wheels with tires on without damaging the tire, as long as you mask carefully and use products intended for automotive surfaces. The biggest risk is not chemical damage to the rubber. It is overspray, uneven edges near the bead, and trapped dirt where the tire meets the wheel.

That bead area is where shortcuts show. If brake dust, old tire dressing, or road film is left behind, paint can lift early. On a daily driver, that often means chipping around the lip within a few weeks or months. On a weekend build, the finish may last longer simply because it sees less abuse.

So the honest answer is yes, but with limits. Mounted tires make the job faster and cheaper. They also make it harder to achieve a crisp finish around the edge and inside tight contours.

When Painting Wheels With Tires On Makes Sense

There are situations where leaving the tires mounted is the smart move. If the wheels have light curb rash, faded clear coat, or a worn finish that you want to improve without paying for tire dismounting, this method is practical. It is also useful when the goal is appearance, not full restoration.

For many drivers, especially those refreshing stock wheels on a commuter, Jeep, or work truck, the time savings are worth it. You avoid the extra labor of breaking down each tire, and the wheel can still look dramatically better from five feet away – and often from much closer if the prep is done right.

This approach also works well on wheels that are already mounted on older tires you plan to replace later. If a new tire set is coming soon, painting now can be a reasonable interim upgrade.

When You Should Remove the Tires First

There are also clear cases where painting wheels with tires on is not the right move. If the wheels have severe corrosion, peeling finish near the bead, or deep curb damage, mounted tires get in the way of proper repair. The same goes for powder coating or any finish where complete stripping and curing are part of the process.

High-end wheels deserve more precision. If you are working with polished lips, machined surfaces, or a wheel design with a lot of exposed barrel area, tire removal gives you better access and a more professional edge. The finish will usually last longer because you can prep the entire face and lip correctly.

If you are already investing in a premium look, do not let a shortcut define the result.

How to Paint Wheels With Tires On the Right Way

The process is straightforward, but the finish depends on discipline. Rushing between steps is what creates fish-eyes, peeling, and rough texture.

Start by removing the wheel from the vehicle. You can technically paint it while it is still bolted on, but that makes cleaning harder and raises the chances of overspray hitting brake components or body panels. Once the wheel is off, wash it thoroughly with soap and water, then use a dedicated degreaser or wax-and-grease remover. Brake dust is stubborn, and any tire shine residue near the edge can ruin adhesion.

After cleaning, address damage. Light curb rash can be smoothed with sandpaper. Flaking clear coat should be feathered out so the new paint does not sit on a failing layer. If the old finish is stable, you do not always need to strip to bare metal, but you do need to scuff the surface enough for primer or paint to bite.

Masking is where mounted tires either work or fail. Some DIY painters use playing cards tucked between the wheel lip and tire sidewall. Others use masking tape and paper or plastic. The card method is popular because it creates a clean edge quickly, but tape still helps in areas where cards shift or leave gaps. The key is full coverage of the tire sidewall and valve stem, with no exposed rubber near the edge.

Once masked, apply a light, even primer if your paint system calls for it. Then build color in thin coats instead of trying to cover everything at once. Heavy coats are what cause runs and soft finish lines near the tire. Let each coat flash properly. Finish with clear coat if the paint type requires it and if you want more gloss and durability.

Then let it cure. Not dry to the touch – cure. Mounting the wheel back on too soon or washing it too early is one of the easiest ways to ruin a decent job.

The Biggest Mistakes DIY Painters Make

Most bad wheel paint jobs do not fail because the tires stayed on. They fail because the wheel was not truly clean. Tire dressing sling, silicone residue, and old brake dust are constant problems. If the surface feels slick anywhere, it is not ready.

The next mistake is poor sanding. Paint needs mechanical adhesion. Spraying over glossy factory clear without scuffing it enough may look fine on day one and peel later.

Then there is product choice. General-purpose spray paint is rarely the best option for wheels, which deal with heat cycles, road grime, and constant impact from debris. Wheel-specific paint systems are usually the smarter call because they are formulated for harsher conditions.

Finally, many people ignore the inside of the spokes and the outer lip. Those are the zones your eye catches first. If coverage is thin there, the wheel never looks fully refinished.

What Kind of Finish Should You Expect?

If you paint carefully, mounted-tire wheel refinishing can look very good. It can absolutely transform the appearance of a vehicle, especially if the original finish is faded or stained. On black, silver, graphite, or gunmetal wheels, the visual improvement is often strong enough to make the whole vehicle feel newer.

But this method has a ceiling. It is not the same as a stripped, repaired, professionally coated wheel with the tire removed. Edges may not be quite as sharp. Durability may be lower around the bead. Tiny imperfections in prep are more likely to show up over time.

That does not make it a bad choice. It just means the right standard is improvement, not perfection.

Is It Better to Paint, Powder Coat, or Replace?

It depends on the wheel, the budget, and the goal. Paint is the fastest and most accessible option. Powder coating is tougher and often cleaner-looking, but it requires full tire removal and more downtime. Replacement makes sense when the wheel is heavily damaged, structurally questionable, or simply not the style you want anymore.

For many owners, paint is the sweet spot. It delivers a visual upgrade without the cost of a new wheel set. If the wheel is sound and the finish is the main issue, refinishing can be a smart move.

That is especially true when appearance matters as much as function. Wheels are one of the clearest examples of automotive design doing real work. They take abuse every day, but they also define stance, contrast, and presence. Technology as an art form only works when both sides show up.

So, Can You Paint Wheels With Tires On?

Yes – and for the right vehicle, budget, and expectations, it is a solid DIY job. Just do not confuse possible with effortless. The tire can stay on, but the standards for cleaning, masking, and coating still need to stay high.

If you want a clean refresh, this method can deliver. If you want the best edge quality and longest-lasting finish, remove the tire first. Either way, the wheel deserves the same attention you would give any visible performance part. A strong look starts with surfaces that are prepared like they matter.

How to Change Tires and Rims Right

A bad wheel swap usually starts with confidence. The jack goes under the wrong point, the lug nuts come off in a rush, and the new rim looks perfect right up until vibration shows up at 55 mph. If you are learning how to change tires and rims, the goal is not just getting the vehicle back on the ground. It is getting the fit, torque, and contact patch right so the vehicle drives the way it should.

For DIY owners, this job sits at the intersection of maintenance and style. A fresh set of tires restores grip and braking. A new set of rims can sharpen the entire stance of a car, truck, Jeep, or SUV. Done correctly, the result is functional and visual. Done carelessly, it can create safety issues, uneven wear, or damage to studs, sensors, and suspension components.

What to know before you change tires and rims

Before touching a lug nut, confirm that the new tire and wheel package actually fits your vehicle. That means more than matching bolt count. You need the correct bolt pattern, wheel diameter, wheel width, center bore, offset, and tire size. If one of those is off, the wheel may bolt on but still rub the brake caliper, sit too far inward, or push too far outward.

This is where many swaps go wrong. A rim that looks aggressive on a product page may not work with your brake setup or suspension travel. Tire size matters just as much. Going too tall can affect speedometer accuracy and clearance. Going too wide can change steering feel and increase rubbing at full lock. There is no single best upgrade size for every vehicle. It depends on intended use, suspension height, and how much ride comfort you want to keep.

If your vehicle uses a tire pressure monitoring system, plan for that too. Some wheels accept factory sensors easily. Others require a different sensor shape, valve stem, or relearn procedure after installation.

Tools that make the job cleaner and safer

You do not need a full shop, but you do need the right basics. A quality floor jack is better than the emergency jack included with most vehicles. Jack stands are not optional if the vehicle will be off the ground for more than a quick roadside tire change. You will also want a lug wrench or breaker bar, a torque wrench, wheel chocks, gloves, and a tire pressure gauge.

If you are changing the tire on the rim, not just swapping complete wheel-and-tire assemblies, that is a different level of job. Mounting and balancing tires properly requires dedicated equipment. Most DIY owners should remove the old assemblies and have the tires mounted and balanced by a shop. It is faster, more precise, and easier on the wheel finish.

How to change tires and rims step by step

Start on a flat, solid surface. Put the vehicle in park or in gear if it is a manual, set the parking brake, and chock the wheels that will stay on the ground. Then loosen the lug nuts slightly before lifting the vehicle. Do not remove them yet. Breaking them loose while the tire is still planted keeps the wheel from spinning.

Next, place the jack at the correct lift point. Your owner’s manual shows these locations, and using them matters. Lift the vehicle until the tire clears the ground, then support it with jack stands if you will be working for more than a moment.

Remove the lug nuts fully and pull the wheel off. If it sticks from corrosion, do not hammer the rim face. A firm hit to the tire sidewall with your hand or a rubber mallet usually frees it. Once the wheel is off, inspect the hub surface. Dirt, rust, and scale can keep the new rim from sitting flush, which leads to wobble and improper torque. Clean the mounting surface with a wire brush until it is smooth.

Now test-fit the new rim before committing to the full swap. Check caliper clearance, center bore fit, and stud engagement. If the wheel needs hub-centric rings, install them now. If your setup uses a specific lug seat style, make sure your lug nuts match the wheel. Conical-seat, ball-seat, and shank-style hardware are not interchangeable just because they thread on.

Mount the new wheel and hand-thread the lug nuts. Tighten them in a star pattern so the wheel seats evenly against the hub. Lower the vehicle just enough for the tire to touch the ground lightly, then use a torque wrench to tighten the lug nuts to the vehicle manufacturer’s specification, again in a star pattern. Final torque matters. Too loose and the wheel can work itself free. Too tight and you risk stretched studs or warped brake components.

Repeat the process at each corner. After that, set tire pressure to the correct spec for your vehicle and tire setup. If you installed a different wheel and tire package, the pressure printed on the tire sidewall is not the target number. Use the vehicle recommendation as your baseline, then adjust only if your application calls for it.

Changing tires on rims is not the same as swapping assemblies

A lot of people use the phrase how to change tires and rims when they mean replacing one complete wheel assembly with another. That is the easy version. The harder version is separating the tire from the old rim, mounting it onto a new rim, and balancing it.

That second job requires a tire machine, a balancer, and enough care to avoid scratching the wheel or pinching the bead. Low-profile tires and larger aftermarket rims make it even more demanding. If your goal is a professional result, especially on a premium finish, this is usually where a shop earns its keep.

There is no loss of DIY credibility in outsourcing mounting and balancing. In fact, it is often the smarter move. Handle the fitment planning and vehicle-side installation yourself, and let a machine do the part that needs machine-level precision.

Fitment details that affect performance and appearance

Rims change more than looks. Offset alters where the wheel sits relative to the hub. A lower offset pushes the wheel outward for a wider stance, but too much can increase scrub radius, stress wheel bearings, and throw debris down the body side. A higher offset pulls the wheel inward, which may clean up the look but can create suspension or brake clearance issues.

Wheel width and tire width should also work together. Stretching a narrow tire onto a wide rim may create a certain style, but it reduces rim protection and can compromise how the tire behaves under load. On the other hand, an oversized tire on a narrow wheel can feel vague and unstable. The right pairing keeps the sidewall shape controlled and the contact patch predictable.

For trucks and Jeeps, the trade-off often comes down to road comfort versus off-road clearance and presence. Larger wheels with shorter sidewalls can look sharper on pavement, but they generally give up some ride compliance. Smaller wheels with taller sidewalls often perform better off-road and absorb impacts more effectively. Style matters, but use matters more.

Common mistakes to avoid

The most common mistake is assuming all five-lug wheels fit all five-lug vehicles. Bolt pattern must match exactly. The second is ignoring center bore and offset. The third is using the wrong lug nuts. Hardware is not a detail. It is the connection between the wheel and the vehicle.

Another frequent issue is skipping the re-torque. After driving 50 to 100 miles on freshly installed wheels, check lug nut torque again. New wheels can settle slightly against the hub, especially if the mounting surface had minor debris or fresh coating.

Finally, do not forget balance and alignment. If you install a new tire and rim package and the steering wheel shakes, the issue may be wheel balance, not the wheel itself. If the vehicle pulls or the tires begin wearing unevenly, alignment may need attention, especially if the new setup changes overall diameter or width.

When a shop is the better call

Some jobs look simple until the details stack up. If your vehicle has large brake calipers, aftermarket suspension, wheel spacers, or TPMS complications, professional installation can save time and prevent expensive mistakes. The same goes for vehicles with corrosion-heavy hubs or lug nuts that have been overtorqued by impact guns.

For many owners, the best approach is hybrid. Source the right parts, confirm fitment carefully, and handle the wheel removal and installation if you are comfortable. Use a tire shop for mounting, balancing, and sensor service. That gives you control without forcing every part of the process into a home garage.

A tire and rim change is one of the fastest ways to alter how a vehicle feels and how it presents itself. Treat it like both a maintenance job and a design decision, and the result will look right, drive right, and stay right long after the first test drive.

How to Store Tires and Rims the Right Way

A good wheel and tire setup is not cheap, and a bad storage routine can ruin it quietly. One season in the wrong corner of the garage can leave you with dry rubber, stained finishes, trapped moisture, or a set that vibrates when it goes back on the vehicle. If you’re wondering how to store tires and rims without shortening their life, the answer comes down to clean prep, the right environment, and the right position.

For daily drivers, lifted trucks, Jeeps, and performance builds alike, storage is part of maintenance. Tires are engineered compounds. Rims are finished surfaces. Both react to heat, sunlight, moisture, and pressure over time. Store them correctly, and your next seasonal swap is simple. Store them poorly, and you may be shopping sooner than expected.

How to store tires and rims without causing damage

The first step is cleaning them properly before they ever go into storage. Road salt, brake dust, tar, and grime do more than make a wheel look neglected. They hold moisture against the finish and can slowly etch coatings or encourage corrosion, especially on damaged spots around the lip or lug area.

Wash the tires and rims with mild soap and water, then dry them completely. That last part matters. Putting damp wheels into storage bags or stacking them while moisture is still trapped between surfaces is an easy way to create stains, oxidation, and odor. If the wheels have a polished or coated finish, avoid harsh chemicals that strip protection.

Once they are clean, inspect them like you mean it. Look for uneven tread wear, sidewall cracking, punctures, bent lips, or curb damage. If a tire is already aging out or a rim has structural damage, storage will not fix it. It only delays the moment you have to deal with it. Mark each wheel’s previous position on the vehicle – front left, front right, and so on – so rotation planning is easier next season.

The best place to store tires and rims

The ideal storage space is cool, dry, and stable. A climate-controlled garage, basement, or enclosed workshop is better than a shed, carport, or anywhere with big swings in temperature and humidity. Tires do not like prolonged heat, direct sun, or ozone exposure from electric motors and certain shop equipment. Rims do not like wet concrete, condensation, or contact with chemicals.

If your only option is a garage, choose the cleanest and most protected area you have. Keep the set away from windows, furnaces, water heaters, air compressors, welders, and chemical storage. Fuel vapors, solvents, and petroleum products can accelerate rubber degradation. That matters whether you are storing a winter setup for your SUV or a polished aftermarket wheel package for a weekend truck.

A common mistake is leaving the set directly on bare concrete for months. Concrete can hold moisture, and temperature transfer is not ideal either. Put down a piece of clean plywood, thick cardboard, rubber matting, or a storage rack to create separation from the floor.

Should you bag the tires?

Usually, yes – with one condition. They need to be fully dry first. Tire storage bags or large plastic bags help reduce exposure to air, dust, and light. If the tires are mounted on rims, bagging still helps, especially for finished wheels that you want to keep free from scratches and shop debris.

Do not seal in moisture. If you wash the set and bag it too soon, you are creating a closed, damp environment. That is a bad trade. Protection only works when the components go in clean and dry.

Store mounted and unmounted sets differently

How to store tires and rims depends partly on whether the tires are mounted on the wheels.

If the tires are mounted on rims, stacking is generally acceptable for seasonal storage, as long as the stack is not excessive and the wheels are protected from metal-to-metal contact. Four is usually manageable for most passenger vehicle setups. You can also hang mounted assemblies on a proper wall rack designed to support them by the wheel, not by compressing the tire oddly.

If the tires are not mounted on rims, store the tires upright, side by side, and rotate their position slightly once a month if they will sit for a long stretch. Do not hang unmounted tires, and do not stack them flat for extended periods. That can distort their shape over time.

For rims stored without tires, keep them upright or on padded shelving with spacing between each wheel. Finished surfaces are easy to mark up if they are leaned carelessly against each other. A protective sleeve, cloth barrier, or wheel tote goes a long way here.

What about tire pressure?

For mounted sets, reduce pressure modestly for storage if the manufacturer guidance and your setup allow it, but do not fully deflate the tires. A tire that is left nearly empty is more vulnerable to bead issues and shape distortion. You are not trying to collapse it. You are simply avoiding unnecessary stress from full operating pressure while it sits.

If the mounted set stays on the vehicle during storage, that becomes a different conversation. Then you need to think about flat spotting, full vehicle weight, and moving the vehicle periodically or placing it on stands when appropriate.

Protecting rim finish during storage

Wheel finish is where a lot of value lives. Painted, machined, polished, chrome, satin black, bronze, and clear-coated wheels all have different sensitivities, but the rule is the same: keep them clean, dry, and separated from abrasion.

Do not slide wheels across the floor. Do not stack them face to face without a barrier. Do not wrap them in dirty blankets that carry grit into the finish. A set of padded wheel bags, foam separators, or even clean microfiber barriers can prevent the kind of cosmetic damage you notice immediately when reinstalling them.

This is especially relevant for aftermarket rims. Style matters, but finish care is not just cosmetic. Chips, scratches, and compromised coatings can open the door to corrosion around exposed metal. At FORTLUFT, that mix of function and appearance is not a contradiction. It is the point. Good parts should perform and present well.

Common mistakes that shorten tire life

Most storage damage does not look dramatic at first. It shows up later as vibration, sidewall dryness, surface staining, or tires that seem older than they should. The biggest mistakes are easy to avoid once you know where the risk comes from.

One is storing tires in direct sunlight. UV exposure steadily breaks down rubber. Another is keeping them near electric motors or generators that produce ozone, which can accelerate cracking. A third is ignoring cleanliness and storing brake dust and road salt right on the wheel. Then there is the simple but costly mistake of piling heavy items on top of the tires or wheels.

There is also an it-depends factor with long-term storage. A few months between seasons is straightforward if the space is controlled. A year or longer requires more attention to environment, positioning, and periodic checks. If the storage area gets damp in summer or freezing in winter, your margin for error gets smaller.

A smart seasonal routine for trucks, Jeeps, and SUVs

Larger wheel and tire packages need a little more planning because of their weight and bulk. All-terrain and mud-terrain tires, plus heavier rims, are harder to stack safely and easier to scratch during handling. If you run oversized fitments on a truck or Jeep, use a rack or individual storage positions if possible rather than building a tall stack.

This is also the time to check torque notes, tread depth, and wear patterns before the set disappears for the season. If one tire is wearing faster than the others, storage is your pause point to address alignment or suspension issues before they eat into the next season too.

For shops and higher-volume buyers, labeling every set with vehicle info, position, and removal date keeps inventory clean and reinstalls faster. Efficient storage is not just about preservation. It saves labor and reduces avoidable damage.

How to know your stored set is still ready to use

Before reinstalling, inspect the tires and rims again. Look for cracking, hardening, flat spots that do not round out, corrosion around the bead area, or finish damage around lug holes and edges. Check tread and age. Storage preserves a set, but it does not stop time.

If the tires are several years old, even a well-stored set may need closer evaluation before going back into service. The same goes for rims that took an impact before storage and were never inspected properly. Clean storage is smart maintenance, not a substitute for condition checks.

Treat your wheel and tire package like a real component investment, because that is exactly what it is. A clean, dry, controlled storage routine keeps the rubber healthier, the finish sharper, and the next install a lot less frustrating.

How to Ship Tires and Wheels Safely

A bent lip, scraped finish, or damaged bead seat can turn a good sale or a planned install into a headache fast. If you need to know how to ship tires and wheels, the real goal is not just getting them from point A to point B. It is getting them there clean, protected, and ready to mount.

Shipping tires by themselves is fairly simple. Shipping wheels takes more care. Shipping mounted tire and wheel sets sits in the middle – easier in some ways, heavier and more expensive in others. The right method depends on what you are sending, how far it is going, and how much risk you are willing to accept.

How to ship tires and wheels without damage

The first decision is whether you are shipping tires only, wheels only, or complete mounted assemblies. Each one needs a different packing approach.

Bare tires are the least fragile. They can often ship with minimal packaging because rubber handles normal transit well. Wheels are different. Painted, polished, machined, or powder-coated finishes can be marked up by rough handling, and the outer lip is especially vulnerable. Mounted sets add sidewall protection and reduce direct contact with the wheel face, but they also bring more weight and bulk, which pushes shipping costs higher.

If appearance matters – and with aftermarket wheels, it usually does – package for impact, not just for dirt. A shipping label stuck on an exposed wheel may get it delivered, but it will not protect the finish.

Shipping tires only

For tires without wheels, start by cleaning off loose dirt and small stones. That keeps the package cleaner and avoids extra handling issues. Then measure the tire’s overall diameter and section width so you can estimate shipping charges accurately.

Many carriers accept tires with a label attached directly to the tread, but that does not always mean it is the best choice. Wrapping the tire in heavy plastic or shrink wrap gives it a cleaner presentation and helps protect the label. Some shippers use cardboard discs on both sides if they want more structure, especially for higher-value performance tires.

If you are shipping a pair, do not assume strapping them together is the cheapest or safest option. Sometimes two separate packages move more cleanly through the network than one bulky bundle. It depends on carrier pricing and dimensional weight.

Shipping wheels only

Wheels need more protection than most people expect. The face, lip, and back pad can all be damaged in transit if the box is too thin or the wheel is allowed to shift.

Start with a clean wheel so tape, foam, and wrap sit flat. Cover the face with a foam sheet or thick cardboard disc. Do the same on the back side. Then wrap the entire wheel in bubble wrap or foam, paying extra attention to the outer edge. Put it in a strong corrugated box sized closely enough that the wheel cannot move around.

Void fill matters here. If the wheel slides inside the box, the box is not doing much. Use packing paper, foam, or additional padding to lock it in place. Double boxing is worth considering for premium wheels, larger diameters, or any finish that marks easily.

Shipping mounted tire and wheel sets

Mounted sets are common in the aftermarket because they simplify installation for the buyer. They can also protect the wheel lip somewhat, since the tire takes some of the abuse. But they still need proper packaging.

The standard method is to place a heavy cardboard disc over the wheel face and another over the back, then shrink wrap or stretch wrap the entire assembly. Some shippers also add edge guards or foam around the rim area before wrapping. For high-value sets, boxing each assembly is the safer move, though it costs more.

If the wheels have exposed spokes and a deep lip, use thicker face protection. A thin disc alone may not prevent pressure damage if another package is stacked against it.

The materials that actually make a difference

If you are learning how to ship tires and wheels for the first time, do not overcomplicate it. A few materials do most of the work.

Strong corrugated boxes are the foundation for wheels. Not lightweight moving boxes – shipping-grade cartons that can handle weight. Cardboard discs protect the faces. Foam sheets, bubble wrap, and stretch wrap prevent scuffs and surface abrasion. Reinforced packing tape helps the box stay closed under load. Labels should go on a flat, secure surface where they will not peel off.

For mounted assemblies or tires only, heavy plastic wrap can be enough when allowed by the carrier, but exposed labels and weak wrapping can fail in transit. If the shipment matters, cleaner packaging usually pays off.

Carrier choice, cost, and trade-offs

There is no single best carrier for every tire or wheel shipment. Parcel carriers work well for many single wheels, single tires, and smaller sets. Freight becomes more attractive when you are shipping multiple wheels, oversized truck tires, or several mounted sets at once.

Parcel shipping is usually easier for residential delivery and one-off orders. Freight can lower the per-unit cost on larger shipments, but it requires more coordination and may involve palletizing, business delivery hours, or liftgate fees.

Dimensional weight also changes the math. Tires are bulky. Wheels are dense. Mounted assemblies are both. A package can cost more because of size even when it does not seem especially heavy. Measure carefully and compare rates before choosing a method.

Insurance deserves a quick reality check. It can help with loss or major transit damage, but reimbursement often depends on proper packaging. If the wheel was sent with minimal protection and arrives scratched, a claim may not go your way. Pack like you expect scrutiny.

Labeling and documentation

Bad labeling ruins good packaging. Make sure the shipping label is clear, complete, and firmly attached. If you are boxing wheels, put the label on the top face of the carton, not over seams or heavy tape lines where it may wrinkle.

It also helps to place a copy of the shipping information inside the box or under the wrap. If the outer label gets damaged, the carrier still has a way to identify the shipment.

For resale, return processing, or B2B orders, keep records of the wheel size, tire specs, finish, and quantity before the shipment leaves. A quick photo of each item and the final packaging condition can save time if there is a damage claim or a receiving dispute.

Common mistakes that cost money

The most common mistake is underpacking the wheel face. Cosmetic damage does not always look dramatic, but it is enough to trigger a return, discount request, or unhappy customer.

The second is using oversized boxes. Extra room inside the package turns every bump into movement, and movement is what damages finishes, lips, and edges.

Another frequent issue is skipping measurements and relying on rough estimates. Shipping charges on tires and wheels can swing fast based on size, zone, and package shape. If you sell or ship parts regularly, accurate dimensions are not optional.

Finally, do not ignore the destination. A single wheel going to a commercial address may be straightforward. Four 35-inch mud tires going to a residence with limited access is a different job. The best packaging and shipping method depends on the full picture.

A practical packing standard to follow

If you want a reliable baseline, use this approach. Ship bare tires clean and tightly wrapped, with secure labels and optional side discs for added structure. Ship bare wheels in snug, heavy-duty boxes with front and rear face protection, full edge padding, and no internal movement. Ship mounted sets with thick cardboard discs on both sides, strong wrap, and boxing when the finish or value justifies it.

That standard is not flashy, but it works. It protects the part, supports cleaner delivery, and reduces the kind of avoidable damage that eats margin.

For enthusiasts, shops, and resellers, details matter. Tires and wheels are not just functional components. Fitment, finish, and presentation all count. That is why smart packaging is part of the product experience, not an afterthought.

At FORTLUFT, that mindset applies across the aftermarket – parts should arrive ready to perform and ready to look the part. When you ship with that standard in mind, you protect more than freight. You protect the value of what is inside the package.

The best shipping method is usually the one that matches the part, not the cheapest option on the screen. Pack for impact, measure honestly, and give the finish the same respect you gave the purchase.